Generators and Modifiers
Each parameter has two slots that let you add:
- A Generator: which aims to produce a source procedurally, without using an external source.
- Several Modifiers represented by a scientific flask: often called Effects in other software, they modify the source and can be combined
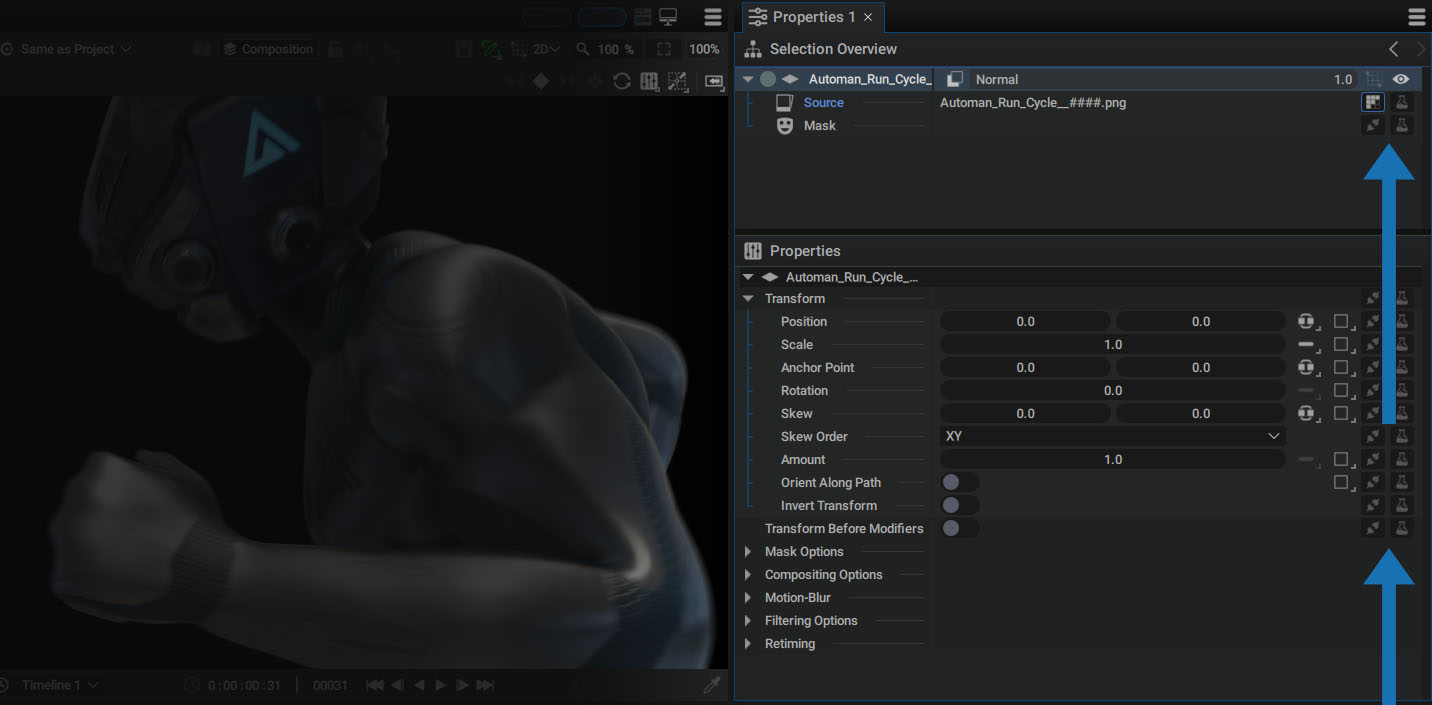
We can see that parameters containing images are not the only ones with these two slots. All parameters, whatever their type, can be connected to a generator and be affected by several modifiers.
Generators: a non-destructive way to generate sources
Autograph is not just a system dedicated to composite images stored in files. It is also a complete 2D/3D creation tool, offering you the ability to work with sources generated on the fly by Generators.
The purpose of a Generator is to generate a given type of data. Unlike Modifiers, that are used to make changes to an existing source, Generators are used to define the source content, by replacing it in a non-destructive way.
Generators are not just for generating images. They are classified by type, according to the parameter that can use them:
- Images
- Text data
- Numerical data (1D/2D/3D/4D)
- 3D objects
A Generator can create a simple Circle or 2D Noise that extends infinitely, as well as a 3D Object, a random number, or text based on the current timecode.
Warning
In After Effects, image generators such as Fractal Noise are considered effects and are applied to an existing source, like a solid with a limited size. Generators in Autograph are not considered effects, they generate their own source and have the advantage of being infinite in size by default.
Create and connect a new generator to a existing parameter
When we drag an image from the Project Panel into a Composition, a new layer is created and its Source parameter is connected to the Reader.

The first slot shows the connection to this Reader, but by clicking on it, you can change the source feeding this parameter.
- On the left: the list of sources available in the Project Panel.
- On the right: the list of procedural generators that can be connected to a parameter.
By choosing a generator, you replace the Layer's visual content before editing its parameters.
This operation can be done in the Inspector as well as in the Timeline:
Create a new generator from scratch
In the previous case, we assigned a generator to the Source parameter of an existing Layer. But it is possible to create a new layer connected to a generator in a single operation.
Clicking the "+" button in the Timeline:
Using the Quick Access menu:
When no layer is selected, placing the cursor over the Viewer and pressing the Q key brings up the Quick Access menu. This menu displays the same two-column content as that shown when the slot is clicked.
An integrated search bar lets you quickly add a generator to a new layer in the composition:
Warning
If a layer is selected, pressing Q will display another type of Quick Access menu, dedicated to modifiers. To add a new generator under these conditions and without having to deselect it, press Shift Q to display the Quick Access menu dedicated to generators.
Numeric Generators
Other types of generator can be created and connected to parameters. Depending on the type of parameter, the generator list will be different.
In the example below, two Numeric Generators are added and then removed:
- A Random added to the Layer Position, choosing a different value for X and Y for each image, between -200 and 200
- An Oscilator added to the Layer Scale, varying between -1.0 and 1.0.
Adding these generators makes them appear in blue in the Selection Overview tree, allowing quick access to modify their parameters.
Info
Unlike After Effects, which requires you to use expressions to generate these numerical values, Autograph's generators make this generation much more accessible. However, note that Autograph also has an Expression generator that uses Javascript syntax for more complex operations.
Modifiers (also known as Effects)
Every parameter can have its content, value, or state defined in the following ways:
- By manually entering this data as a numerical value, for example for Position
- By using a Generator that will procedurally create this data, according to different parameters
- By acquiring a value from another parameter using Links
Once this data is obtained, you can change it by adding Modifiers onto it using the Modifier slot (slot with a scientific flask).
Like Generators, there are different types of Modifiers:
- Images
- Transformation
- Text data
- Numerical data (1D/2D/3D/4D)
- 3D objects
The list of Modifiers will be filtered according to the type of parameter you are altering.
Most creative software applications call these elements "effects", often confining them to images and sounds. Autograph offers a more general approach, and therefore uses the term "Modifiers".
Adding Modifiers
Adding a Modifier to a parameter can be done in several ways, making it appear in orange in the Selection Overview within a group named Modifiers.
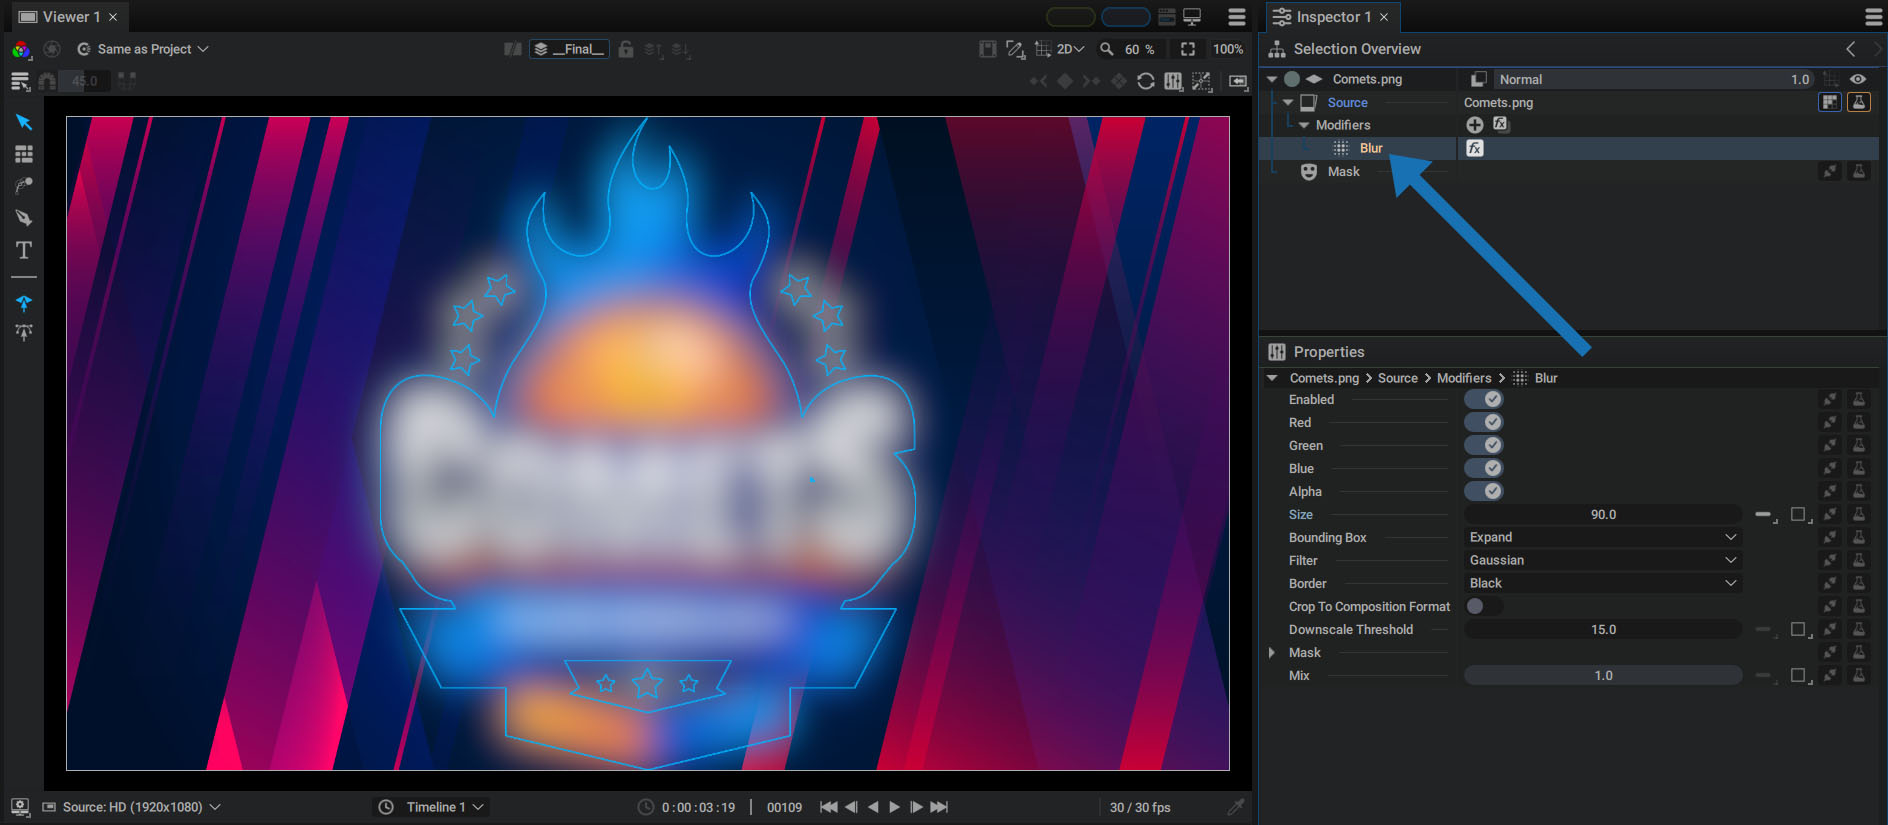
Clicking the scientific flask slot:
Clicking on the slot containing a scientific flask displays a list of modifiers compatible with the parameter type. An integrated search bar lets you quickly add a modifier.
In the example below, we add a Blur modifier to the Layer Source parameter:
Adding Numeric Modifiers:
Adding a Modifier to a numeric value is done in the same way. In the example below, the layer position is animated by two Keyframes.
To spatially shift this animation without tweaking the keys, we add a Math modifier in Add mode, which adds a value to each dimension.
Most numeric modifiers are reversible. This means that even when applied after an animation defined by Keyframes, you can still manipulate the Motion-Path control points. The offset defined by the Math modifier will be taken into account and subtracted from the mouse movement.
After moving a control point, turning off the Math modifier will return the Motion-Path to its original position, as show below.
Using the Quick Access menu:
When a layer is selected, moving the mouse over the Viewer and pressing the Q key displays a floating list containing image modifiers compatible with the layer source.
An integrated search bar lets you quickly add a modifier:
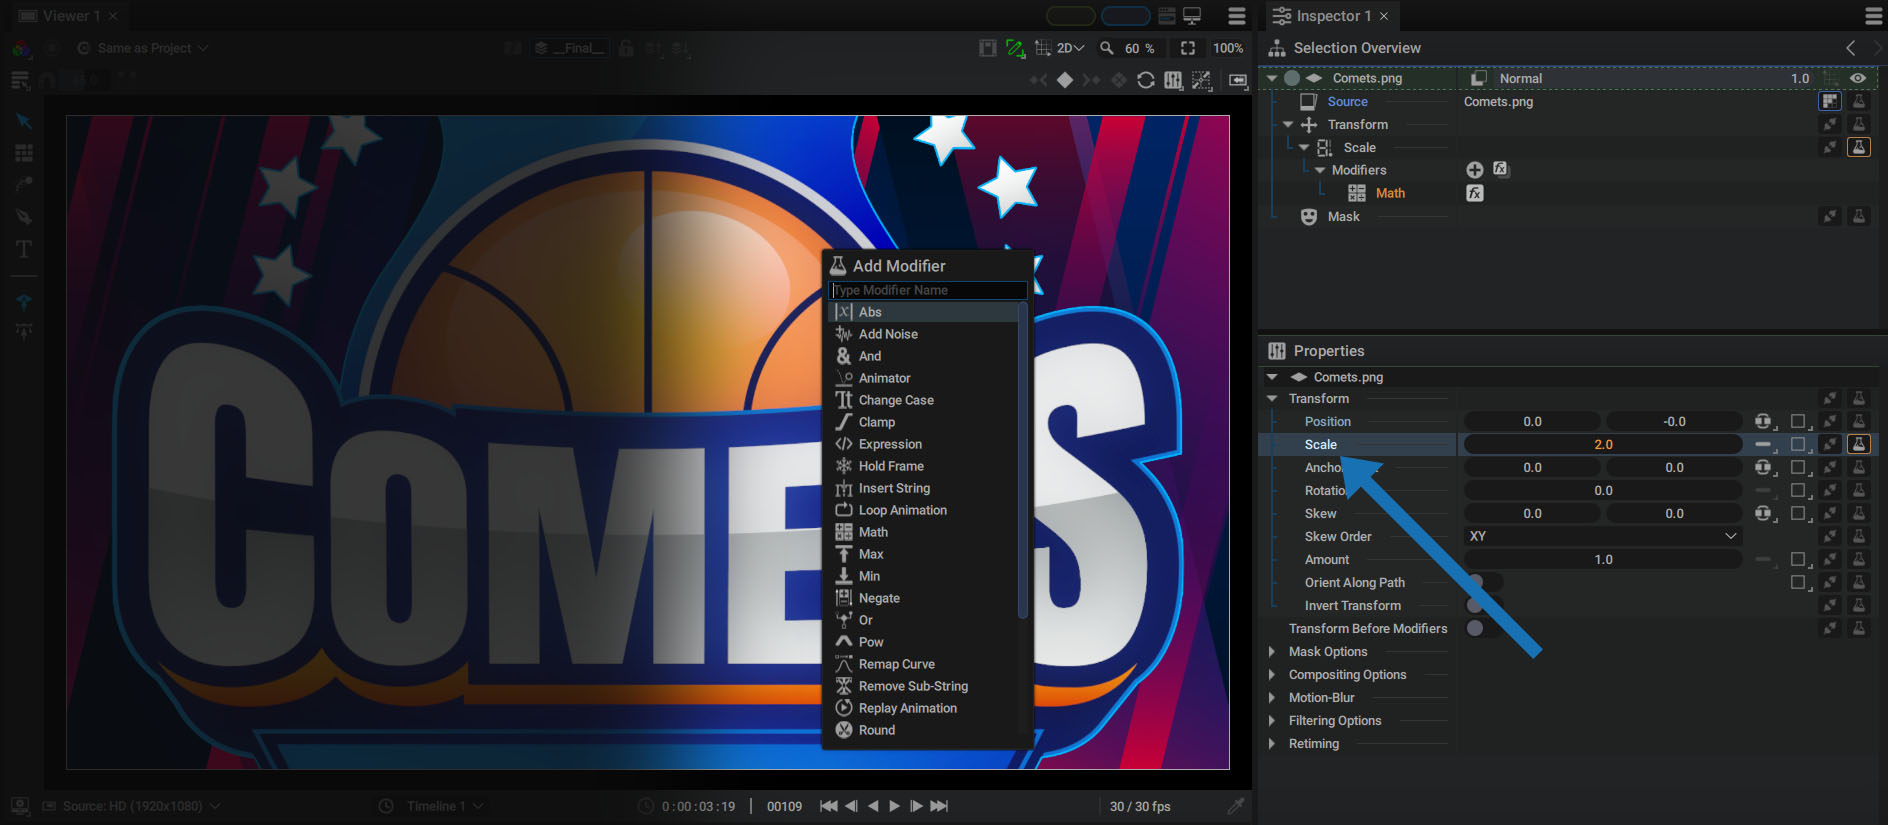
Quick Access menu on any parameter:
The previous case shows that selecting a layer then invoking the Quick Access menu automatically adds an Image Modifier to its source.
But this floating menu can also be called up after selecting a parameter in the Properties section of the Inspector.
Modifiers Group
Unlike Generators that can only be connected once as a parameter, you can add as many Modifiers as you want.
A list of Modifiers is created and grouped in a new section available as a source sub-parameter. Autograph applies them one after another, starting from the first one on the list and progressively going down.
Warning
The order in which Modifiers are applied is read from top to bottom, except for Transform Modifiers, which are read from bottom to top. This specific behavior is explained in the Transform Parameter chapter.
This new section is called a Modifiers Group and it’s visible both in the Timeline and in the Selection Overview section of the Inspector.
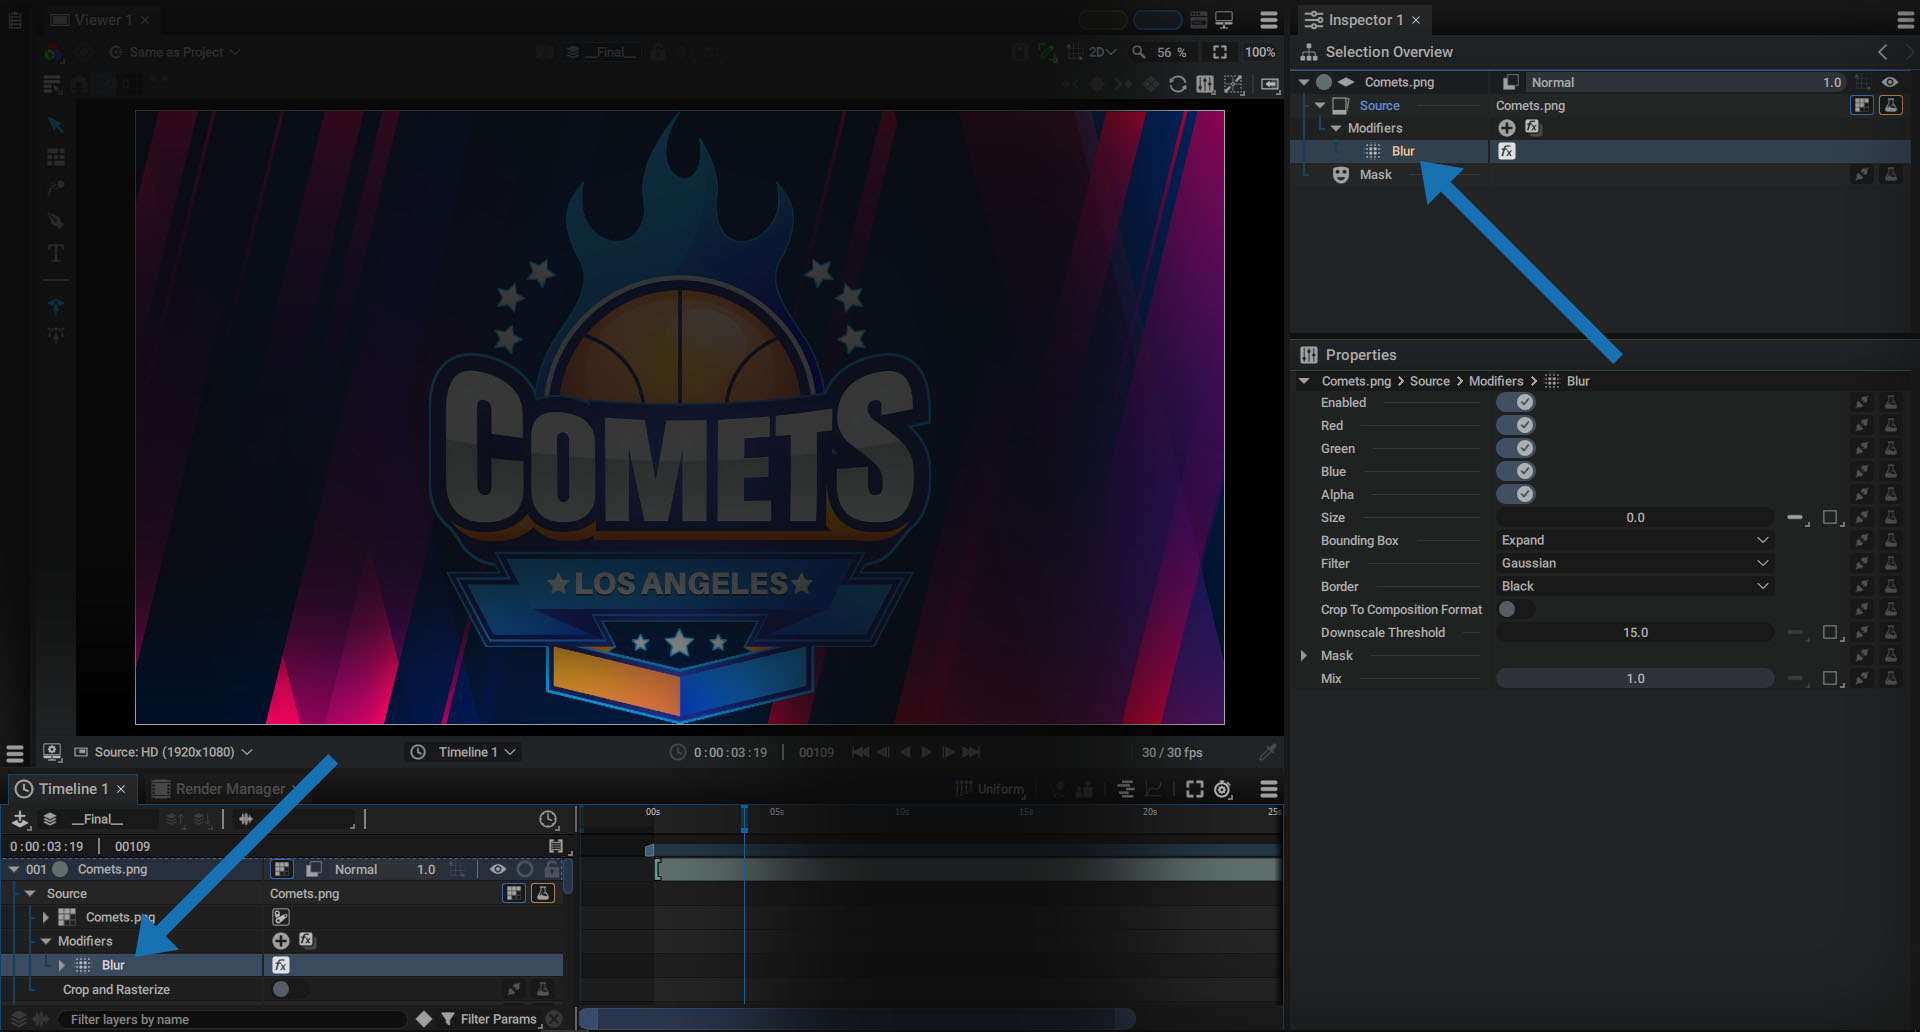
Add and temporarily disable Modifiers or Modifiers Groups:
- A + button is located right next to the Modifiers group, allowing new Modifiers to be added to it, on the same parameter.
- There's also a FX button on the right to deactivate a Modifier or the entire Modifiers Group.
Modifier order
Key points to remember:
- Modifiers are organized on a list where the order of execution is read from top to bottom, except for the Transform Modifiers.
- The order of the Modifiers in this list has a big impact on the final result
In the following example, two Modifiers have been added to a logo:
- A Blur
- An Edge Detect that draws contours according to the image contrast
Here you can compare, from left to right:
- The original image without Modifiers (the Modifier Group is disabled)
- The addition of a Blur followed by an Edge Detect
- The addition of an Edge Detect followed by a Blur
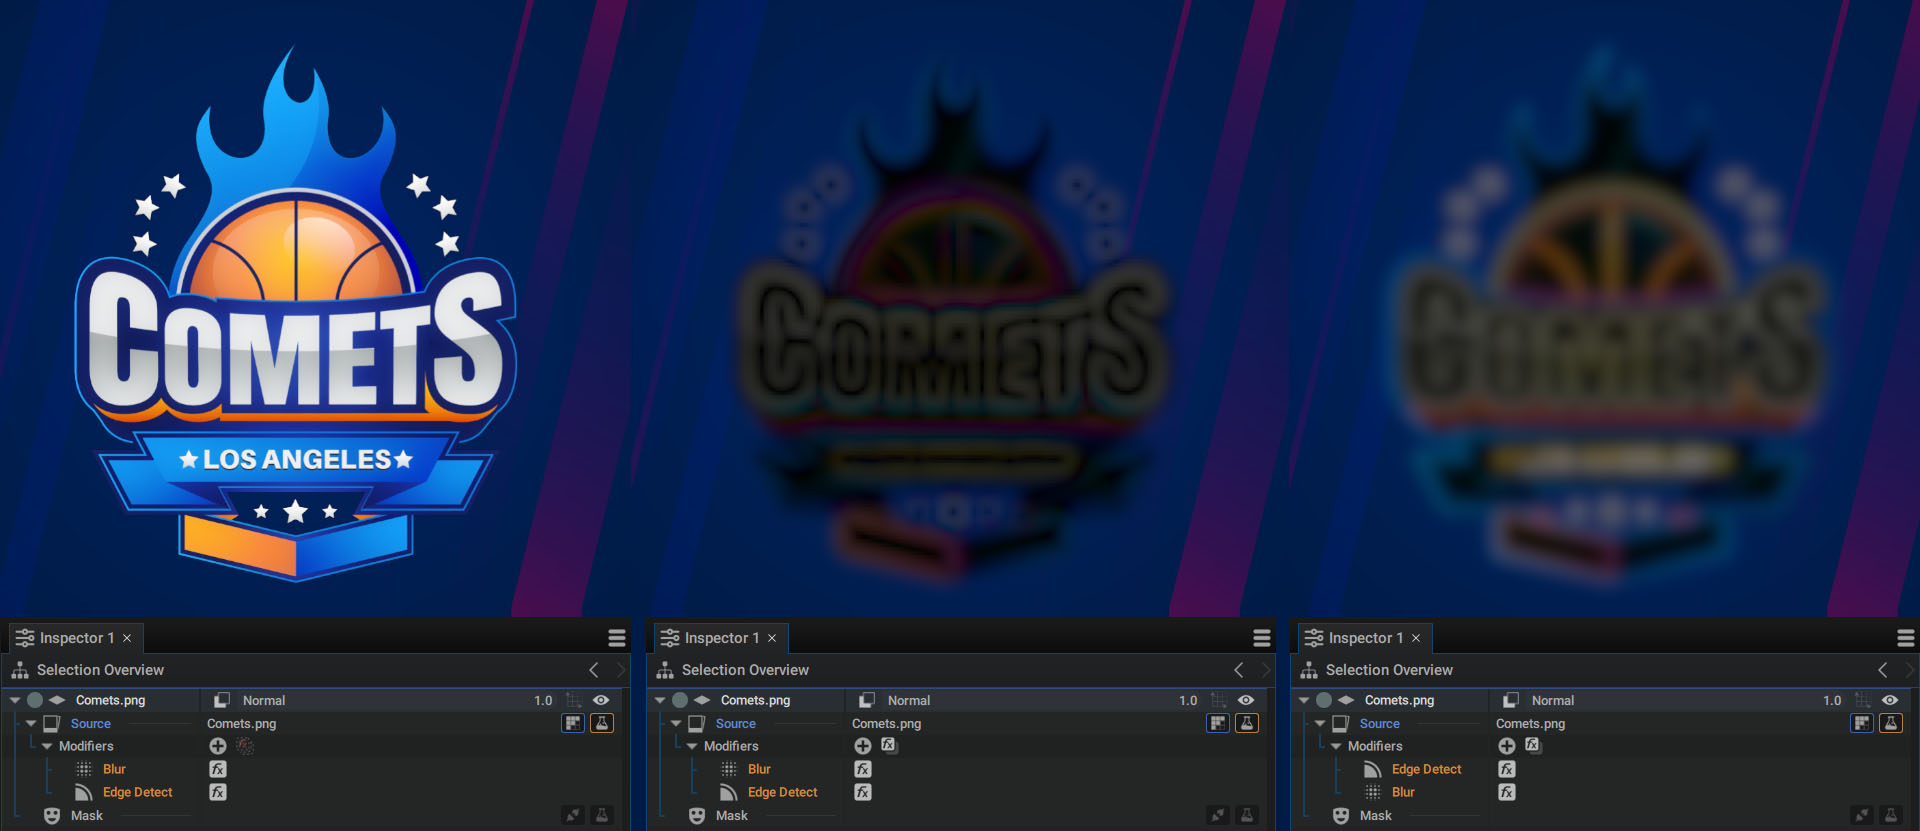
In order to control the order in which Modifiers are applied, simply click and drag them to move them up or down on the list.
Dual display to compare before and after values
As soon as a first Modifier is added to a numerical parameter, its value is highlighted in orange.

Simply hover the mouse over this parameter to view and edit the original value, before the modifiers take effect, , as described in the parameter management documentation.
Type and dimensions
When adding a Generator or Modifiers, the list displayed will only contain those that are compatible with the targeted parameter:
- Some of them are specifically made for images, numerical values, text, tables, curves/shapes, 3D shapes, etc…
- Numerical Generators can sometimes only generate a Float2 when you only want a single Float, for example. In this case, you can use the 2D/3D/4D -> 1D Generators to extract one dimension.
Special Modifiers and how they can replace Generator content
The purpose of a Modifier is to turn a value into something else, but some Modifiers can go as far as replacing this value with a target value (progressively or not).
We can cite:
- Animator: which, when in Target Value mode, gradually replaces the starting value with a custom one
- Math: which has a Replace mode that lets you animate a numerical value toward another one, according to a weight between 0.0 and 1.0.