Type, State and Handling
What makes up a parameter
Parameters are everywhere in Autograph - on layers, Generators, and Modifiers. Recognizing them is relatively easy as they always follow the same pattern.
At minimum, parameters contain:
- A name
- A value or state
- A Generator or Link slot, represented by a plug icon
- A Modifier slot, represented by a scientific flask icon
Optionally, the same line also contains
- A button to manage parameter dimensions
- A button for adding Keyframes
Parameters are displayed in both the Timeline and the Inspector:
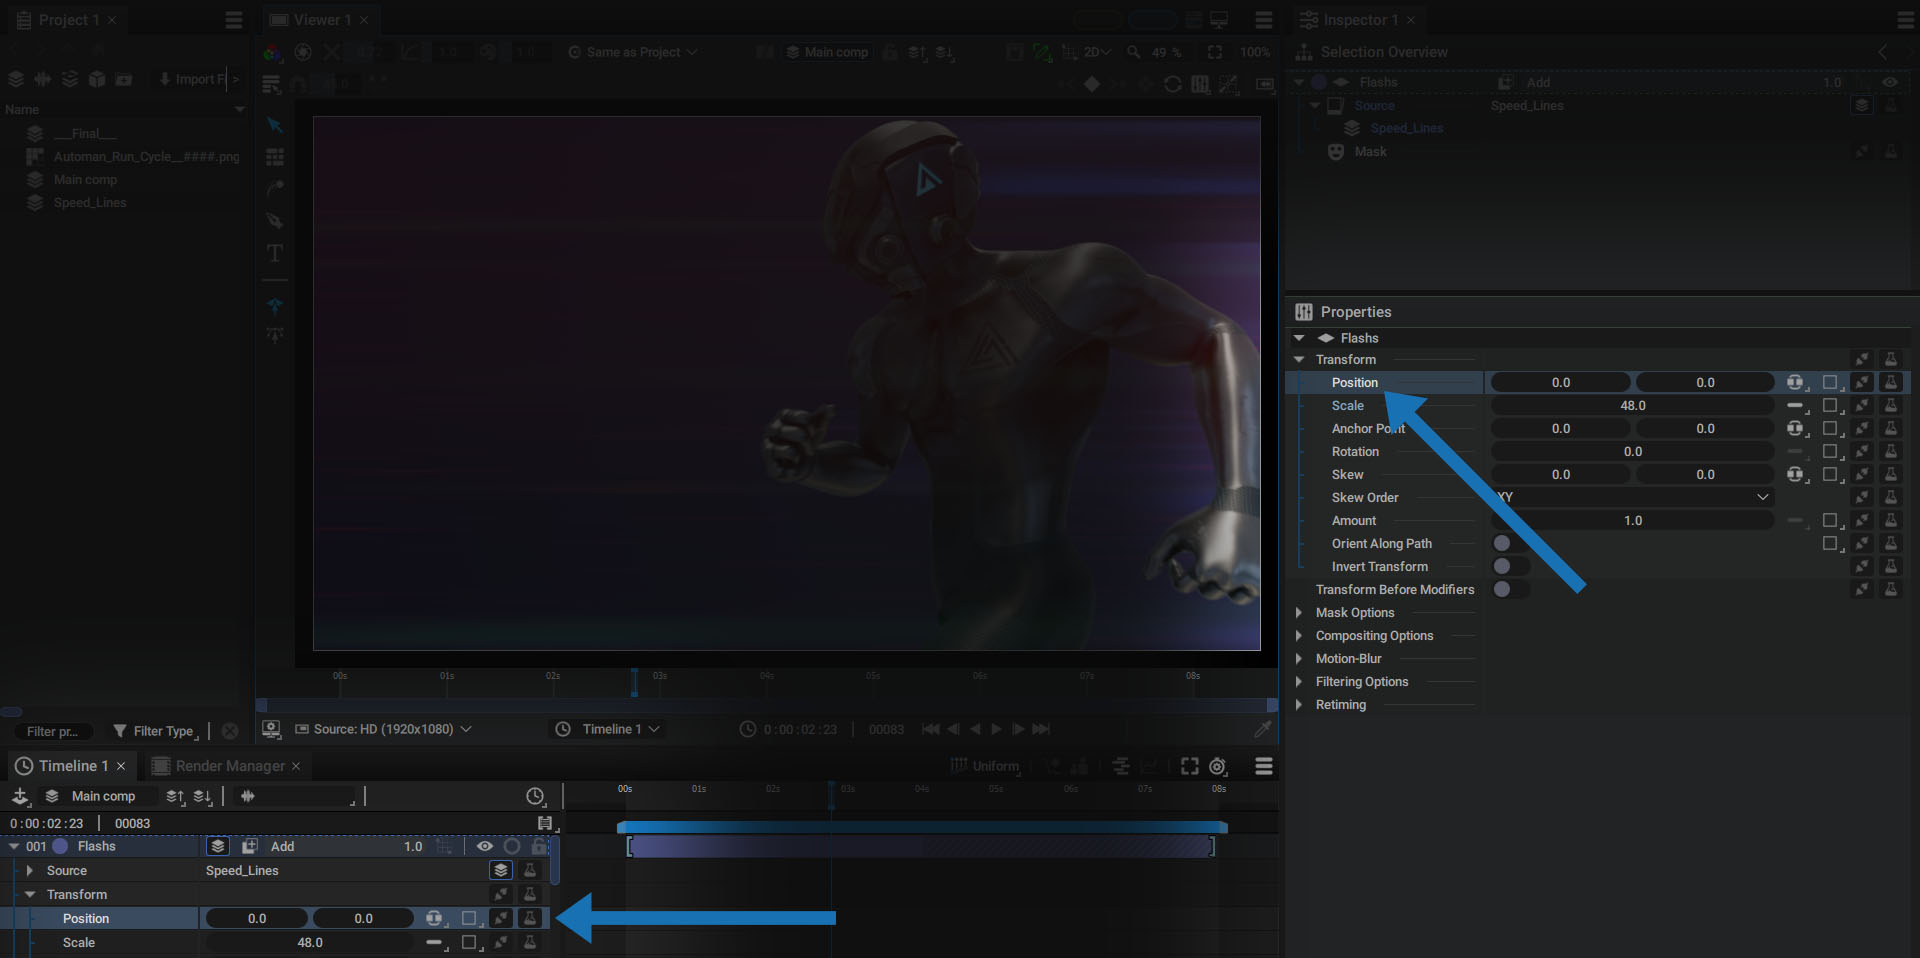
These parameters are sometimes grouped into categories, which may themselves be parameters; but this is not necessarily the case.
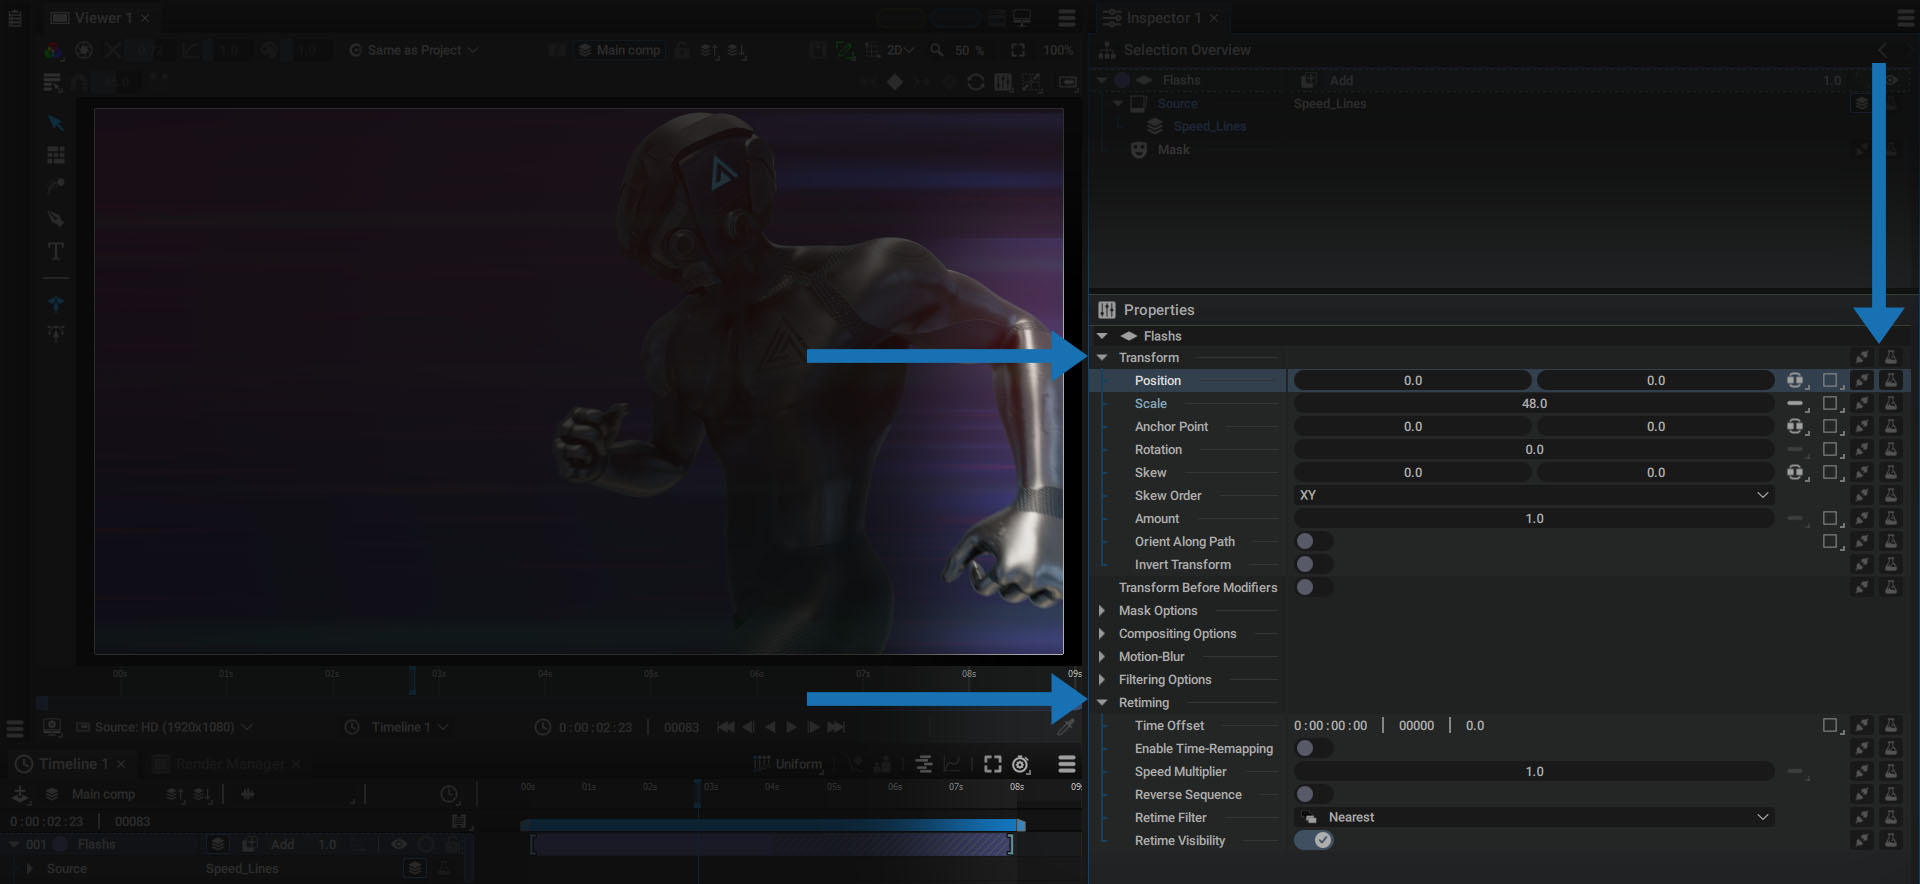
In the image above:
- The Retiming section of the selected layer is just for folding/unfolding its sub-parameters; but Retiming is not a parameter in itself.
- The Transform section contains both sub-parameters and Generator and Modifier slots. Transform is therefore also a parameter.
Parameters that can be animated
In addition to its main four characterizing elements, a parameter can also have a button so it can be animated. Even if you have the ability to animate most parameters, some of them cannot be animated when it doesn't really make sense to.
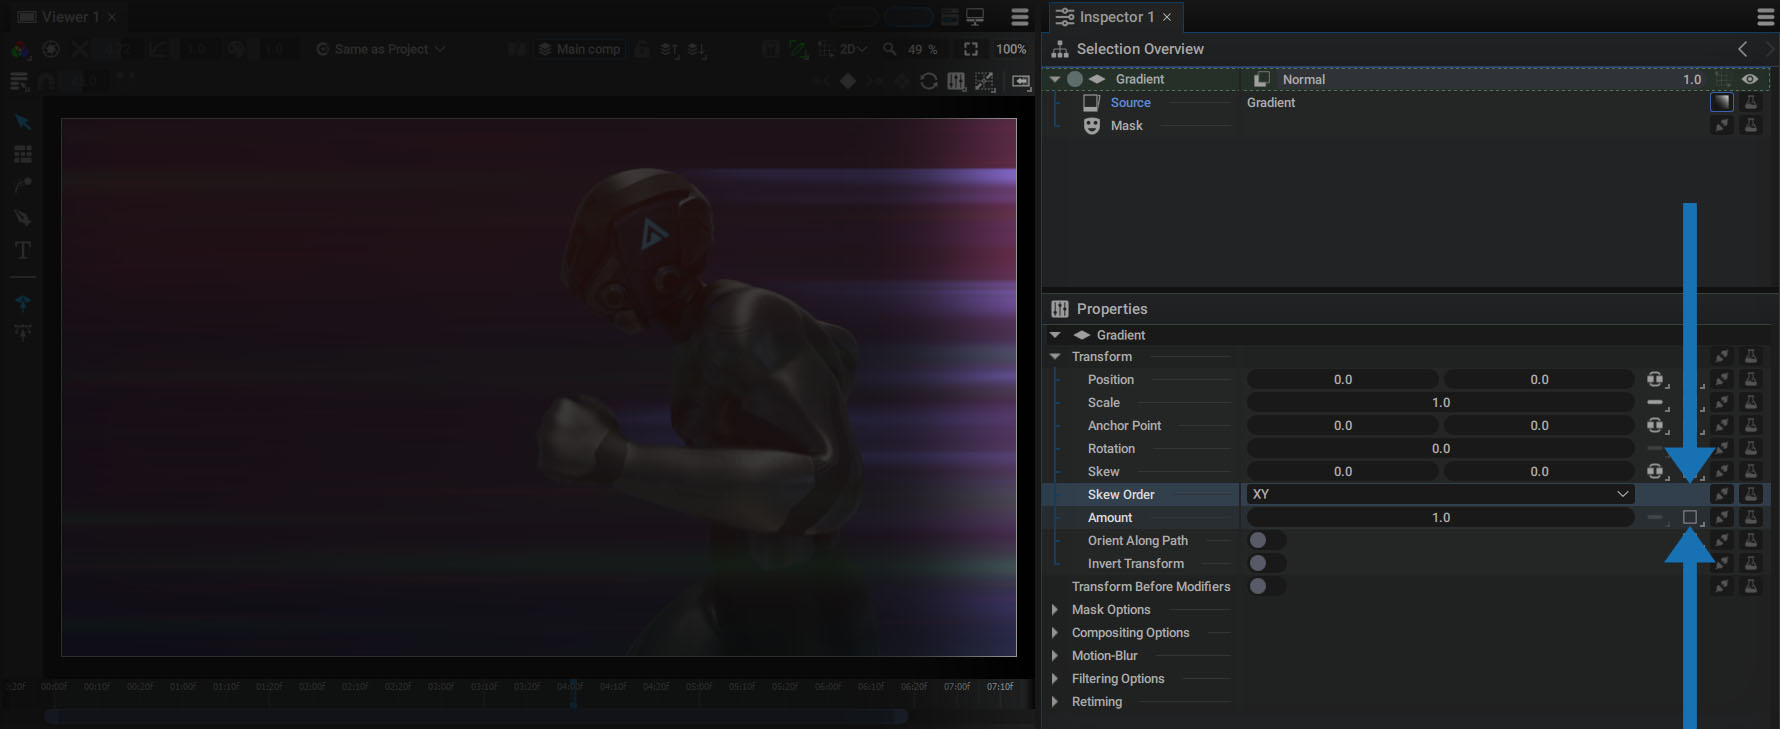
If a parameter can be animated, a square representing the Keyframes menu will be visible next to the button used to Manage dimensions.
In the image below, the Amount parameter is animatable, while the Skew Order is not:
Animating a parameter can be done by using Keyframes but also by adding Generators or Modifiers.
Changing a parameter value
By clicking on a parameter value, you enter an editing mode where you can modify it. The parameter's background becomes darker and its contents are fully selected on the first click. To change the current value, simply enter a new value and confirm with the Enter key, or by clicking outside the parameter.
You can also press Tab to edit the next parameter, or Shift + Tab to edit the previous parameter.
But Autograph offers other methods for modifying the current parameter.
By clicking and dragging the mouse:
Left-click on a parameter, then hold down the button and move the mouse left or right.
Using Keyboard Arrows:
In edit mode, use the Left and Right arrows on the keyboard to position the cursor on a specific digit.
Use the Up and Down arrows to increment or decrement the current digit by 1.0:
Using Keyboard Arrows with Alt and Shift keys in the Viewer:
After positioning your cursor over the Viewer, press the Alt key while using the keyboard arrows to move the selected layer(s) one pixel across the screen.
It's important to note that the distance covered each time an arrow is pressed depends on the Viewer's zoom ratio. When we talk about one pixel, we mean the pixels of your monitor. Not those of your composition.
- If the Viewer's Zoom factor is set to 100%, one pixel on your monitor corresponds to one pixel in your composition.
- If this value is greater than 100%, the displacement in the Composition will be less than 1 pixel.
- If this value is less than 100%, the displacement in the Composition will be greater than 1 pixel.
The video below shows these three cases (note the evolution of the Position parameter in the Timeline or Inspector):
If in addition to pressing the Alt key, you press the Shift key, this relative displacement is now 10 pixels.
In the video below, we start by moving the layer by one pixel using the Alt key, then 10 pixels by also pressing the Shift keys.
Warning
Remember that these shortcuts will only work if your mouse cursor is positioned over the viewer.
Using Math operations:
In edit mode, the current value can be followed by a mathematical operation, such as addition or multiplication by another value.
- The current value can be retained, followed by the operation
- The value can be replaced by the operation only. This previous value will then be used in the operation.
More complex, multi-operand operations can be used, in particular through the use of parentheses:
Using Javascript functions:
When editing a parameter, the entered value is read by a Javascript interpreter. This means that any Javascript function using the standard libraries and on a single line can be used.
For example, functions from the Math library:
- Math.sqrt(25): returns the square root of 25
- Math.random(): returns a random float number between 0.0 and 1.0
Parameter precision level
Autograph always maintains the highest level of precision for each parameter, rather than rounding off values. Internally, up to 12 decimal digits are stored.
However, to simplify parameter reading, a display value rounded to 2 decimal digits is shown to the user when the parameter is not in edit mode.
But just click on the value to see the full decimal digits. This precision is also maintained when tweaking a parameter, as shown below.
Edit several parameters at the same time
Several parameters of the same type can be edited at the same time, as described in the Properties section of the Inspector.
Color-coding of parameters
A parameter can contain:
- A value: for example 40 or 140.55
- A state: On/Off in the case of toggles, or one of the choices available in a list.
The parameter content can be statically defined by the user, or controlled by keyframes, generators or modifiers.
In all these cases, the parameter value or background will change color.
When the parameter is Keyframed:
- Background turns dark gray if a keyframe exists but is not present at the current time
- Background turns light gray if a keyframe is present at the current time

You'll also notice that the diamond on the right is either hollow or solid, as described in more detail in the section on Keyframes.
When a parameter is connected to a generator or linked to another parameter:
The value set manually by the user is replaced by a new one. This value is then grayed out and the background becomes blue, like the color used to represent the generators in the Selection Overview.

In the case of a Link, a yellow outline is displayed around the connection slots, as described in this section.

When a modifier is added to a parameter:
its output value after the action of the modifier(s) is displayed in yellow.

As the parameter remains editable, the background does not change color and the value is not grayed out. When you move the mouse close to the parameter, you see the value before the modifier effect, drawn in white.
In the example above, a Math modifier in Add mode is added to a Position whose dimensions are in Single mode. The added value is also displayed in Properties.
When a parameter is shared:
In the case of a Share, a pruple outline is displayed around the connection slots, as described in this section.

Right mouse button options
Right-clicking on a parameter displays several options:
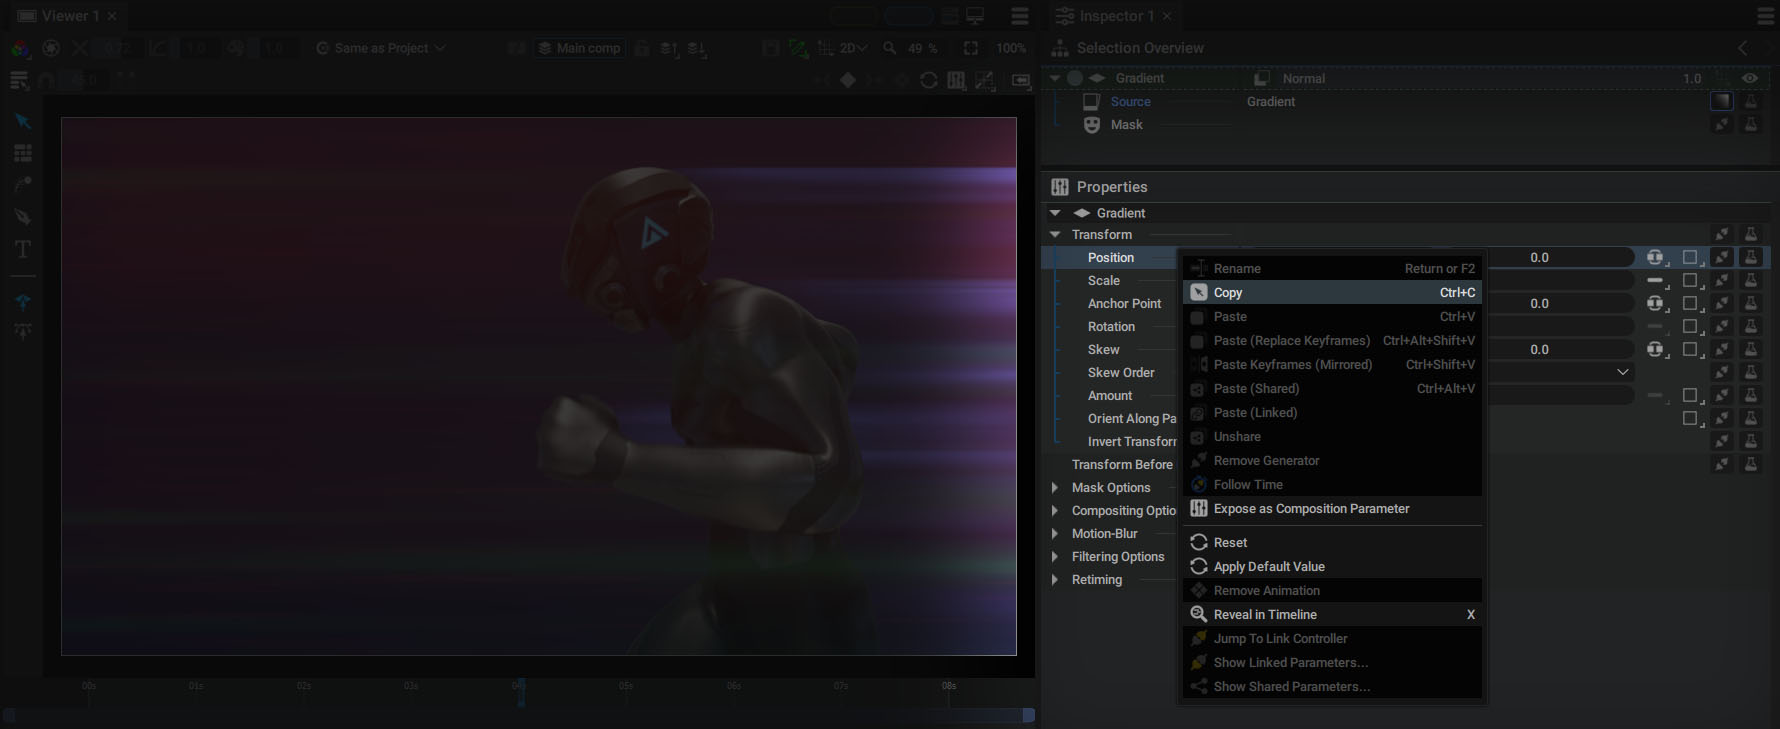
- Various Copy/Paste functionalities
- Unshare: remove the current parameter from its sharing group
- Follow Time: enables the option of the same name when linking a parameter
- Remove Generator: delete the Generator currently connected to this parameter
- Expose as Composition Parameter: automatically creates a variable in the current composition's custom params and connects this parameter to it
- Reset: deletes all keyframes, generators and modifiers applied to the parameter and resets to the default value
- Apply Default Value: restores the default value without deleting keyframes, generators or modifiers
- Remove Animation: deletes all keyframes on this parameter
- Reveal in Timeline : displays the parameter in the timeline, as described in the properties panel documentation
- Various Linking/Sharing functionalities
Visualize parameters with non-default values
The above menu contains an option Apply Default Value to reset a parameter to this value.
To quickly visualize which parameters have been modified and whose value is different from the default one, their names are displayed not in white, but with a light blue color.
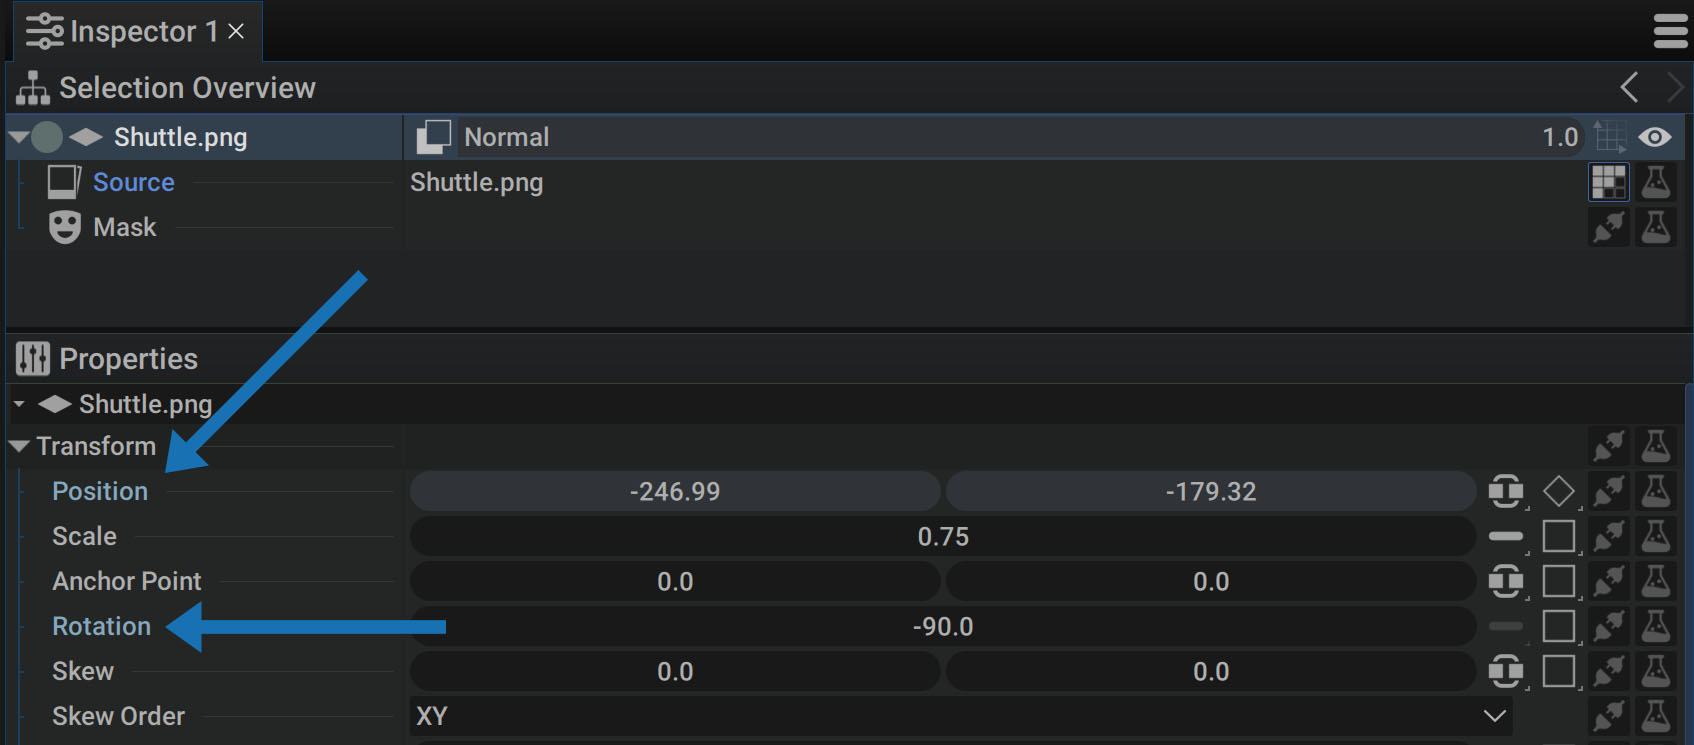
Note
This color change takes place only in the Inpector and not in the Timeline.
Different parameter types
A parameter's value or status depends on the data type it can store. The list of available types in Autograph is visible when you add a Custom composition parameters.
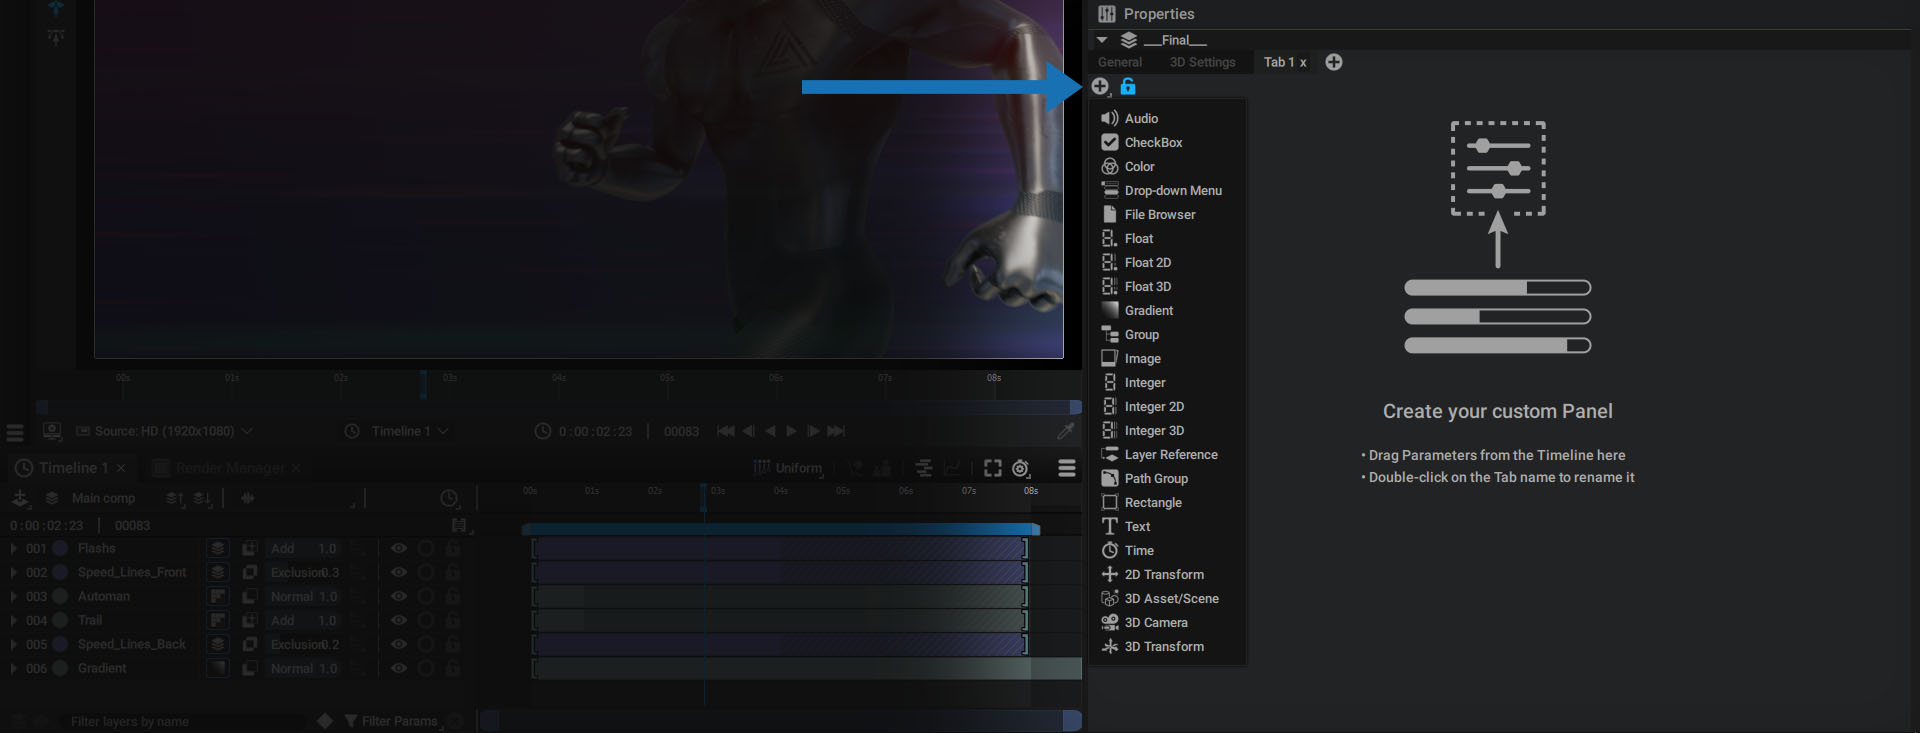
- Audio: contains an audio source or an Audio Mix
- Checkbox: can have two states. ON or OFF
- Color: group of four floats, defined by R/G/B/A (Red/Green/Blue/Alpha)
- Drop-down Menu: lets you create a custom menu to drive inner parameters
- File Browser: path to a file. It can be absolute or relative using Project Variables
- Float: single numerical value containing a decimal after the decimal point
- Float2D: group of two numeric values containing a decimal
- Float3D: group of three numeric values containing a decimal
- Gradient: group of Stops defined by a position, color, and left and right influences
- Group: acts in the same way as the Retiming section we mentioned above.
- Image: contains an image, whether it comes from a Reader, a sub-composition, or a layer-image
- Integer: single numerical value with no decimals
- Integer2D: group of two numeric values with no decimals
- Integer3D: group of three numeric values with no decimals
- Layer Reference: not to be confused with Image which contains only graphic information. Here it is the main line of the layer containing an index to determine its position in the Stack that will be referenced
- Rectangle: group of four floats, defined by L/B/R/T (Left/Bottom/Right/Top)
- Text: defines a source text only, as opposed to its style. Technically speaking, this element is usually called Character String, or just String for short
- Time: composed of a timecode and a corresponding frame number. The FPS used for the timecode is defined by the one of the compositions to which this parameter is attached
- 2D Transform: 2D Transformation matrix and individual parameters (Position, Rotation, etc)
- 3D Asset/Scene: complete scene (including the ones created from scratch in Autograph) or asset from importing 3D geometry in the Project panel; for example, a USD file
- 3D Camera: 3D Camera parameters (without its Transformation), including Camera Type, Focal lenght, Focus Distance, etc
- 3D Transform: 3D Transformation matrix and individual parameters (Position, Rotation, etc)
Exposing these parameters is very useful when creating stand-alone templates called Packages.
Warning
Identifying a parameter type is essential when copying and pasting or linking or sharing parameters, as only parameters of the same type can be copied/pasted, linked or shared.
Some of these parameter types have multiple values, such as Integer3D, Float3D or Rectangle. The Managing dimensions section explains how to break down these compound parameters into several single parameters.