Curve Editor: Retime Graph
Purpose of the Retime Graph
As described in the Graph Editor - Value Graph chapter, a second mode called Retime Graph lets you work in conjunction with Motion-Paths.
It's purpose is to control the evolution of a Spatial parameter. The Layer Position comes to mind of course, but the chapter dedicated to Motion-Path shows that other spatial parameters are also concerned.
However, we'll take the Layer Position as an example, as this is the most common case and the easiest to understand.
The most important things to remember are:
- The Motion-Path describes the path along which the Layer will move.
- The Retime Graph temporally defines the Layer's position along this path.
Warning
In After Effects, the Speed Graph controls not the positioning of a layer along the path, but variations in its speed. In Autograph, the Retime Graph offers a different approach, which the Left Angle team considers more understandable, simpler to manage and offering more possibilities, such as going back on the path or spatially overtaking it.
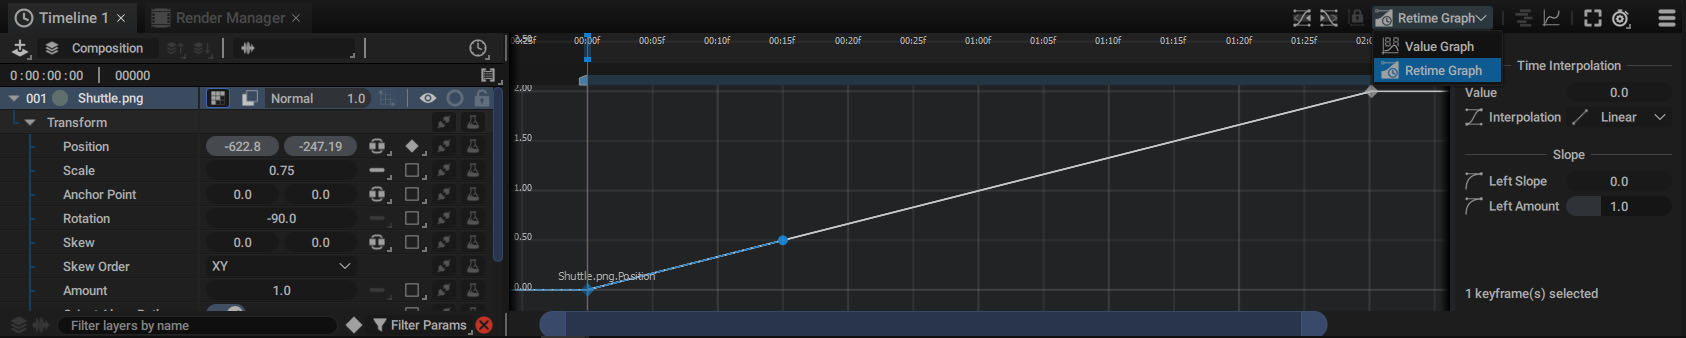
Inspecting the Positon Parameter in the Retime Graph
When a spatial parameter is animated and selected, displaying the Graph Editor automatically switches to Retime Graph mode and displays a curve representing progress along the Motion Path.
Info
If we want to inspect the Position parameter, we can also simply select the Layer. This avoids having to select it when we want to quickly work on it.
The displayed curve changes according to the keyframe interpolation type.
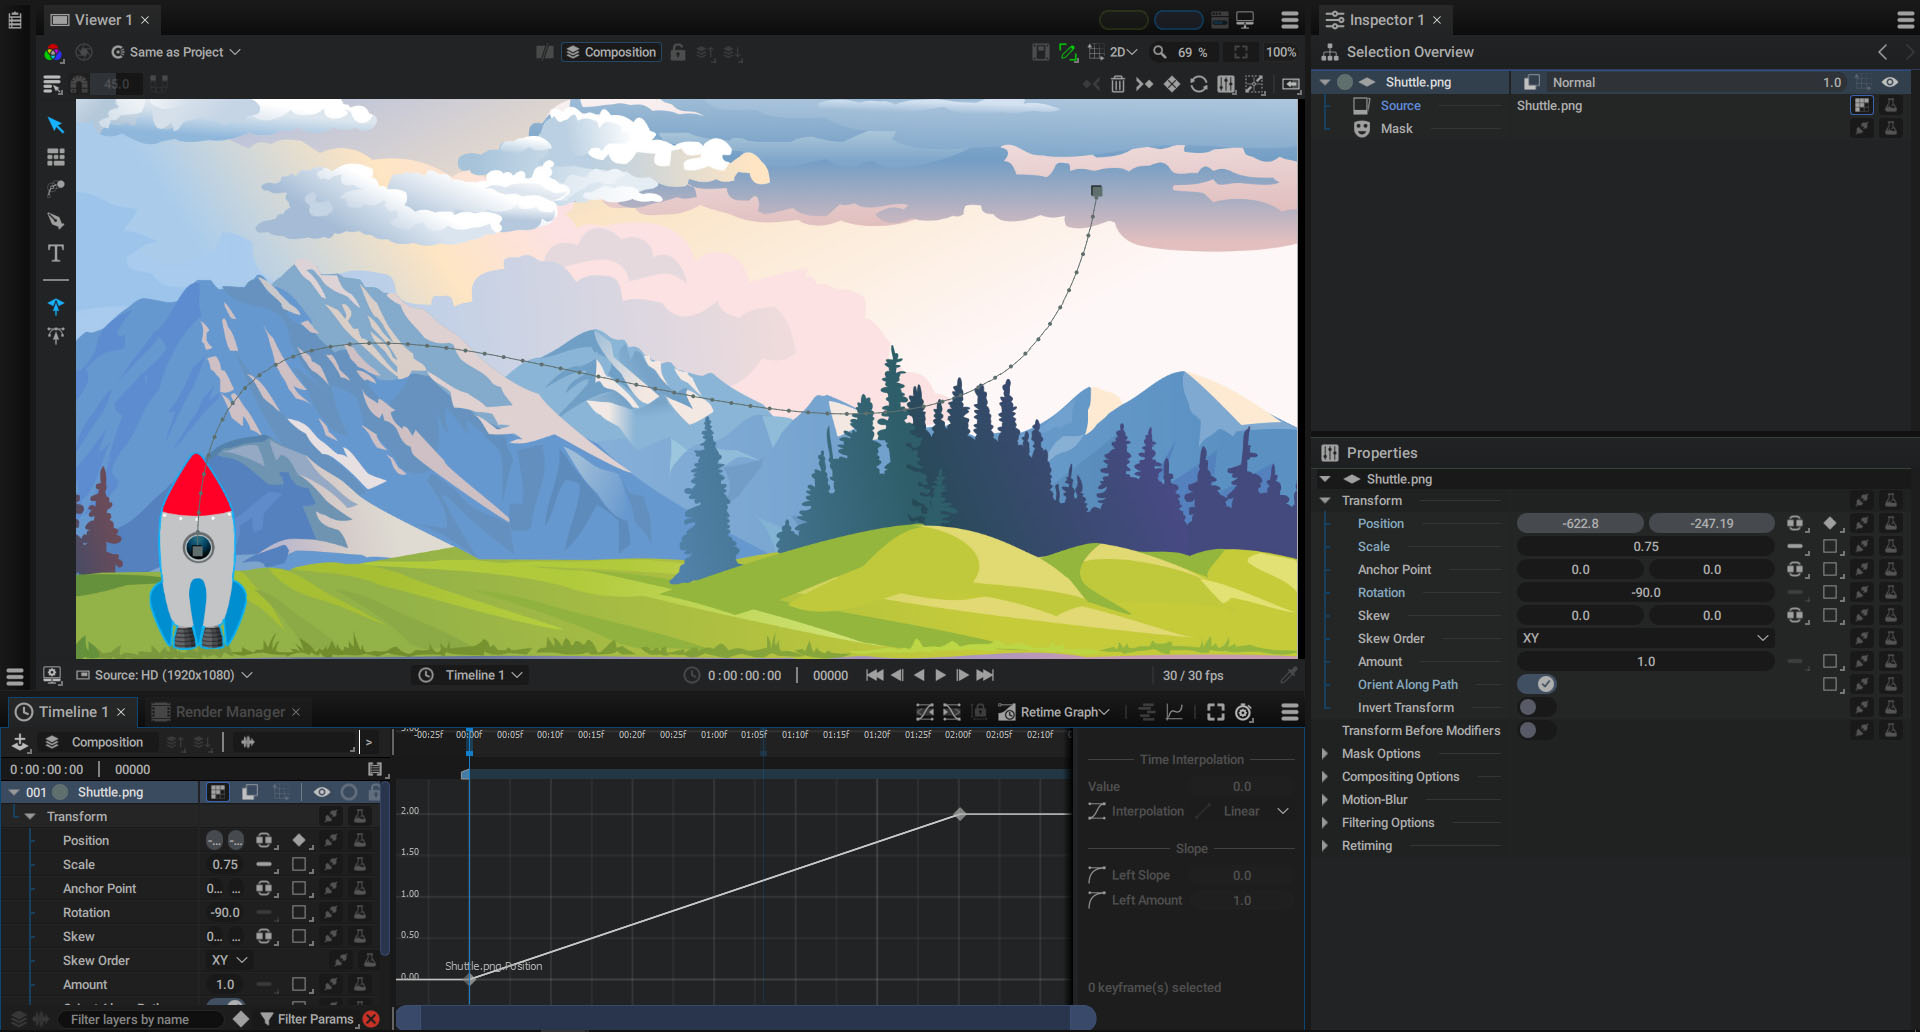
In the example above:
- Two keyframes create a curved Motion-Path, defined by their Position and Tangent
- These two keyframes are represented in the graph by two points (diamond-shaped)
- As these keyframes are interpolated in Linear mode, the motion speed is constant represented by a straight line
- This animation lasts two seconds
Warning
The Retime Graph's purpose is to quickly change the initially linear interpolation of a spatial parameter between two keyframes that are not in Adaptive Time mode. This goal differs from the Retiming section of a layer, which applies entirely to it.
Animation Retiming
The first difference with Value Graph mode is that the two scales, Horizontal and Vertical, both represent time.
By selecting the two keyframes, you can extend the right and top edges of the frame to see the value 2.00, representing seconds on both axes.

As its name suggests, the aim of the Retime Graph is to convert an input animation, defined by keyframes in the Dopesheet, into an output animation whose evolution between keyframes can be controlled.
Warning
Remember that the Retime Graph only controls time. For any change in trajectory, modify the Motion-Path directly in the Viewer.
Slow Down or Speed Up an Animation Globaly
If you click and drag a point on the curve representing one of the keyframes, even if you only move your mouse along one axis, you'll see that this point will always move diagonally.
This behavior, which may seem strange at first glance, actually allows to maintain consistency with the keys' position in the Dopesheet, on the horizontal axis.
In the video below, we speed up the animation by moving the second key closer to the first, just as we do in the Dopesheet.
Note
By moving diagonally, a key ensures that its two input and output values are the same on both axes.
Change Interpolation Between Keyframes
Controlling the key positions in the Retime Graph lets us change the overall duration of the animation, but as the keys are in Linear mode, they always form a straight line, resulting in a constant speed.
By moving the points' tangents, the animation's overall duration remains unchanged, but the layer's speed is no longer constant.
You can also see the dot distribution change on the motion path
Info
When moving tangents, press Shift to align them perfectly horizontally or vertically.
Going Back on the Path or Overtaking It:
Pressing the Alt/Option key while clicking on a keyframe defines and moves a new tangent. Depending on the orientation, the retime curve may go back or exceed the maximum time defined on both axes.
The Retime Graph representing the layer movement on the Motion-Path between two keyframes:
- The layer can go back, displaying this area in bold on the Motion-Path
- Movement can also extend beyond the Motion-Path
Note
Pressing the Alt/Option key and clicking very quickly on a Keyframe without moving the mouse will place the tangent point at the same position as the point itself. Having tweaked the tangents manually, the key will switch to Broken interpolation mode, but will create a movement similar to Linear mode.
Managing New Keyframes in the Retime Graph
By scrubbing in the middle of the animation and moving the Transform Widget, a new intermediate keyframe is created.
This new keyframe also appears in the Retime Graph and can be moved diagonally:
You can modify this new keyframe's tangents or assign it one of the 48 available interpolation types:
For simple cases, acceleration and deceleration spread over the entire Motion-Path can be managed by manipulating tangents (in Broken mode):
Note
As we'll see below, using keyframes in Adaptive Time mode makes the process even easier.
Quickly Focus on a Single Animation Segment
Adding an intermediate keyframe breaks the animation into two segments, even more noticeable if the rocket slows down and pauses in between.
It can be useful to focus on a particular segment to perfect its animation. To do this, two buttons at the top of the timeline automatically zoom in on a segment and place the playhead at its start.
Two shortcuts let you switch quickly from one segment to another:
- Ctrl/Cmd + Down: focus on the previous segment
- Ctrl/Cmd + Up: focus on the next segment
To make the most of these features, we recommend activating the Play Visible Range option at the same time, which will loop only the visible part of the graph.
Note
Zooming in on the graph frames a few additional images before and after the current segment to better visualize the interpolation.
Managing Adaptive Time Keyframes in the Retime Graph
A keyframe set to Adaptive Time mode will disappear from the Retime Graph. Remember that the purpose of this mode is to add new points/keyframes to a Motion-Path without having to manage them temporally.
All you have to do is manage the temporal interpolation of the two adjacent keyframes, distributing acceleration or deceleration over the entire Motion-Path or just a segment of it.
Note
As we see at the end of the video above, moving the Adaptive Time keyframe in the Viewer doesn't change the time interpolation, allowing separate management of the layer's trajectory and speed.
Only for Spatial parameter
To conclude this chapter on the Curve Editor in Retime Graph mode, remember that it can only be used on spatial parameters, such as the Position parameter, for example. If, at the same time, you wish to work on a 2D Layer's Rotation parameter animation, Value Graph mode should be used.
To help the user save time, this switch is automatically made by Autograph according to the selected parameter.
Note
Remember that the Retime Graph lets you modify the duration of an animation, as well as its interpolation, without having to go back and forth with the Dopesheet.