Motion Path
When adding keyframes to a 2D parameter, Autograph draws a trajectory in the Viewer based on the parameter changes over time. This trajectory is called a Motion Path and is most often used to visualize the movement of a layer. Although the Position parameter isn't the only one concerned, we'll start by adding keys to it to keep things simple.
After adding two keyframes to the Position parameter at different times and for different values, a Motion Path appears in the Viewer:

Managing Space and Time Separately
When animating a layer, you need to consider two things:
- The later path (trajectory)
- The speed the layer moves along this trajectory
The main purpose of a Motion Path is to set the layer trajectory, representing the spatial evolution of a 2D parameter.
To control layer velocity on this trajectory, there are other tools that are more suitable to use:
- Timeline/Dopesheet: for handling keyframes
- Retime Graph: for managing the Layer's position on this Motion Path over time
- Motion Path Tool: for editing several Motion Paths at the same time
Each keyframe in the Position parameter of the Timeline is spatially represented by one of the Motion Path control points.
If you select a keyframe in the Timeline, the corresponding control point will also be selected in the Viewer.

These control points are displayed as yellow squares when selected.
Position Motion Path
A Motion Path is made up of several dots, each representing the Anchor Point position for each interpolated image between the two keyframes.
If we bring the keyframes closer together, the dot density decreases as the number of frames separating them also decreases.
Note
Dot density is related to the number of frames separating the two keyframes, the composition frame rate also affects it. The higher the frame rate, the greater the number of dots.
The only visual indication of the layer speed is the distance between the dots. The further apart they are, the faster the layer moves.
Moving Motion Path Points
Clicking and dragging one of the Motion Path points modifies the layer's trajectory.
By pressing the Shift key after starting to move it, you can restrict it to a single axis - either horizontal or vertical.
Motion Path Tangent Handling
Creating two keyframes on the Position Parameter produces a straight Motion Path by default. However, clicking on the first point brings up a yellow tangent. Moving this tangent will bend the trajectory.
Setting Tangent Size:
If you click on the last point, you won't see this tangent, as its handle is at the same place as the control point.
But by pressing the Alt/Option key and clicking and dragging this point, you can draw a new tangent and bend the Path on the other side.
- A single click on a control point with the Alt/Option key gives tangents a null size
- Another click in this situation assigns a new default size
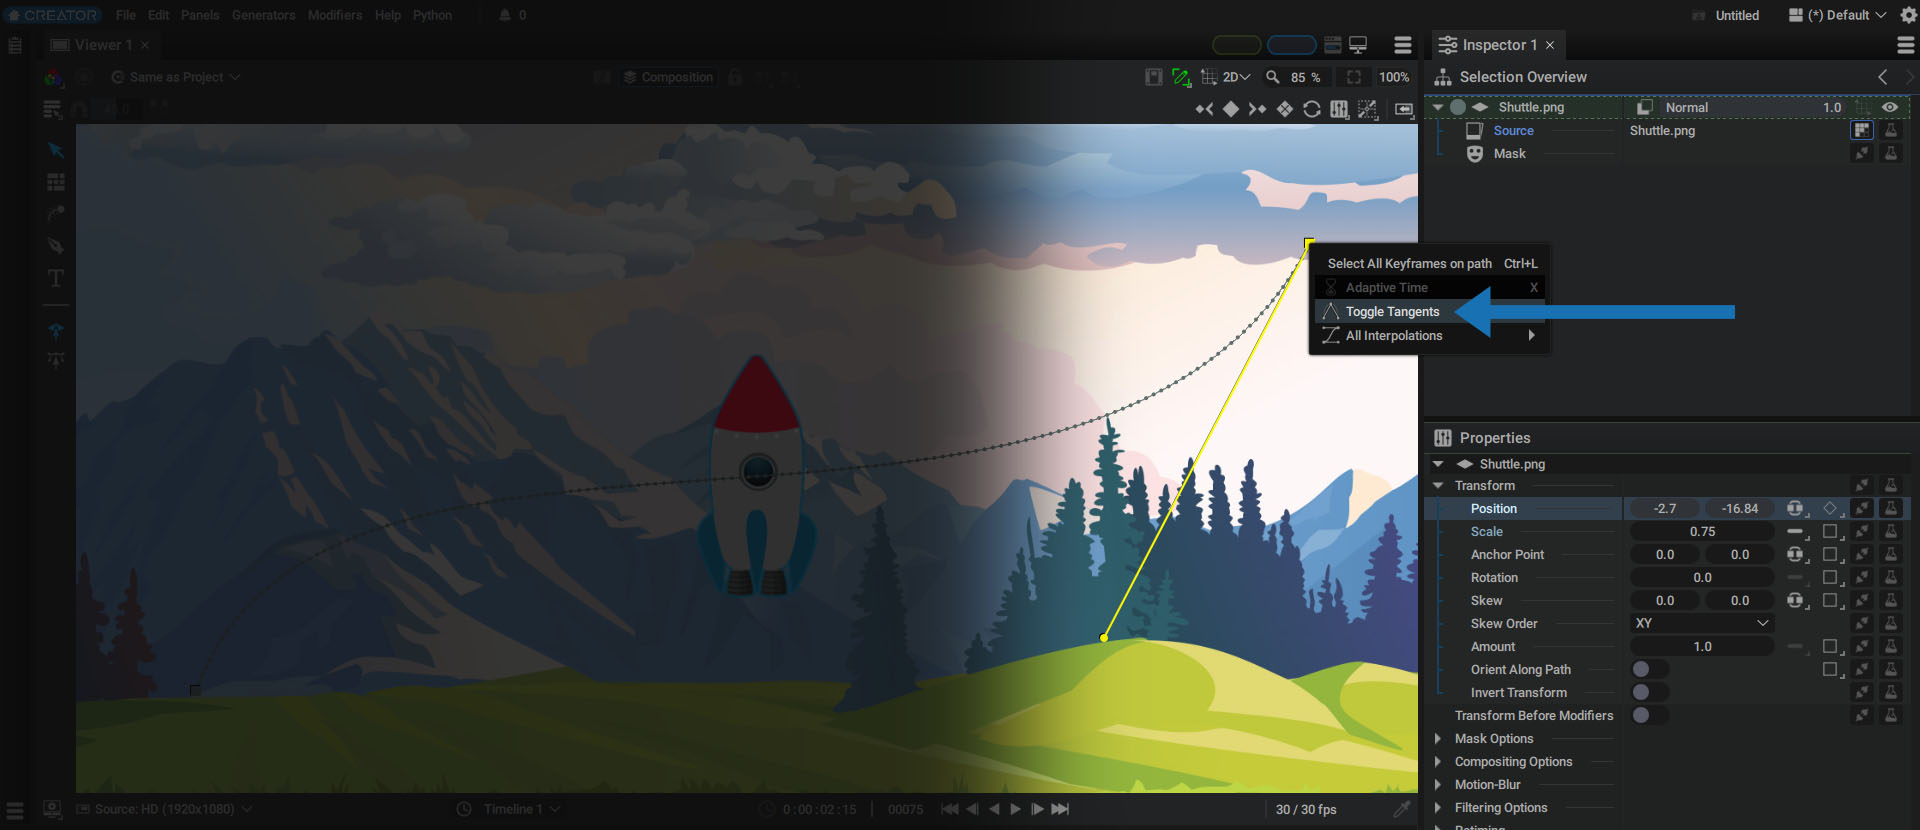
- This function is also available by right-clicking on a point and selecting Toggle Tangents.
Intermediate Keyframe Tangents:
Move your playhead between the two keyframes to position your layer halfway along the path and move the layer in the Viewer to create a new keyframe (and therefore a new control point).
Again, we can adjust this new point's tangents:
You can also directly add a new point to the path by pressing the Alt/Option key and then clicking on the path.
Warning
This new point added with the Alt/Option key will also automatically create a new keyframe in Adaptive mode, unlike a new key created by moving the layer, which would not be in Adaptive mode.
Breaking Tangents:
By pressing the Ctrl/Cmd key and clicking on tangent handles, you can dissociate them to create an angle.
Note
Note that the keyboard shortcuts used to draw and break tangents are the same as those used in path editing tools.
Orienting a Layer along its Trajectory:
To automatically orient a layer in the direction of a trajectory:
- Right-click on the layer in the Timeline, then select Options > Orient Along Trajectory
- Adjust the layer's Rotation value to point in the right direction
Moving the entire Motion Path
To move an entire Motion Path, you need to select and then move all control points. When using the 2D Transform Tool, a selection rectangle will select layers, not control points.
You can quickly select these points by:
- Selecting all parameter keyframes in the Dope sheet, which will select all control points
- Clicking on the parameter name, which will select all keyframes
There is also a feature that lets you go even faster. Right-click on any point and select Select All Keyframes on Path.
Tip
As this function has a shortcut, you can also select any Motion Path control point, press Ctrl/Cmd + L, then move all the control points.
Note
This feature allows you to quickly move a Motion Path when working on a single layer. To save even more time, the Motion Path Tool lets you do the same for several layers at the same time.
Adaptive Keyframes and Motion Paths
When a keyframe is set to Adaptive Time, it's drawn on a path in a different way.
Right-click on the intermediate control point in the Viewer or on the corresponding keyframe in the Timeline and select Adaptive Time (or press the X key after selecting it).
The control point is now drawn as a small circle:
Tangent and Spatial Interpolation Presets
Autograph lets you manually manage the control point tangents with the tools mentioned above; but, it also offers presets to define them automatically, based on the position of the adjacent points.
To access these options, you need to:
- Go to the Dope Sheet module
- Show the Keyframe Properties Dock
After selecting one or more control points, the Spatial Interpolation section contains an Interpolation parameter that defines the mode applied to the current selection.
Warning
Make sure not to confuse this with the Interpolation parameter in the Time Interpolation section just below.
Interpolation presets use three points:
- The current control point
- The previous one on the path
- The next one on the path
Linear:
- The preceding tangent always points to the previous point
- The next tangent always points to the next point
Linear interpolation will therefore always create an angle at the control point.
Smooth:
- Orient tangents horizontally if the current control point is the highest or lowest of the three
- Orient tangents vertically if the current control point is furthest to the left or right
- Between the two limits, the tangents will rotate
Catmul-Rom
- The tangents are parallel to the line formed by the previous and subsequent points
- Their lengths are proportional to the distance between the two points
The tangents of the adjacent points are not taken into account when calculating the tangents of the current point.
Cubic:
Ensuring tangent continuity with Smooth Bezier Interpolation and C2 Continous Tangents.
- Tangents are the same size on both sides
- The tangents of the adjacent points are taken into account
- The curve's continuity will be computed automatically without the need to manage tangents
Broken:
Whatever mode you're using, moving a point or modifying a tangent will immediately switch the point's spatial interpolation to Broken mode. This term refers to the ability to break tangents (by pressing Ctrl / Cmd) and manipulate them without constraint.
Warning
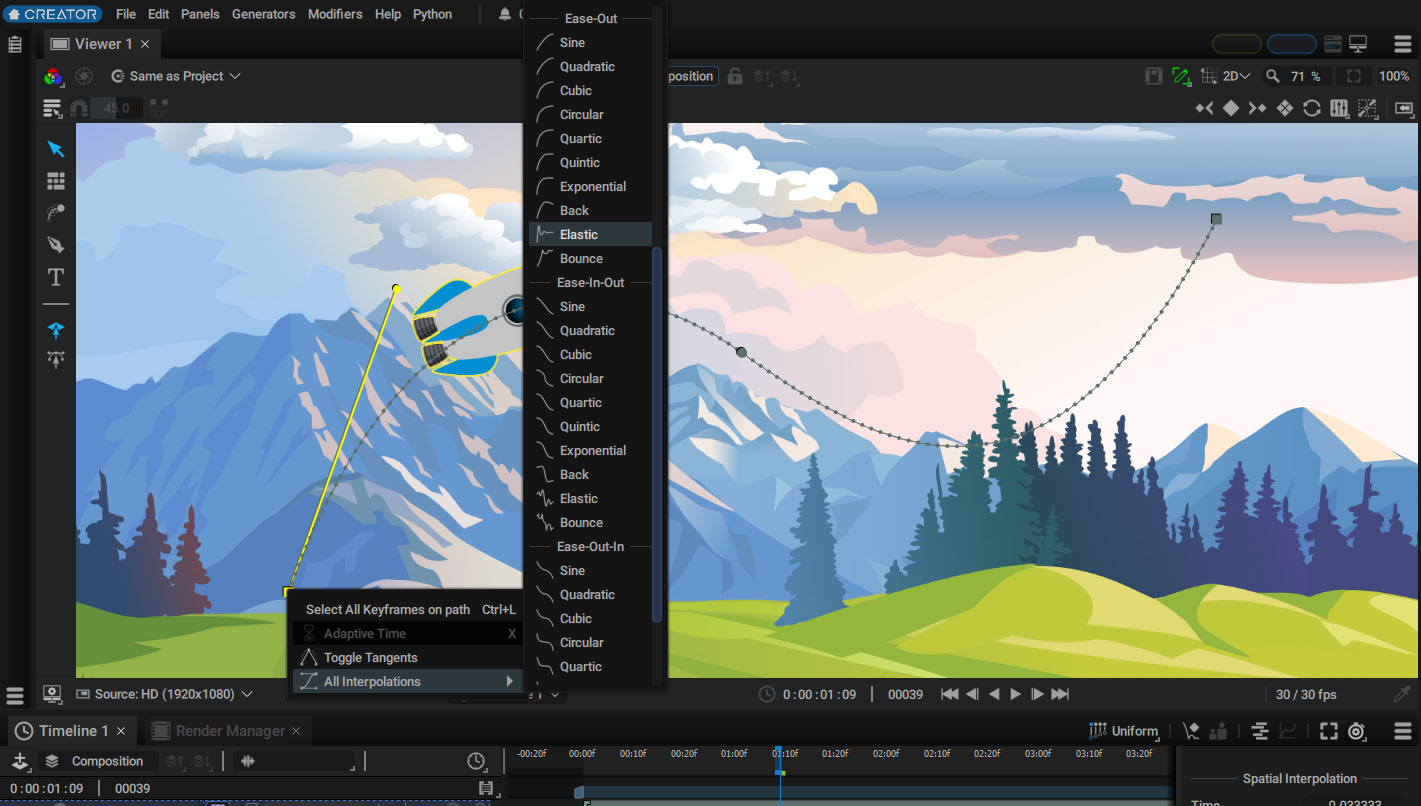
When right-clicking on a control point in the Viewer that is not in Adaptive Time, an All Interpolations section lets you change the Temporal Interpolation. Do not confuse this with Spatial Interpolation which is only available in the Keyframe Properties Dock.
Visualize rollbacks on the Motion Path or its extension
Elastic and Bounce temporal interpolations move the layer along the Motion Path non-linearly.
- Bounce causes the layer to bounce off the last key and back along the Motion Path several times
- Elastic, in addition to going backwards like Bounce, extends the Motion Path beyond the last key
Using the Retime Graph can also produce non-linear movement along the Motion Path.
In the case of a rollback or extension, the Motion Path is drawn much thicker.
Not only for layer position
Although the layer Position parameter is the most common case where you would use Motion Paths, we pointed out earlier that it can be generated by any 2D spatial parameter.
Let's take the example of a God Rays Modifier applied to an image. After setting its Scale parameter to 3.0, its Position parameter is used to define the center of the rays.
By creating two keyframes on the Position parameter, then selecting it in the Properties section or in the Timeline, a Motion Path appears representing the trajectory of this point, whose tangents can be modified to curve it.
Warning
To display the Motion Path of a 2D parameter other than Layer Position, you need to select it in the Timeline or the Inspector.