File/Image Reader
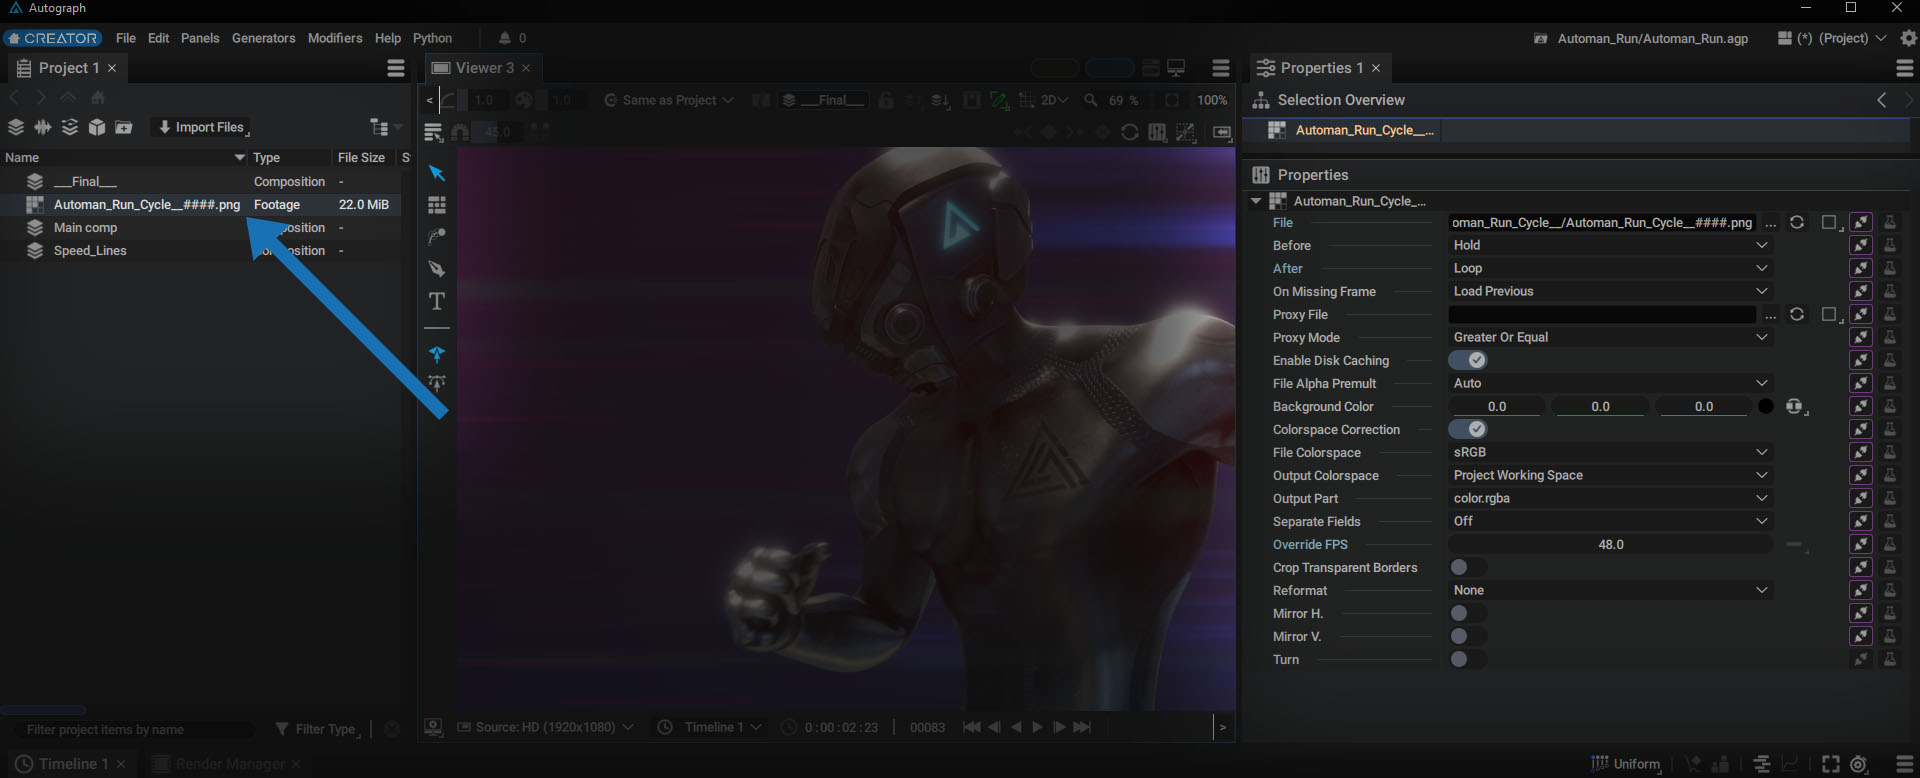
After importing a file into the Project Panel, you can select it to bring up parameter details in the Properties section of the Inspector.

This item refers to an external file (graphic, table, font, etc.) and is called a Reader.
Absolute and Relative Path
The first Reader parameter displays its path to a storage location.
This path can be defined in two ways:
- Absolute: this starts from the root of one of the volumes/storage on your computer
- Relative: this is based on the current project's location
When the file browser is displayed and the current project is saved somewhere, a file can be referenced in Relative mode.
In the bottom right-hand corner, there is a selector that allows you to define whether the import will be absolute or relative to the saved project.

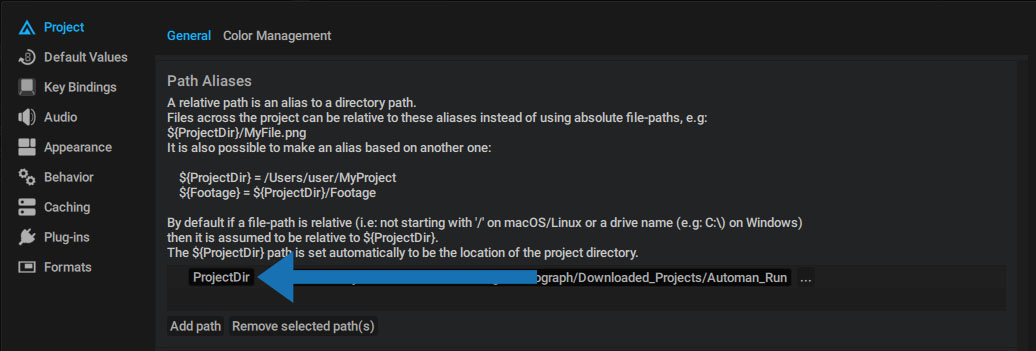
After importing the image, the path of the current project will be represented by the ${ProjectDir} variable.
This variable is defined by Autograph by default, but you can add your own variables by going to Preferences, clicking on the cogwheel icon in the top right-hand corner, then going into the Project > General > Path Aliases section.

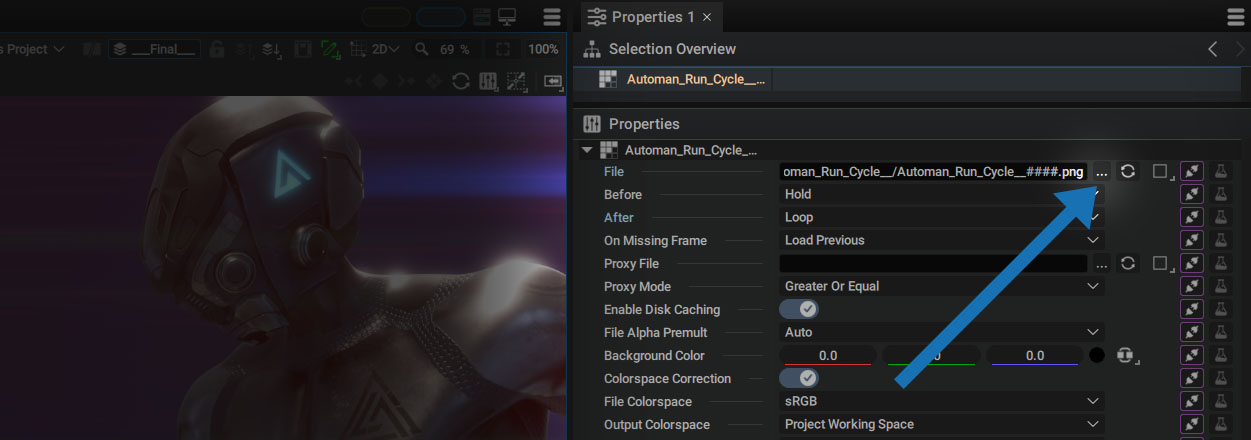
Just to the right, next to the path, there is a "…" button to open the file browser and access your file(s) again.

The reload button (two circular arrows) on the right allows you to reload the content of the targeted file(s) when they have been rewritten and overwritten by a new version. This button allows you to update the Reader content.
Supported media files
Autograph can play the most common media files in modern production. From MP4/h.264 files to ProRes, encoded Quicktime files, MVK, WebM containers, as well as the latest codecs like AV1.
All of these files can be separated into four categories:
- Images
- Image sequences
- Movies (video files)
- SVG (vector files)
Image Sequence:
If you select an Image sequence, the path name will be as follows:
/path/to/your/files/image_sequence#####.png_
The "#####" in the path describes the padding, or the number of digits used in the filename to number images.
If you didn't check the Sequence View button in the file browser and accidentally loaded only one file, such as "image_sequence_00001.png", simply replace "00001" by "#####" to tell the Reader that you want to read an image sequence - no need to open the file browser again and go through your files.
Warning
For licensing reasons, Avid DnxHD/DnxHR codecs are not currently supported by Autograph.
Outside Range Behavior
Just below the file path, you will see Before and After which are the two parameters that define the behavior of a layer outside of its original range.

When you import an image sequence or a movie (video file), and use it as a layer Source in the Timeline, the duration and the frame rate of this animation will define a range, represented by a rectangular block in the Dope Sheet.

Two visibility keys will automatically be created at the first and last available frames in the file. This block represents the original file range. By moving the last visibility key to the left, you can shorten the layer and make it disappear, before reaching the last frames of its content. You can also move this keyframe to the right and extend its visibility in the composition. You can define what happens in the After dropdown list, where several options are available:
- Hold (Default): repeats the last available frame infinitely
- Loop: repeats the whole animation in loop, infinitely; useful when integrating loopable stock images (flames, smoke, animated backgrounds, etc.)
- Bounce: repeats the whole animation, back and forth. Sometimes called "Ping-Pong", it's really useful when you want to loop a non-loopable animation
- Black: fills the extended images in full black
The Before parameter does exactly the same thing but is applied when you extend the range of the layer to the left by moving the first visibility key.
When you extend a layer, the extended part is respresented by diagonal lines.

Proxy File
Autograph's cache system aims to optimize loading and processing images by generating mipmaps. However, file reading itself can require a lot of time and even fill up the cache folder rather quickly.
Two factors can influence reading efficiency:
- Very large images, such as 4K, 8K, or 12K formats, which can put a lot of strain on storage and the CPU.
- The codec used to encode the file, which can require a lot of power during decoding, especially when the codec uses GOP (Group of Pictures).
The solution to be able to work with these formats smoothly is to produce a smaller, lightweight replacement file known as a Proxy that uses faster decoding codecs.
For example: If you work with a single-pass 4K EXR image sequence to be read at 24 FPS, compressed with ZIPS scheme, and encoded in 32bpc float (full), you could use a proxy with the following specs:
- Format: FullHD/1080p or 720p
- 24 FPS
- Codec: ProRes 422
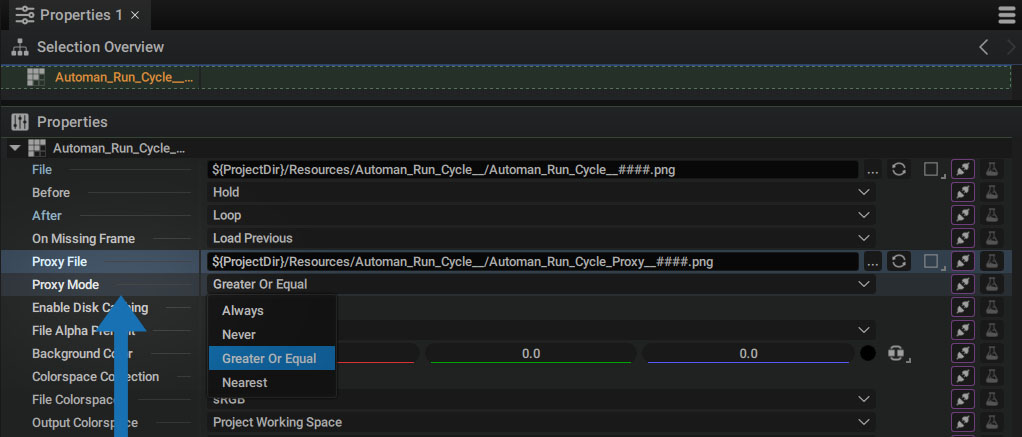
In the Reader parameters, use the Proxy File to set the path to this video file which works in the same way as the File parameter.

The output image size will remain 4K in our example, but the original file won't be used under certain conditions. The proxy will automatically be stretched and filtered according the Filter parameter of the layer using this source. No need to temporarily scale your layers to compensate for the size difference. You can assume that you are still working with the original 4K footage and only notice definition loss based on the size difference.
With the Proxy Mode parameter, you can define the rule used for switching from the original file to the proxy and back:
- Always: the proxy is always used
- Never: the proxy is never used
- Greater or Equal: if the final size of the layer using the Source in the Viewer (after Transform) is greater than or equal to the proxy size, the original file is used.
- Nearest: same concept as Greater or Equal, but compares the current size in the Viewer to the original file and proxy, then uses the nearest in terms of definition.
Manage proxies in the Render Manager:
Proxies can be turned ON or OFF when you render the final sequence. This way, you can work smoothly with proxies, check details from time to time in the Viewer by switching to your original footage, then render your final sequence with full definition footage.
For more detail, refer to the Render Manager section.
Enable Disk Caching
As described in the caching section of the documentation, playing an image or a video can require a lot of resources depending on the algorithm used to encode it.
For example, videos encoded with h.264, h.265, or AV1 codecs sometimes need to decode dozens of frames to show a specific image. If several layers in a composition use the same video source, it would be a shame not to share the decoding so that it could be reused. For each image Autograph decodes, a decoding cache is written in a dedicated folder.

By default, this option is turned on to take advantage of this caching system and speed up the reading and compositing process.
Warning
If you turn this option off, you will use less storage but images will be reread each time you scrub in the Timeline. This could be a performance killer.
Premultiplication
Defining the rules regarding Alpha channel
Autograph has been designed to handle images containing an Alpha layer, with RGB channels that may have been recorded in Straight/Unpremultied or Premultiplied mode.

Some image formats have been designed to work only in Straight/Unpremultied mode like PNG for example, while others like EXR, specifically records its RGB channels Premultiplied by the Alpha.
File Alpha Premult lets you override the rule adopted, according to the file format. In Auto mode, Autograph relies on these rules to determine how to behave with these images. However, it is possible to assign a different behavior.
Defining the background color for premultipled RGB channels
For images with an Alpha with RGB channels that have been premultiplied, it is possible to define the background color if it is not black.

Tip
Two Modifiers, Premult and Unpremult, can be very useful for switching from one mode to the other when you need to composite sources of different origins.