Selection Overview
The Selection Overview displays the details of the current selection(s) made in the Project Panel, Viewer, or Timeline.
A tree representing the most important parameters in the hierarchy is drawn for each selected item. Remember that the goal of this panel is to offer a simplified view of the current selection that dynamically adds lines to the tree when necessary.
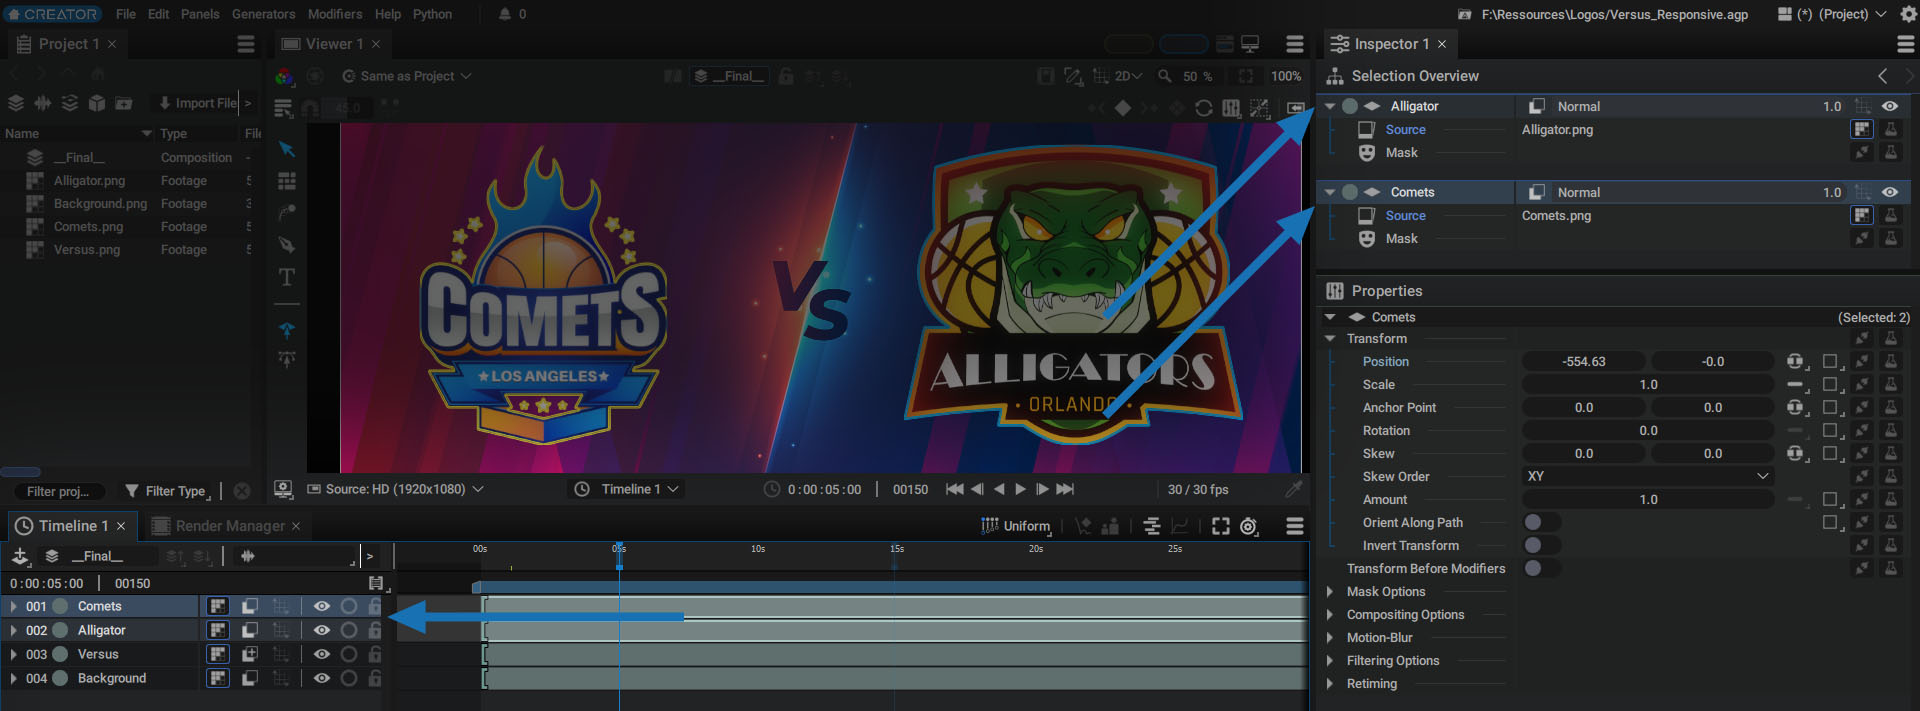
In the image below, the Selection Overview displays the trees of the two selected layers.
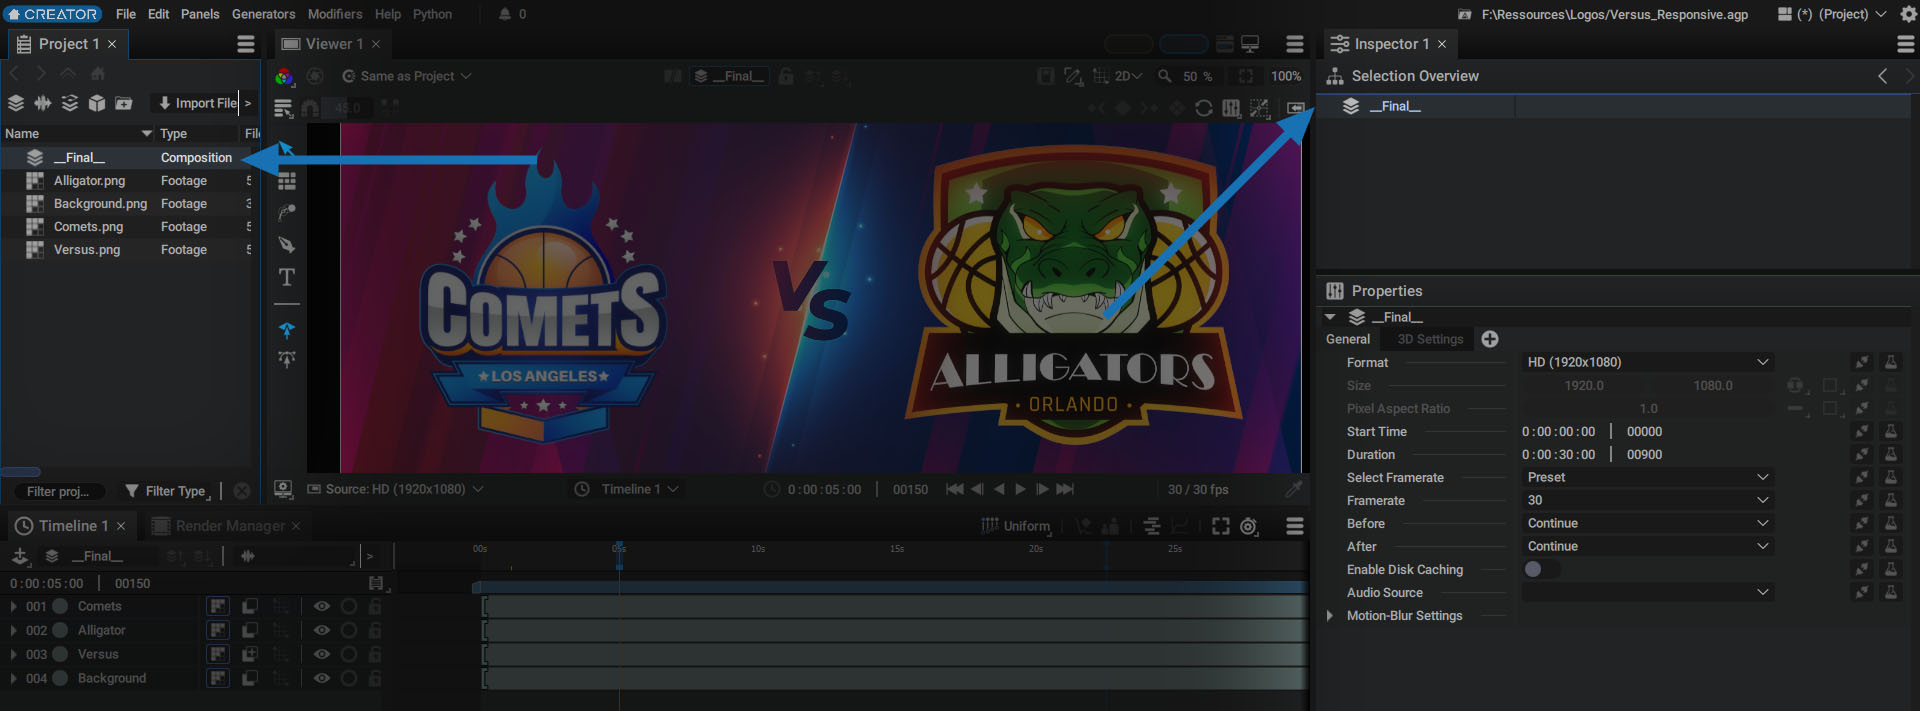
Sometimes this hierarchy can be very simple, like a single line. In the example below, a composition is selected and a single line representing it appears in the Selection Overview.
Selection History
At the top right of the panel, there are two arrows for navigating through the selection history. Each time the current selection is modified in the Timeline, Viewer, or Project Panel, a new state is stored in this history.
This makes it easy to switch back and forth between these states, especially when parameters belonging to different layers need to be connected.

Selection Consistency and Indirect Selection
Selection in Autograph is designed to be consistent. Selecting a layer in the Viewer will also display the layer selected in the Timeline, as well as in the Selection Overview, with the first line of the menu hierarchy representing the layer itself.
If you unfold a layer in the Timeline and click on its Source parameter, it will also be selected in the Selection Overview.
The layer the parameter belongs to will also be selected in the Timeline but with a more subtle outline of dotted lines.
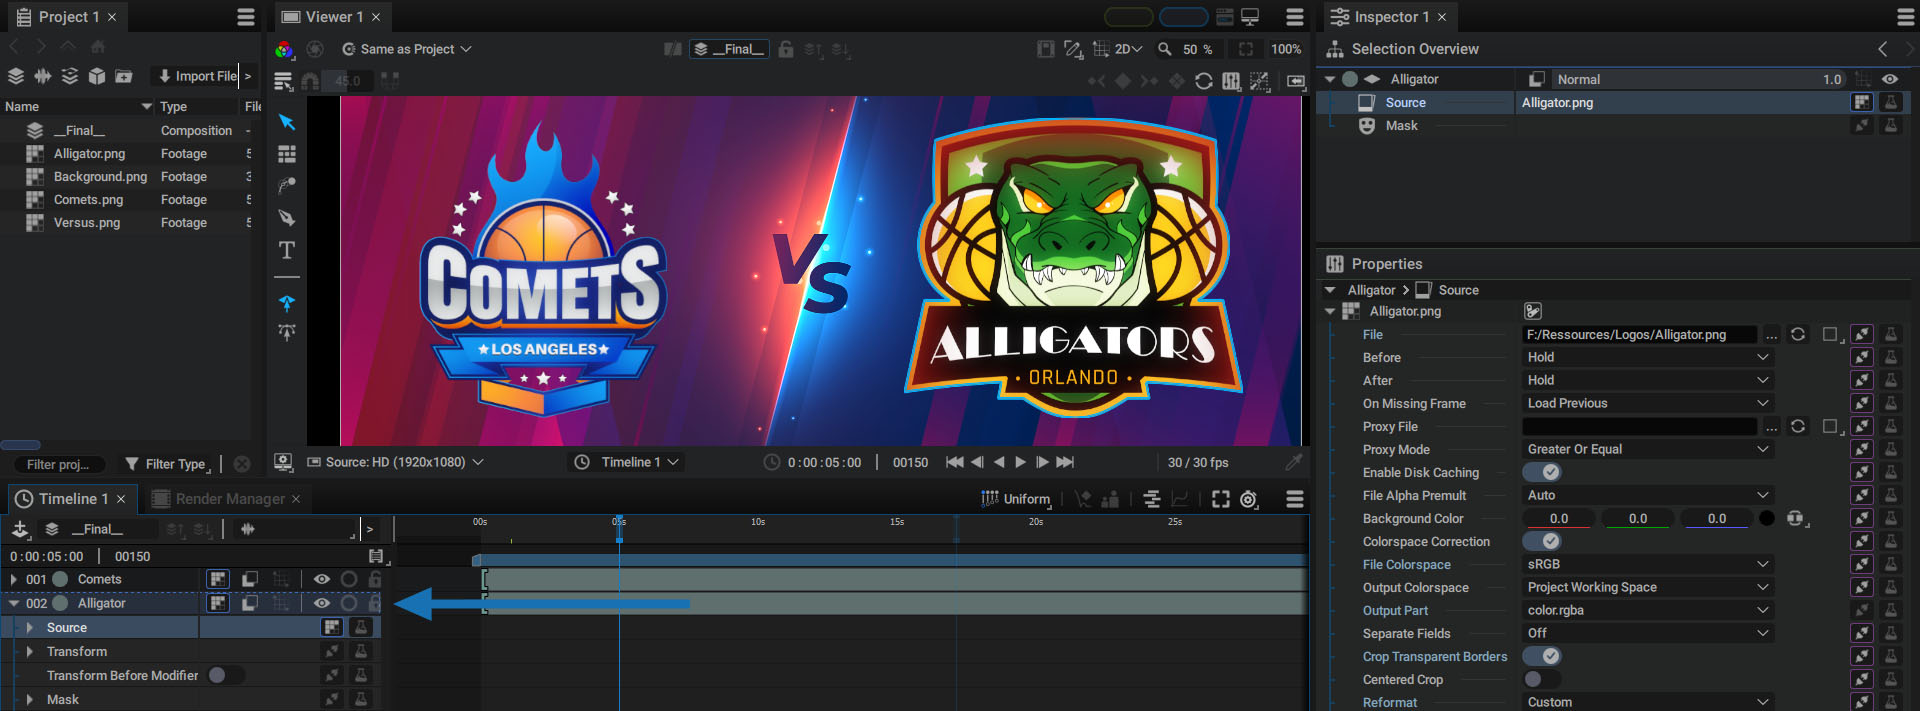
This state is known as Indirect Selection and it allows you to see at a glance that one or more of its parameters are selected, even when the layer is folded up.
Selecting Multiple Parameters
You can press the Ctrl / Cmd key to select several parameters at the same time.
When doing so, two situations may occur:
- The parameters selected are different parameter types
- The parameters selected are the same parameter type
Different Parameter Types
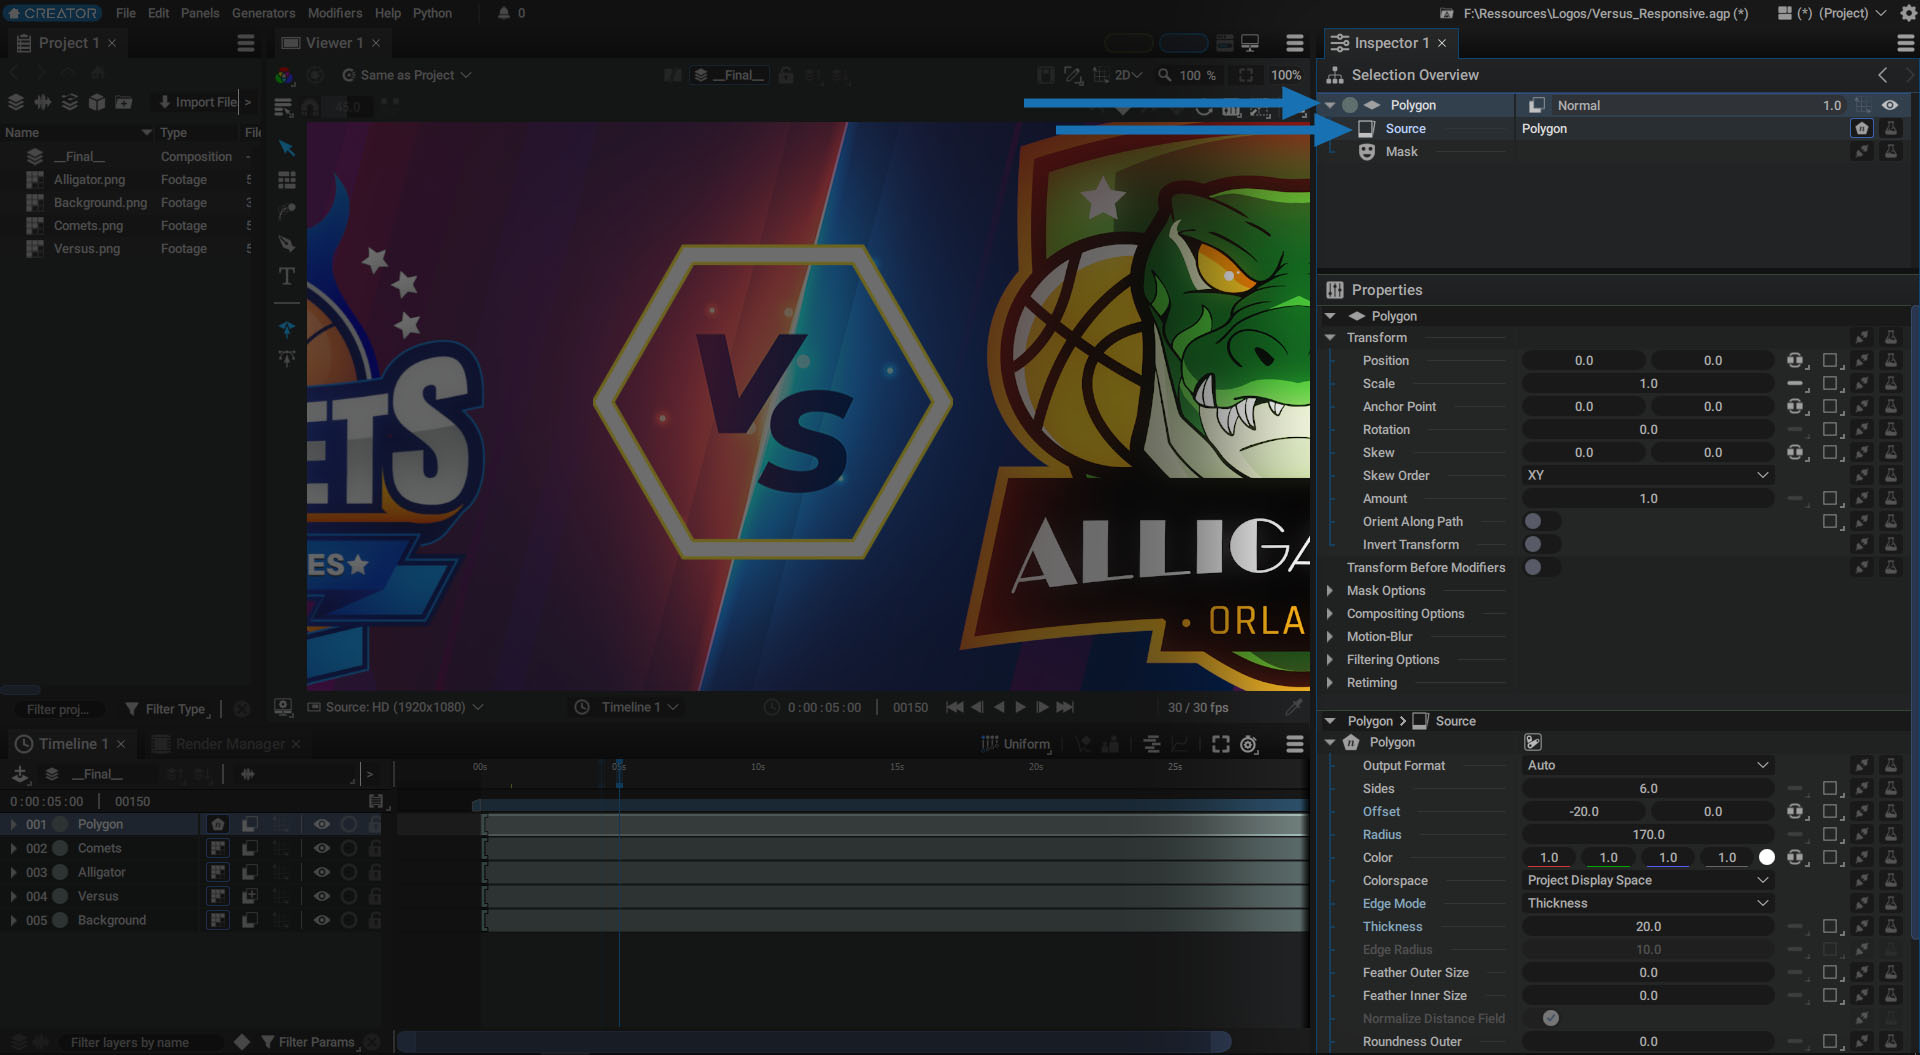
If parameters are different types, they are displayed one below the other in the Properties section. The last parameter selected will always be added to the top, pushing the previous ones down.
In the example below, we've selected the first line of the layer tree, then its Source parameter. So we can modify both the transform parameters as well as the parameters of the Generator producing the layer's graphic content.
Same Parameter Type
If the selected parameters are the same type of parameter, such as several Source parameters from several layers, only one of them will be displayed in the Properties section so that all sources can be edited in a single action.
To demonstrate, let's go through the following example:
In a new composition, add a new layer with a Polygon Generator, then duplicate it twice and place these three layers side by side.
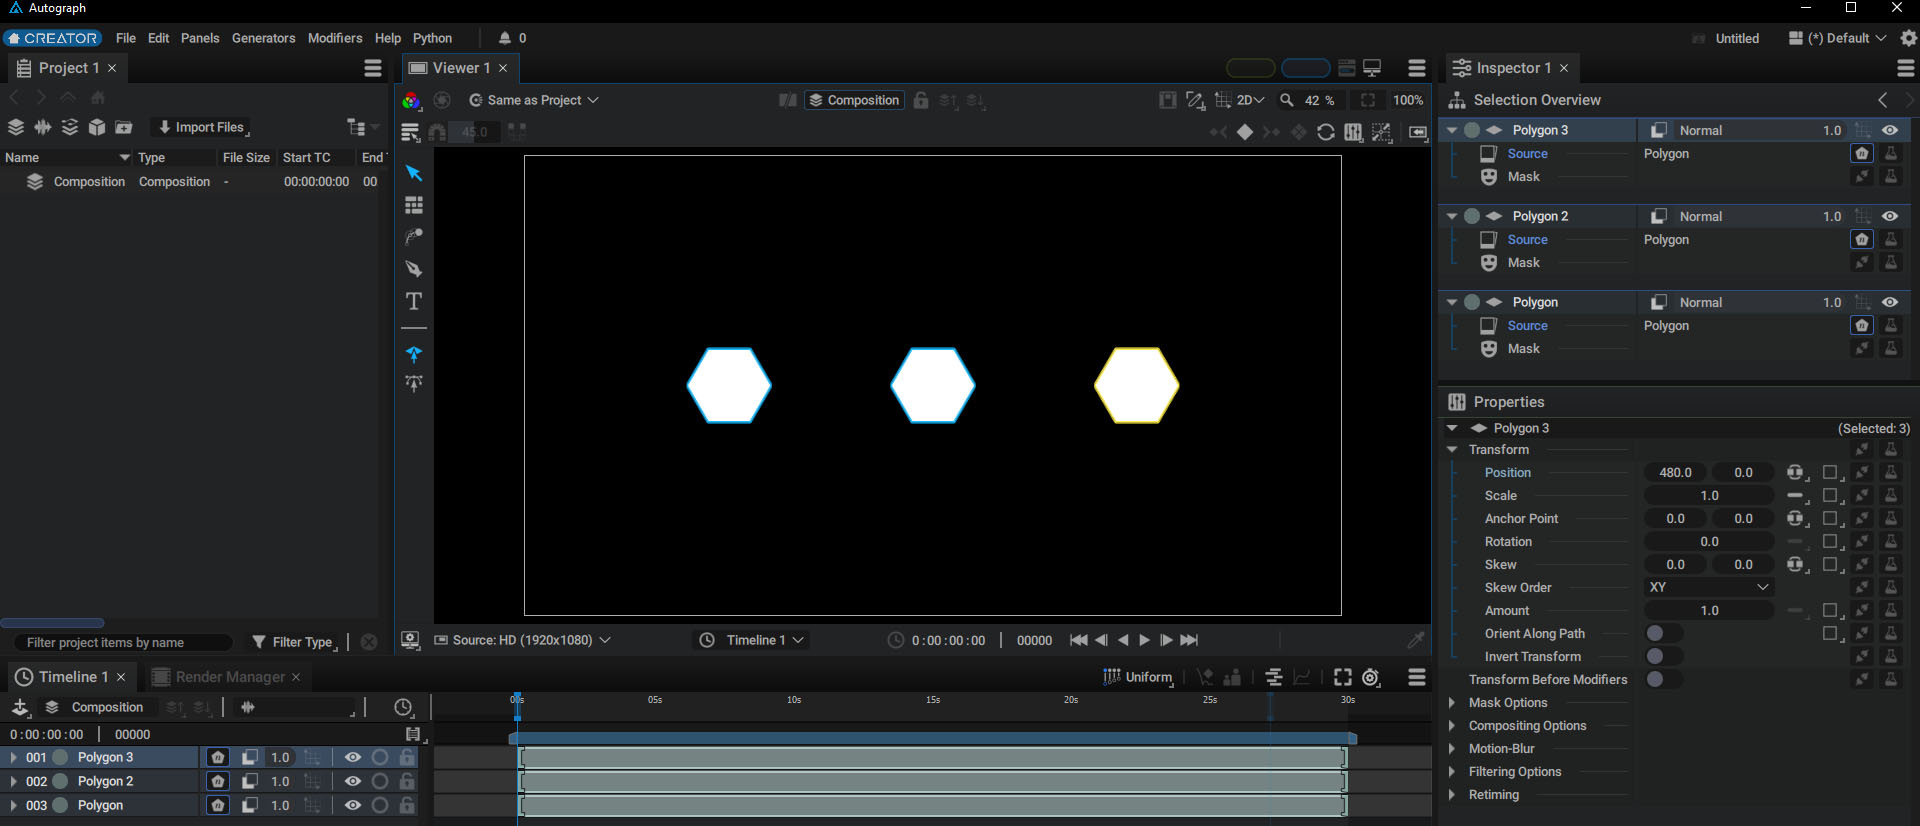
When selecting these three layers in the Timeline, the three trees will be displayed in the Selection Overview. Clicking on only one Source will display the parameters of the Polygon Generator that is connected to that Source parameter.
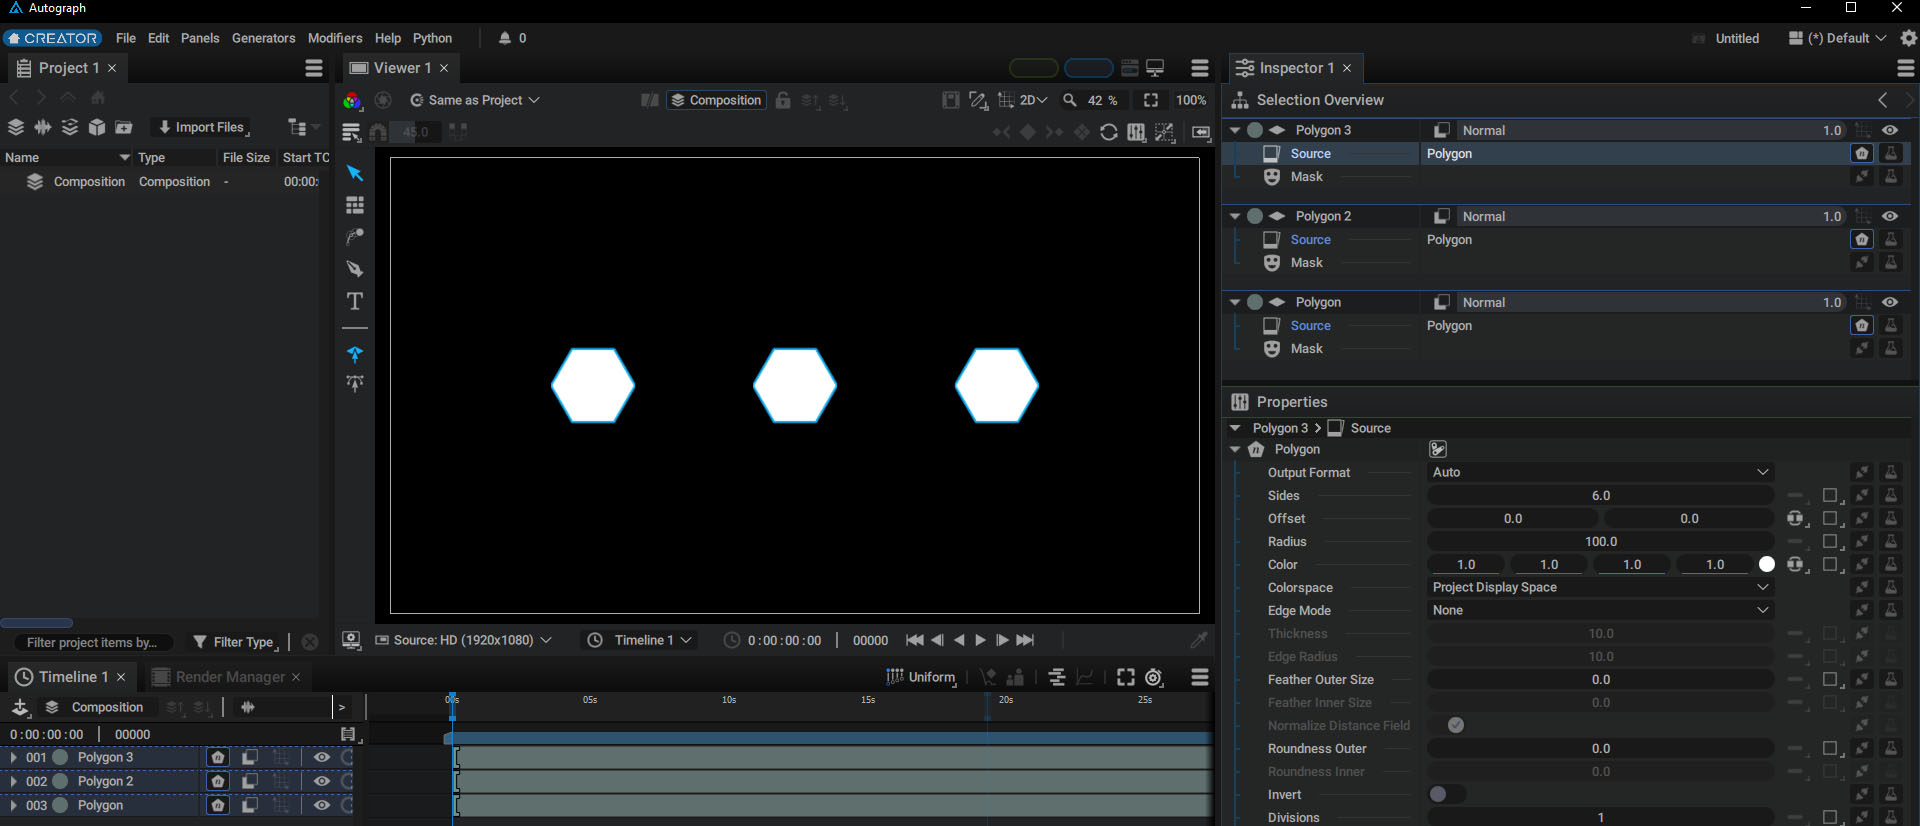
Now, if you press Ctrl / Cmd + click on the other two Source parameters that belong to the other two layers, only one of them will appear, but to the right you will see (Selected:3).
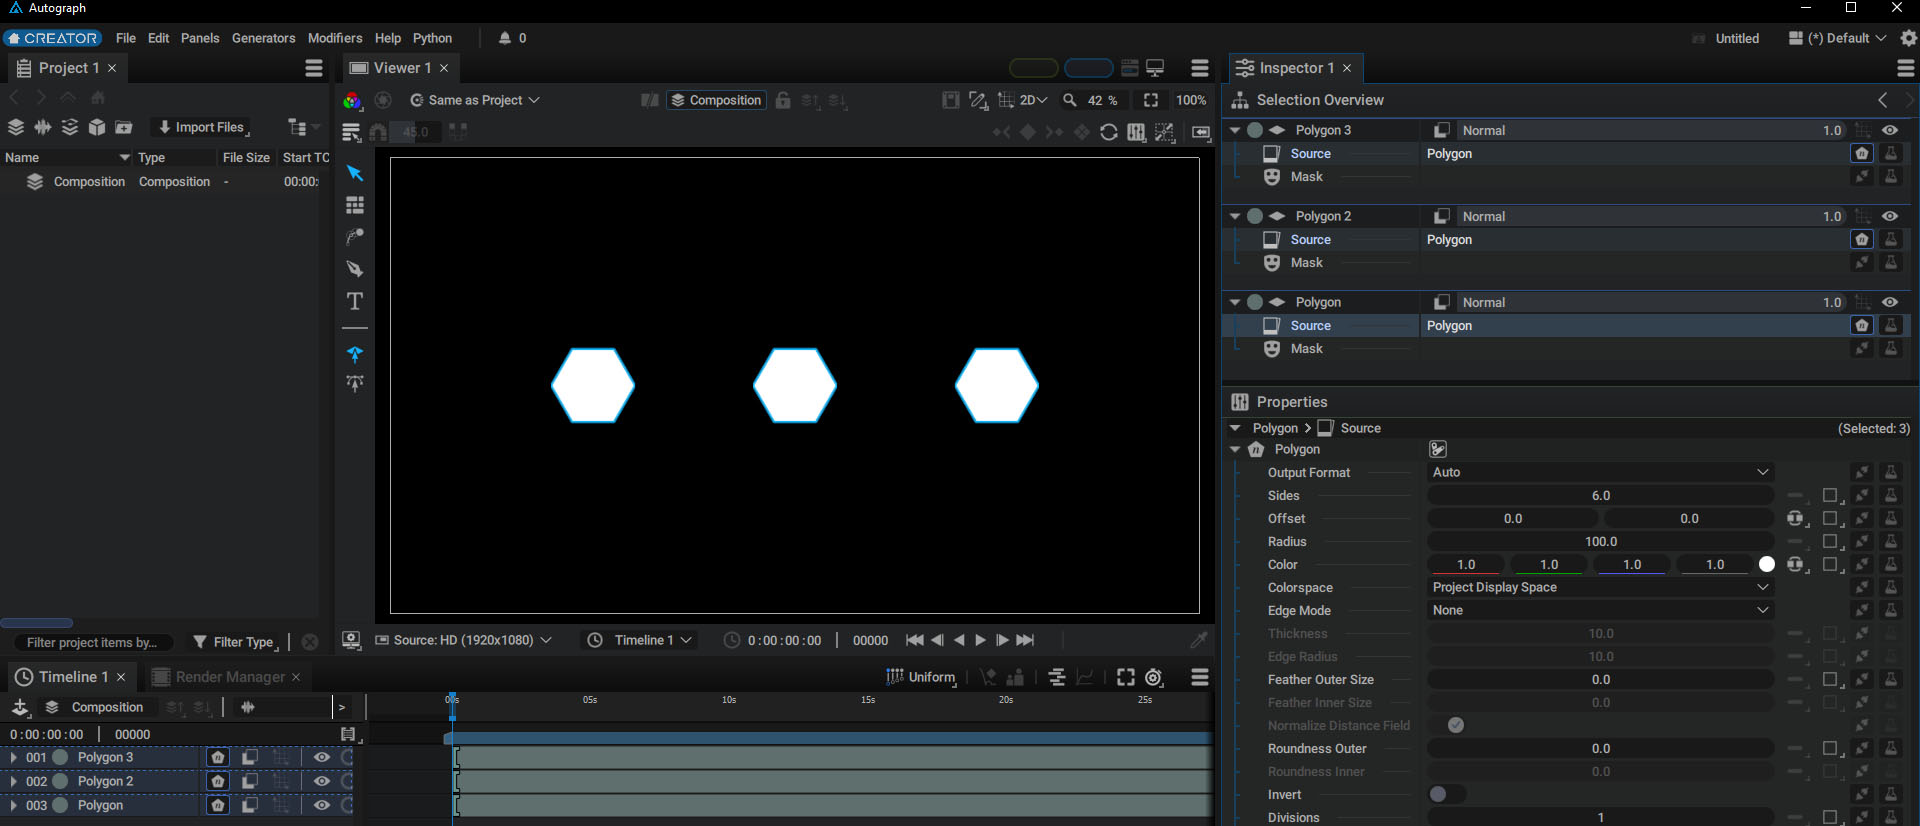
Since all three parameters are image parameters, only one of the three sources will be displayed - but which one?
When selecting several parameters, the last selection will be tagged as the Active Selection, and will be represented by a brighter selection color. This active parameter is the one displayed in the Properties.
With these three sources using the same type of Generator selected, you can modify the polygon's size or the number of sides on all three layers at the same time.
Notes
The notion of Active Selection is very similar to the notion defining the Active layer.
Select All Parameters that are the Same Type In a Single Click
In the previous example, we selected the three Source parameters one by one using the Ctrl / Cmd key; but, you can make this selection in one step by pressing the Alt key and clicking on one of the sources.
This quick selection can be made on any tree branch. When you click the Alt key, Autograph scans all trees displayed in the Selection Overview in an attempt to find the same structure. If the hierarchy matches the hierarchy of the parameter clicked, then parameters of the same type will also be selected.
The video below demonstrates how this quick way of accessing a set of parameters can speed up your work by quickly navigating between Generator transform parameters and Source parameters using the Alt key.
Multi-editing Value
Selecting multiple parameters makes it possible to work on a large number of elements at the same time, for example, to change a single color or to modify a rotation value.
Autograph offers even more control over multiple parameters that can be edited at the same time through various Multi-edit modes, described in this section.
Limited Number of Trees in the Selection Overview
When a large number of layers are selected, for example when using the shortcut Ctrl + A to select all layers in the stack, only the last 10 layers will be displayed in the Selection Overview.
However, all of the layers are selected and it is possible to apply changes to all of the sources at the same time, just like before. In the screenshot below, only 10 trees are visible but you can see (Selected: 28) indicated in the top right-hand corner of the Properties section.
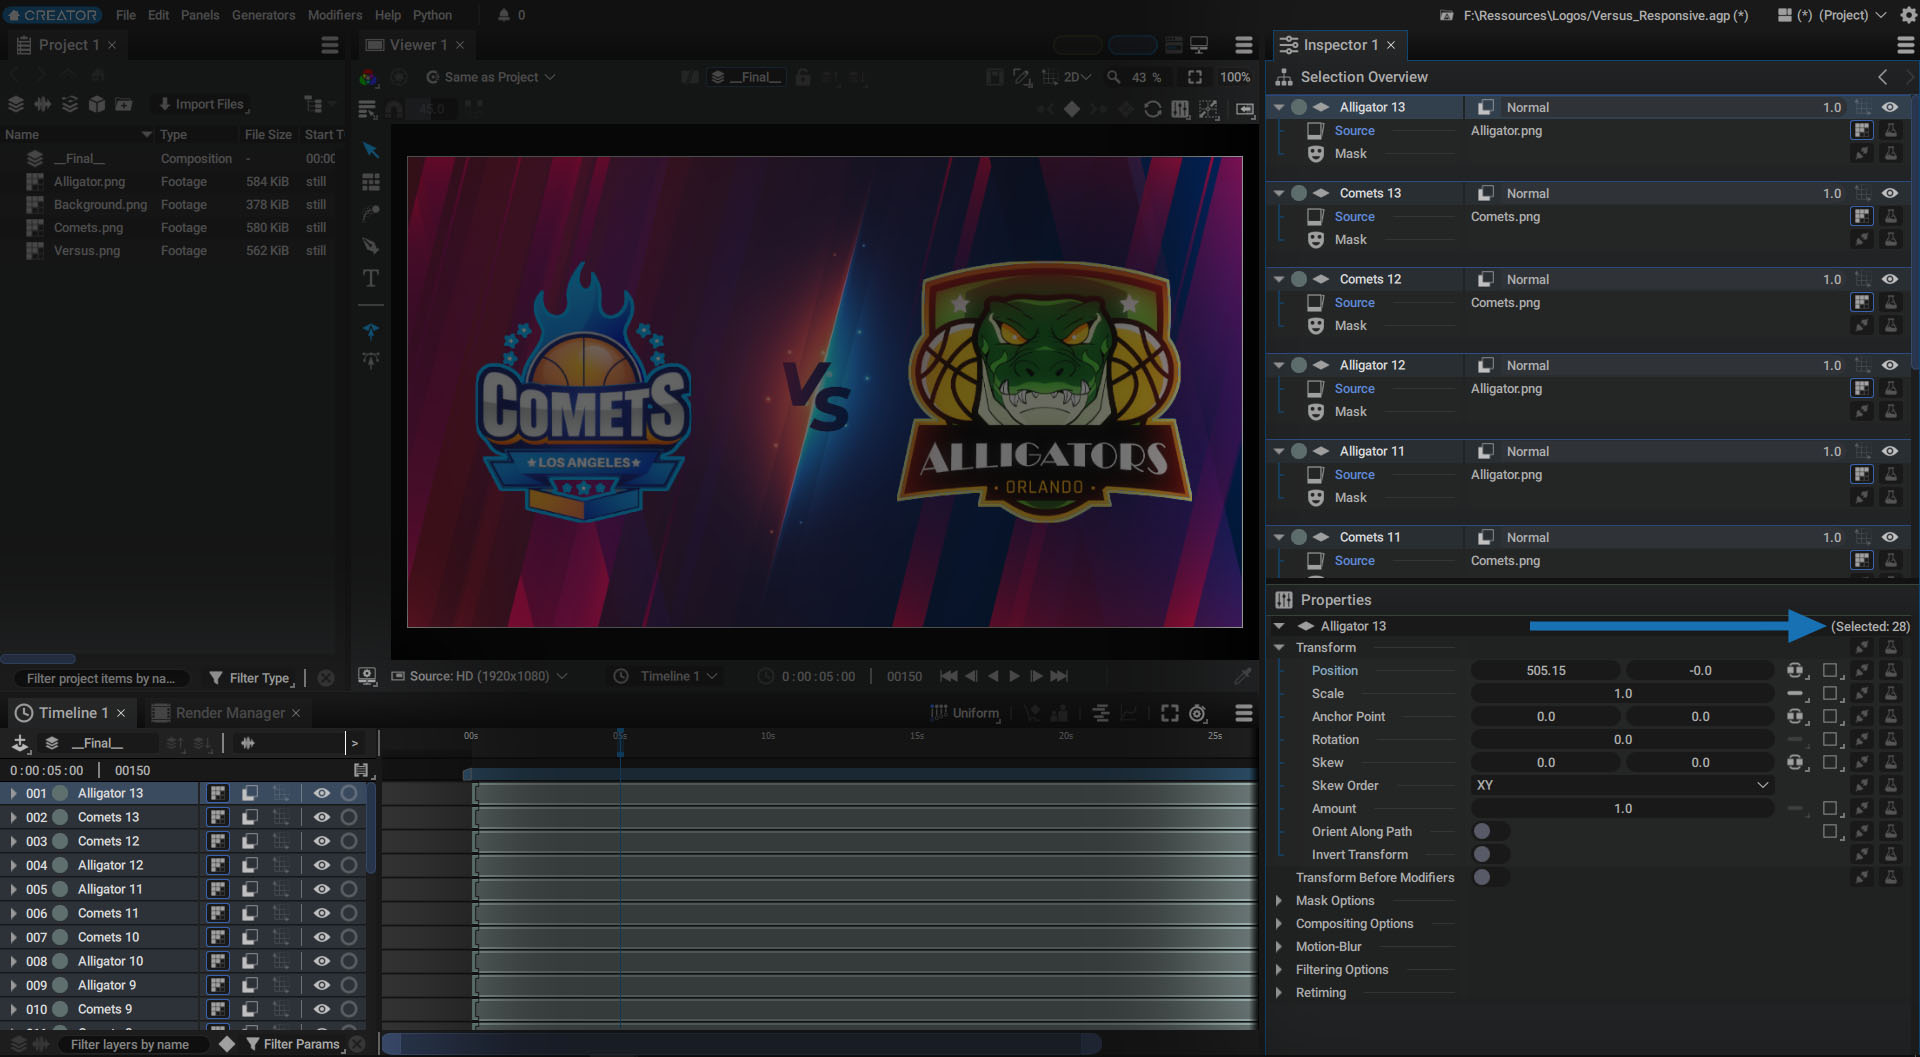
This restriction ensures that the Selection Overview remains legible and understandable, as its purpose is to reduce the amount of information displayed to provide faster access.
Inspecting Generators and Modifiers in the Selection Overview
The Selection Overview displays all of the elements embedded in a layer:
- The layer itself with its Source, Mask, transform parameters, and render options (filtering, motion blur, etc.)
- Generators used by its Source, Mask, or any other parameter, written in blue.
- Modifiers added to its parameters (Image, Numerical, Textual, etc.), written in orange.
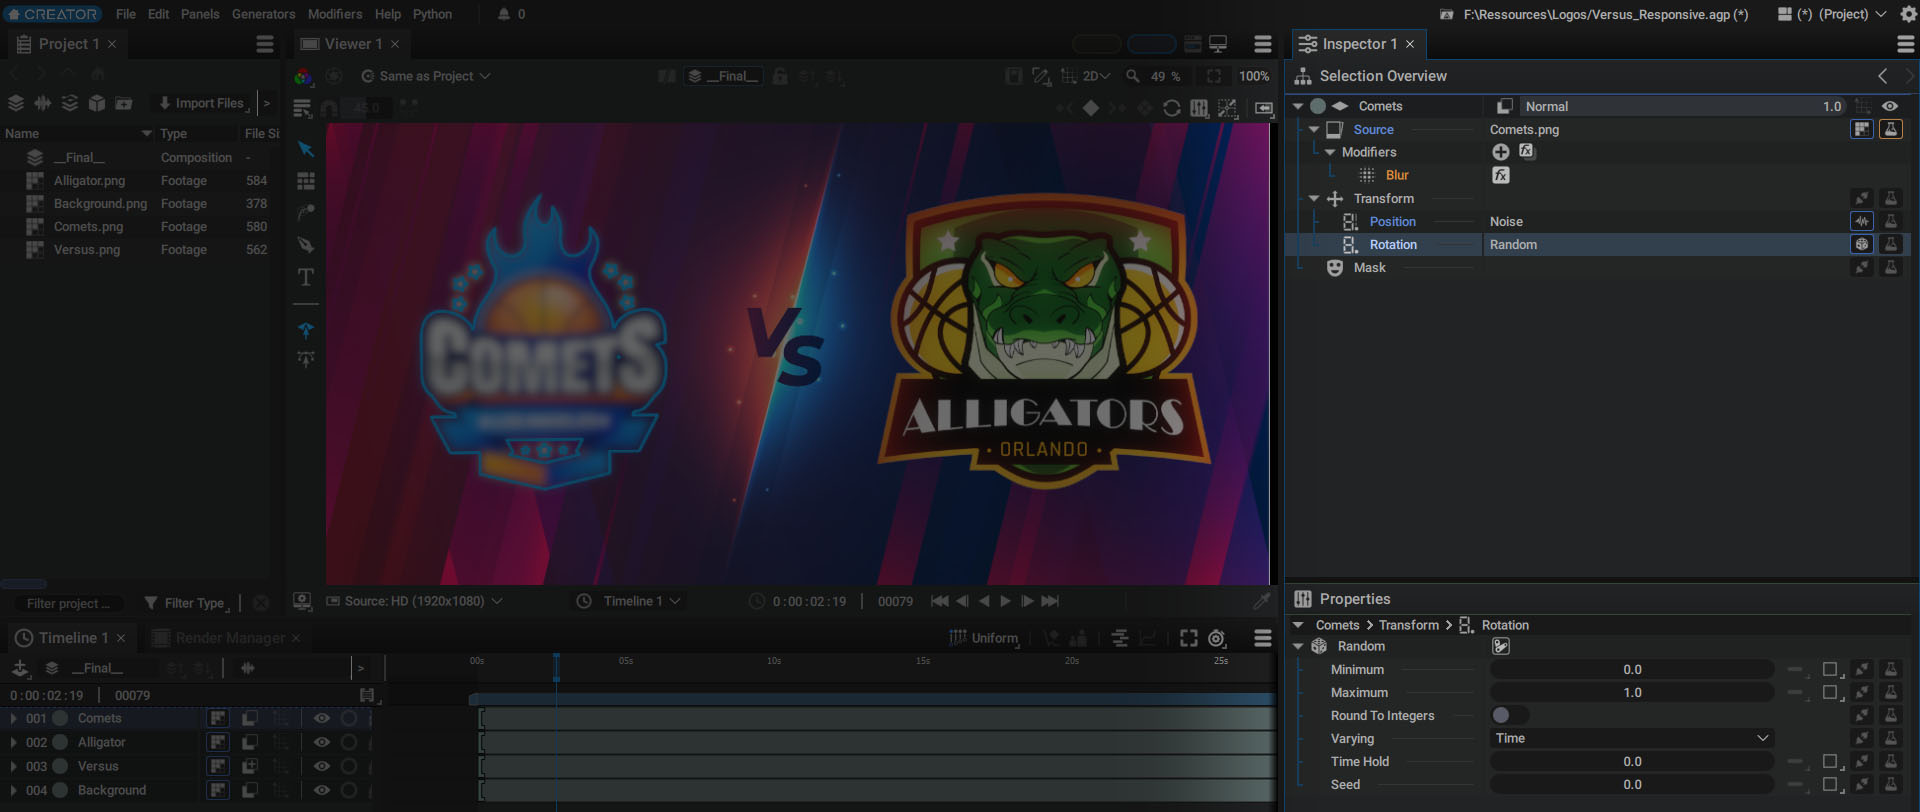
Connected Generator or Reader
When a reader or Generator is connected to a parameter, the name of the parameter turns blue and you will also see:
- The Generator or reader name
- The Generator or reader icon on the right, in the connection slot
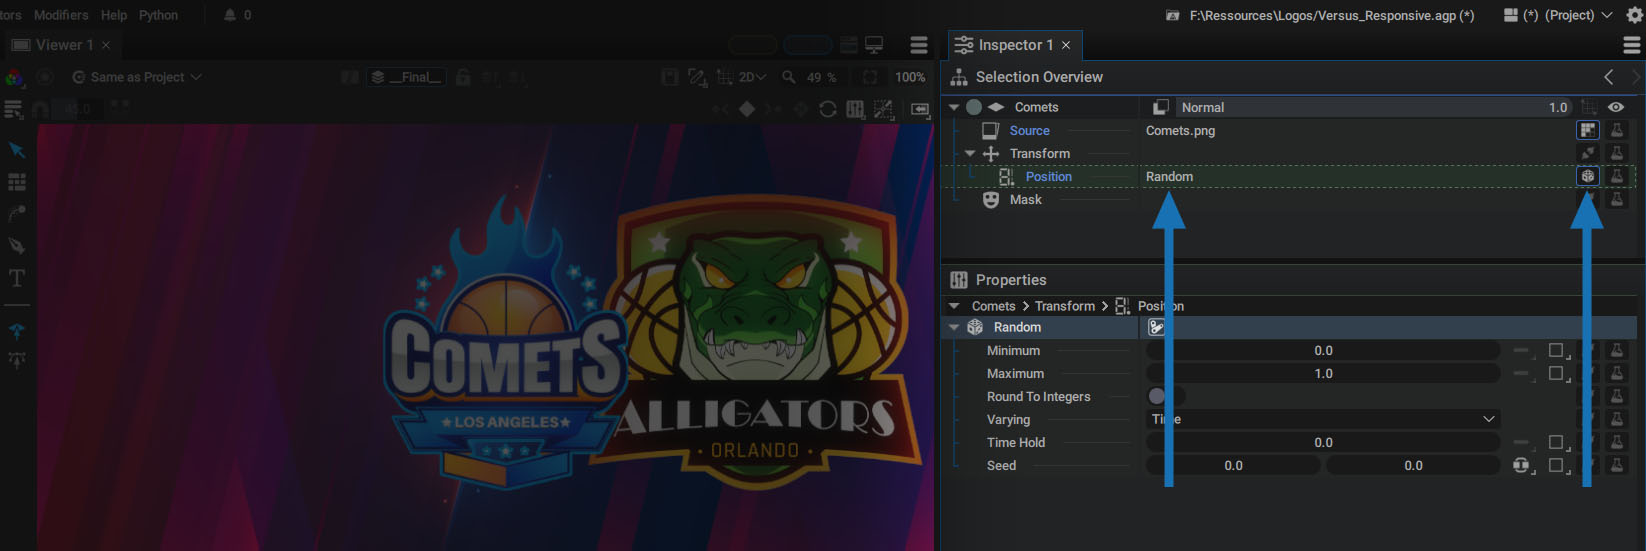
By default, the two parameters displayed in the tree for a selected layer are Source and Mask. Adding a Generator to a parameter will add its name to the tree.
For example, adding a Random Generator to a Position will display the following tree:
Notes
Right-clicking gives you access to options such as deleting a Generator or breaking the connection to a reader.
Added Modifiers
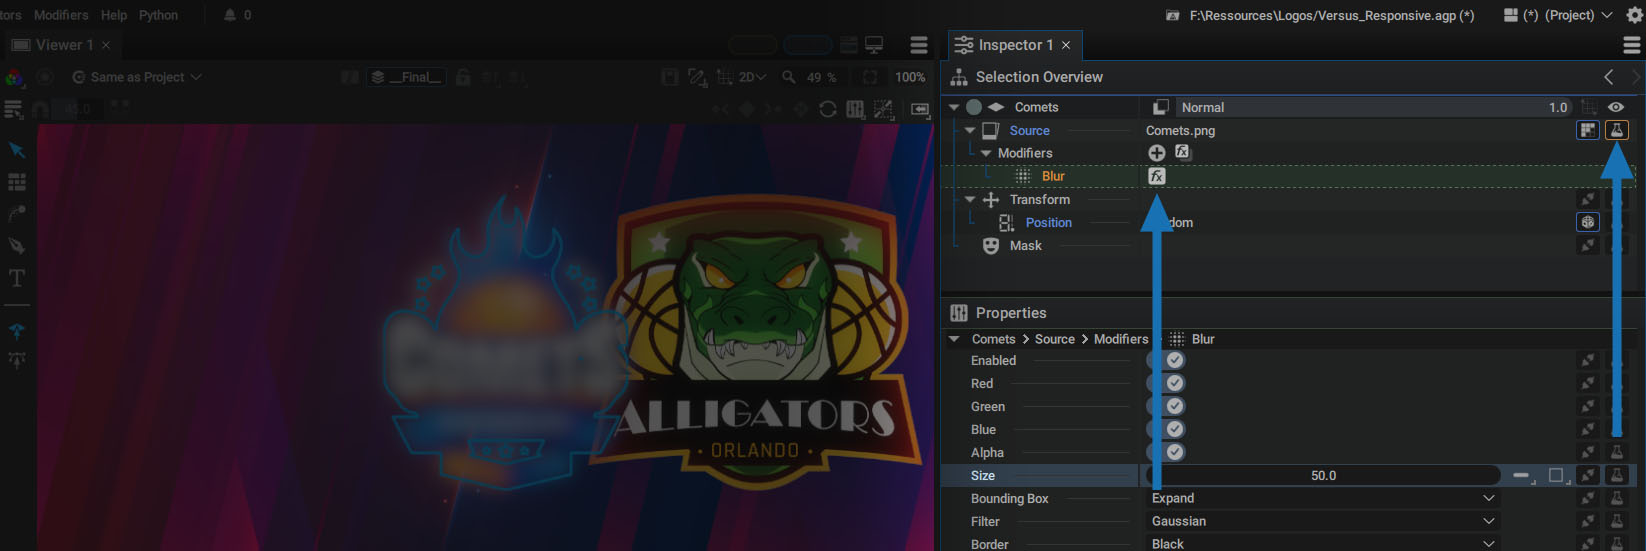
When a Modifier is added to a parameter, it is displayed as a child in the tree:
- The Modifier icon precedes its name, written in orange
- A switch allows you to switch the Modifier ON/OFF
Notes
Right-clicking on a parameter using Modifiers provides access to options such as disabling all Modifiers at once.
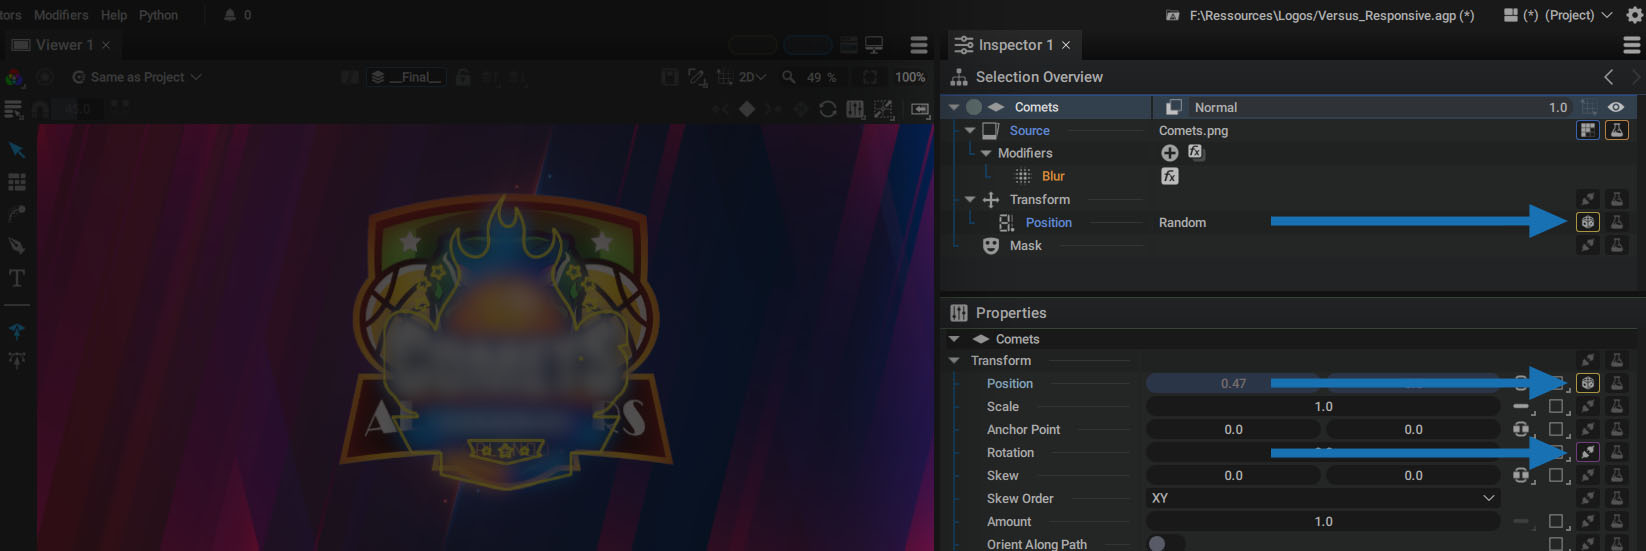
Linked and Shared Parameters
- When a parameter is driven by a link to another one, its connection slot has a yellow outline.
- When a parameter is shared, its connection or Modifier slot has a purple outline.
Notes
Right-clicking on a linked or shared parameter gives you access to options such as jumping to the linked parameter driving the selected one, or displaying the parameter list in the same Share Group.