Source and Mask
Source
The layer Source parameter is an image-type parameter that lets you connect to or generate a graphic source.
The word connect is very important here because layers do not actually import sources, rather, they connect to them. This means that a layer’s Source is completely independent from the transformations and Modifiers that are applied to it. So you can easily switch to a different Source image without affecting the animations or Modifiers that were already applied.
A layer can exist without its Source parameter being connected to anything. In this case, this type of layer is displayed in the Viewer as a simple "X", and the term Null is used to describe it.

You can input a Source by dragging and dropping an element from the Project Panel onto the Source slot or by directly clicking on the Source slot.
There are three ways to access the Source slot:
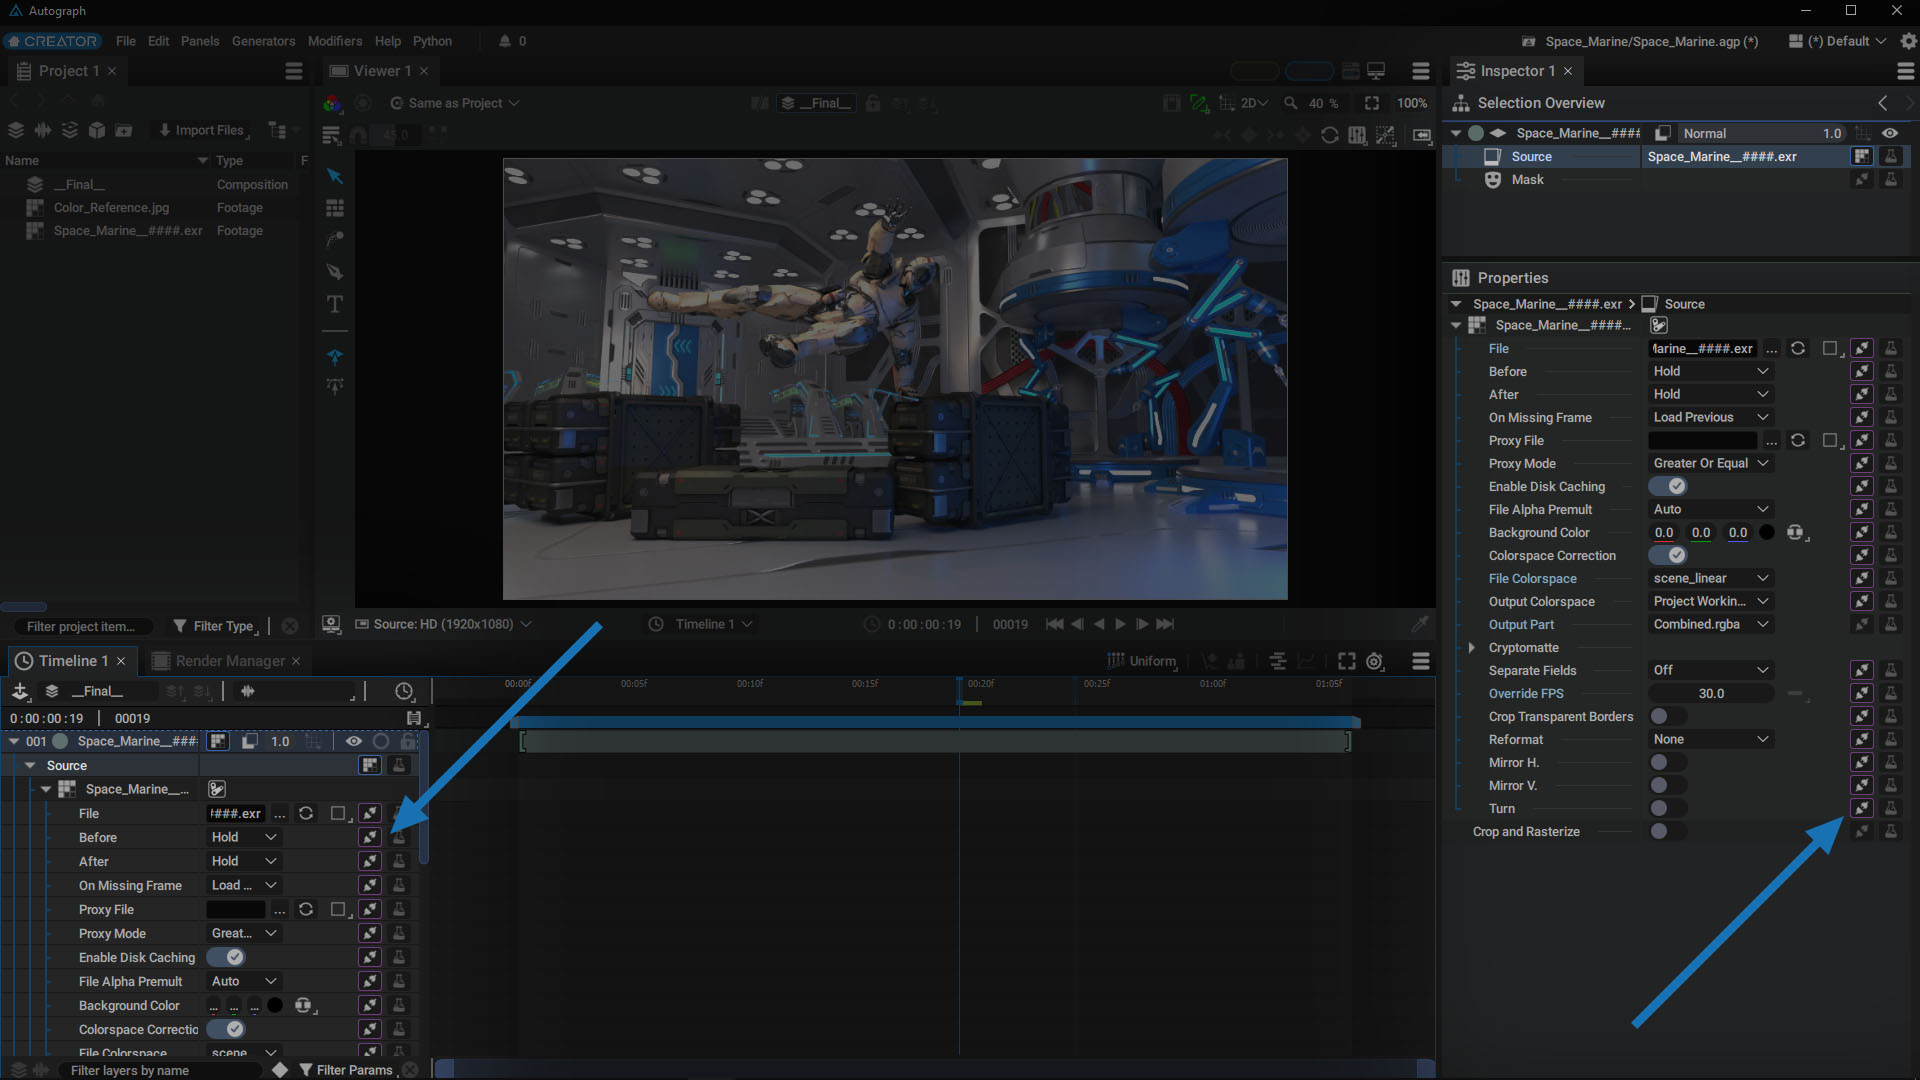
- When unfolding a layer, there is a Source section containing two slots; the left slot is for connecting a source, and the right slot is for adding Modifiers onto it.
- For quick access to the Source parameter without having to unfold a layer, you can use the small connection slot on the layer main line which is a shortcut copy of the main Source connection slot.
- The Source parameter is also accessible through the Selection Overview after selecting the layer
When you want to connect a graphic element to the Source parameter, no matter which way you choose, the result will be the same, as these three slots are the same.
Connecting a Source by dragging a Project Item:
The video below shows how to connect a reader to the Source parameter via:
- The small connection slot on the layer main line
- The Source parameter in the Timeline
- The Source parameter in the Selection Overiew
Clicking on the Source slot:
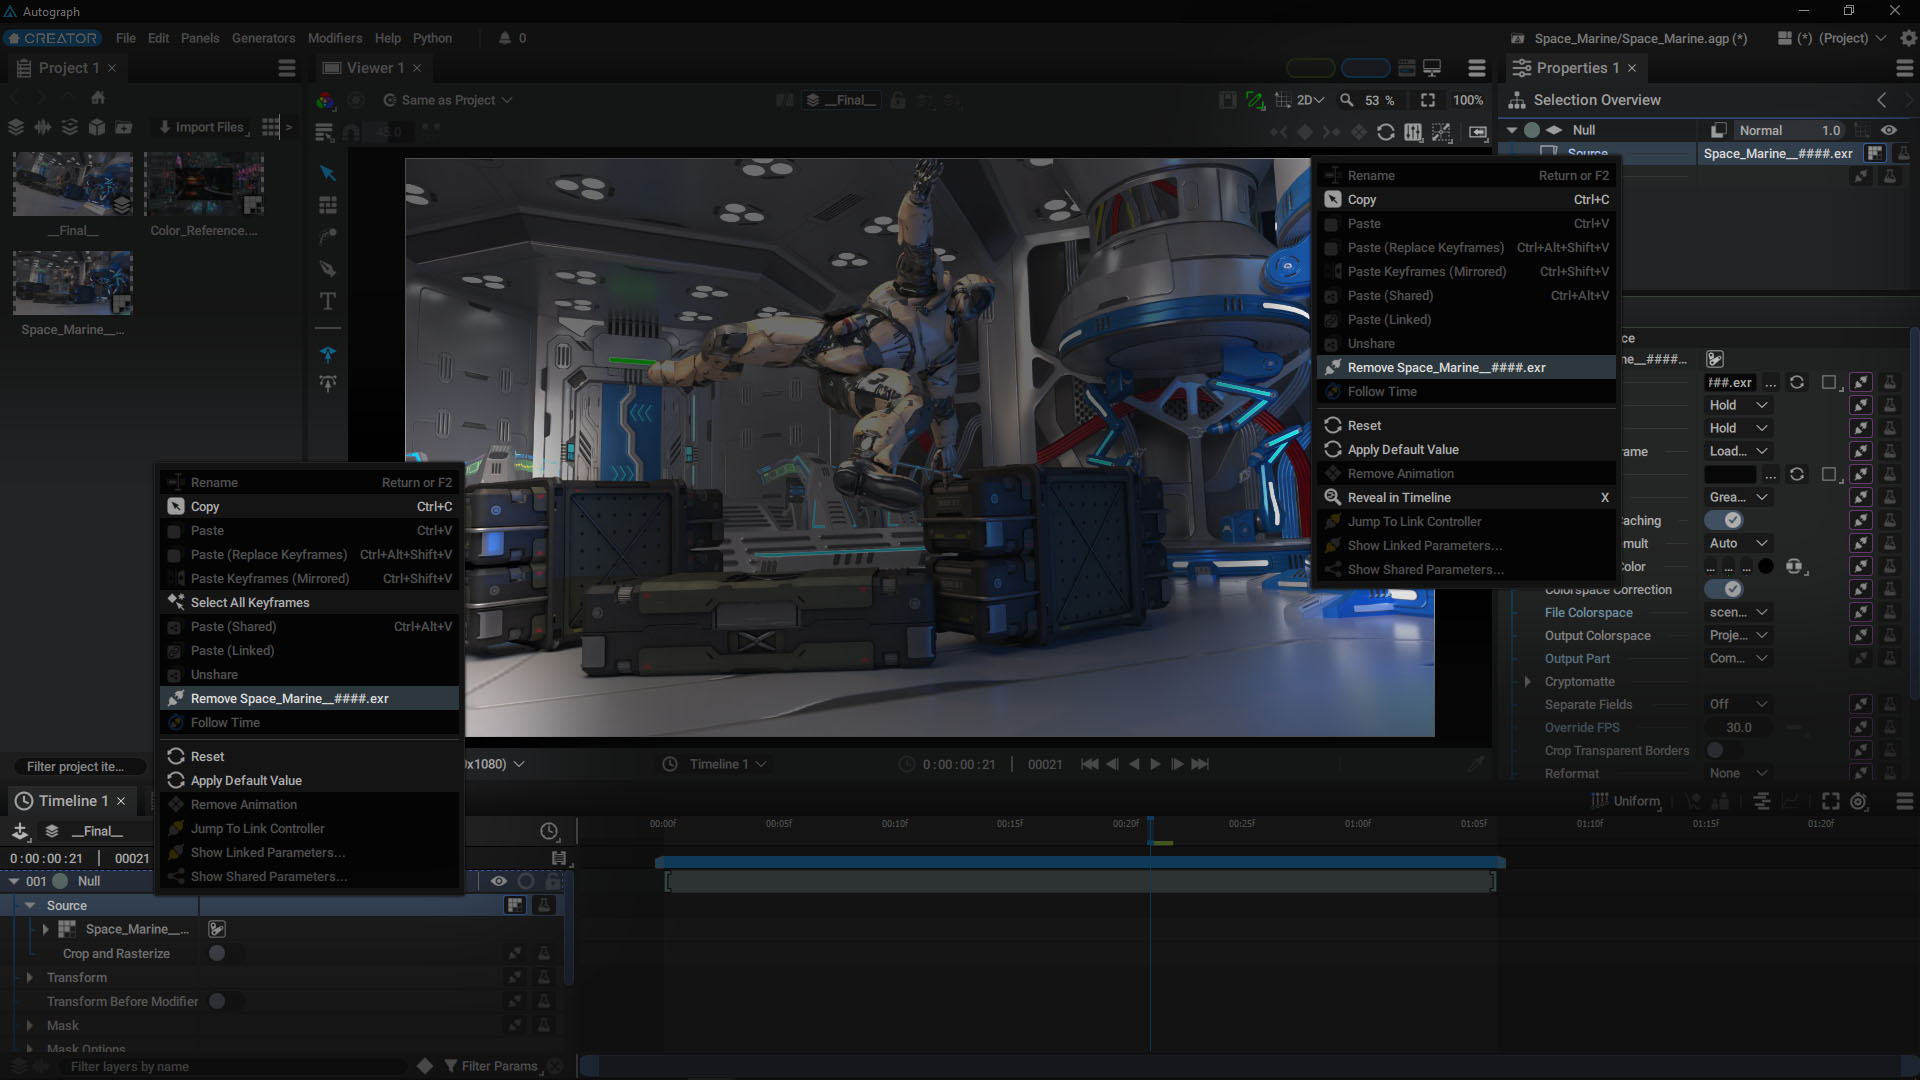
When you click on the Source slot, a menu appears that lets you:
- Connect to one of the Readers present in the Project Panel through the list at the left
- Create and connect to a new procedural Generator, using the list that displays all of them at the right
Disconnecting a Source:
The video above shows that when right-clicking on a Source parameter there is an option to disconnect it, both in the Timeline and in the Selection Overview.

Creating a Source through a procedural Generator:
Selecting a Generator from this list will do two things:
- Create a new Generator
- Link it as the layer Source
Generators are not displayed in the Project Panel since there may be hundreds of them when creating a project. They are therefore created locally on a layer, but can be connected to and shared with other layers.
In the video below, we change the source of a layer several times by connecting Generators to it:
Inspecting Image Reader properties:
To inspect a connected Source element, simply unfold its contents in the Stack or select it and navigate through its various properties in the Inspector.
If a Reader is connected, you will notice that by default, all of its parameters have a purple Shared logo. This is because the Source connects to the Reader, rather than making a local copy of it, and it displays its settings in the Stack. Any changes made in the Stack will have the same effect as if you had selected the Reader in the Project Panel and changed the settings in the Properties Panel.

Keep this setting in mind. If your Reader is used by several layers as a Source, any change in one of its parameters will be reflected in all of these layers. You can, however, locally break this Sharing link to create a local override of a parameter.
To learn more about the concept of sharing, see the dedicated section, as well as the section that goes over overrides through Unsharing.
Mask
Just like the Source parameter, the Mask parameter is an image-type parameter that lets you connect to a graphic source, whether it be a Reader or a Generator. You can connect it to the exact same types of graphic elements and apply Modifiers to it.
Its purpose is to make the layer pixels disappear, usually partially, based on the Alpha channel of an external image.
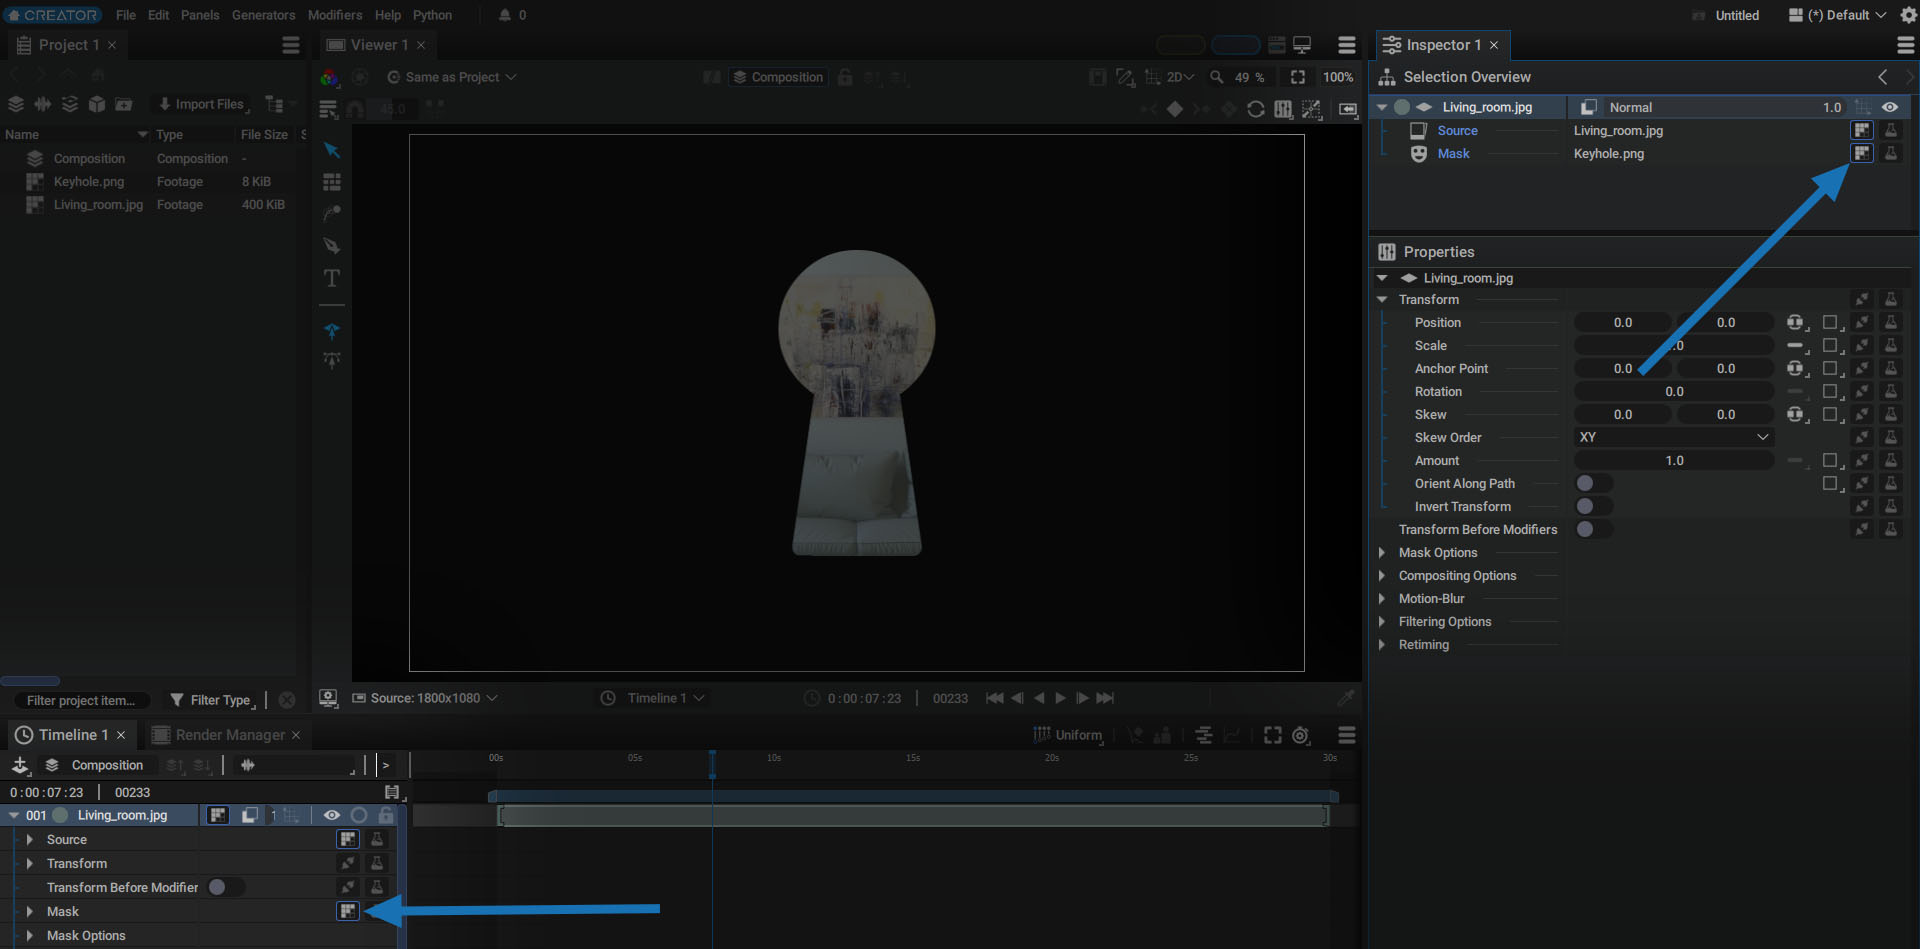
To make the way that a Mask entry can be used a bit more tangible, let's imagine that we have two images:
- One representing a living room
- The other representing the silhouette of a keyhole that has an Alpha layer
Test it by yourself by downloading the living room and keyhole images
The first image is connected to the Source input, while the second is connected to the Mask input.
Only the pixels inside the Alpha channel of the Mask input are kept. Pixels outside will be considered transparent, giving the impression that they have disappeared.

Note
If the element used as a Mask does not have an Alpha channel, Modifiers like Shuffle or Channels Math allow you to shuffle the channels.
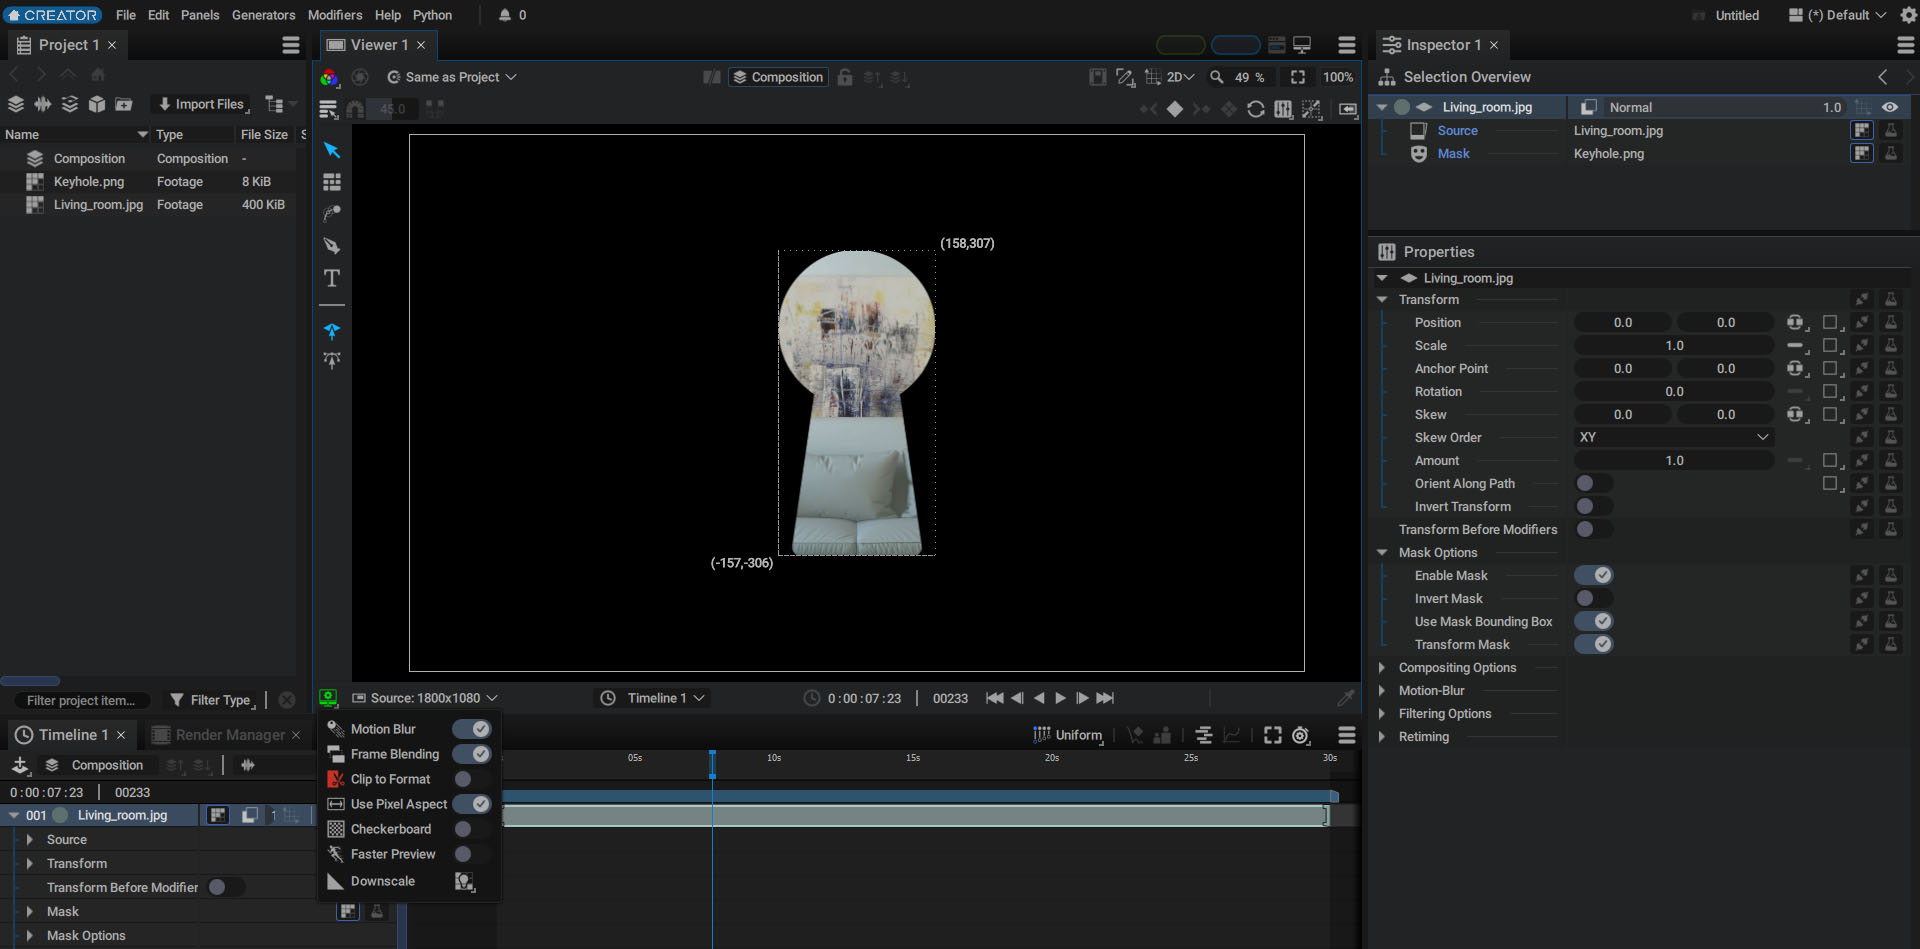
The layer contains a group called Mask Options which lets you modify the way the mask is used.
Enabling and disabling masks:
Using a Mask can sometimes prevent you from seeing the whole Source, which makes it difficult to work on.
So you can disable the Mask by unchecking the Enable Mask switch.
Inverting masks:
This option shows the outside of the Alpha layer rather than the inside.
Use Mask Bouding Box:
This option changes the Bounding Box of the Layer by intersecting that of the Source and that of the Mask. This new Bounding Box is visible when Viewer clipping is deactivated.

Transform Mask:
When a layer undergoes transformations, it is possible to define whether or not the Mask must follow them. There is a Transform Mask switch for this.
This allows you to leave the keyhole in its place, or on the contrary, to lock it with the Source during the transformation.
Note
In this case, a Transform Modifier can be added to the Mask to control its placement independently.
Info
Image used in this page: Living room photo: https://pxhere.com/fr/photo/1367038