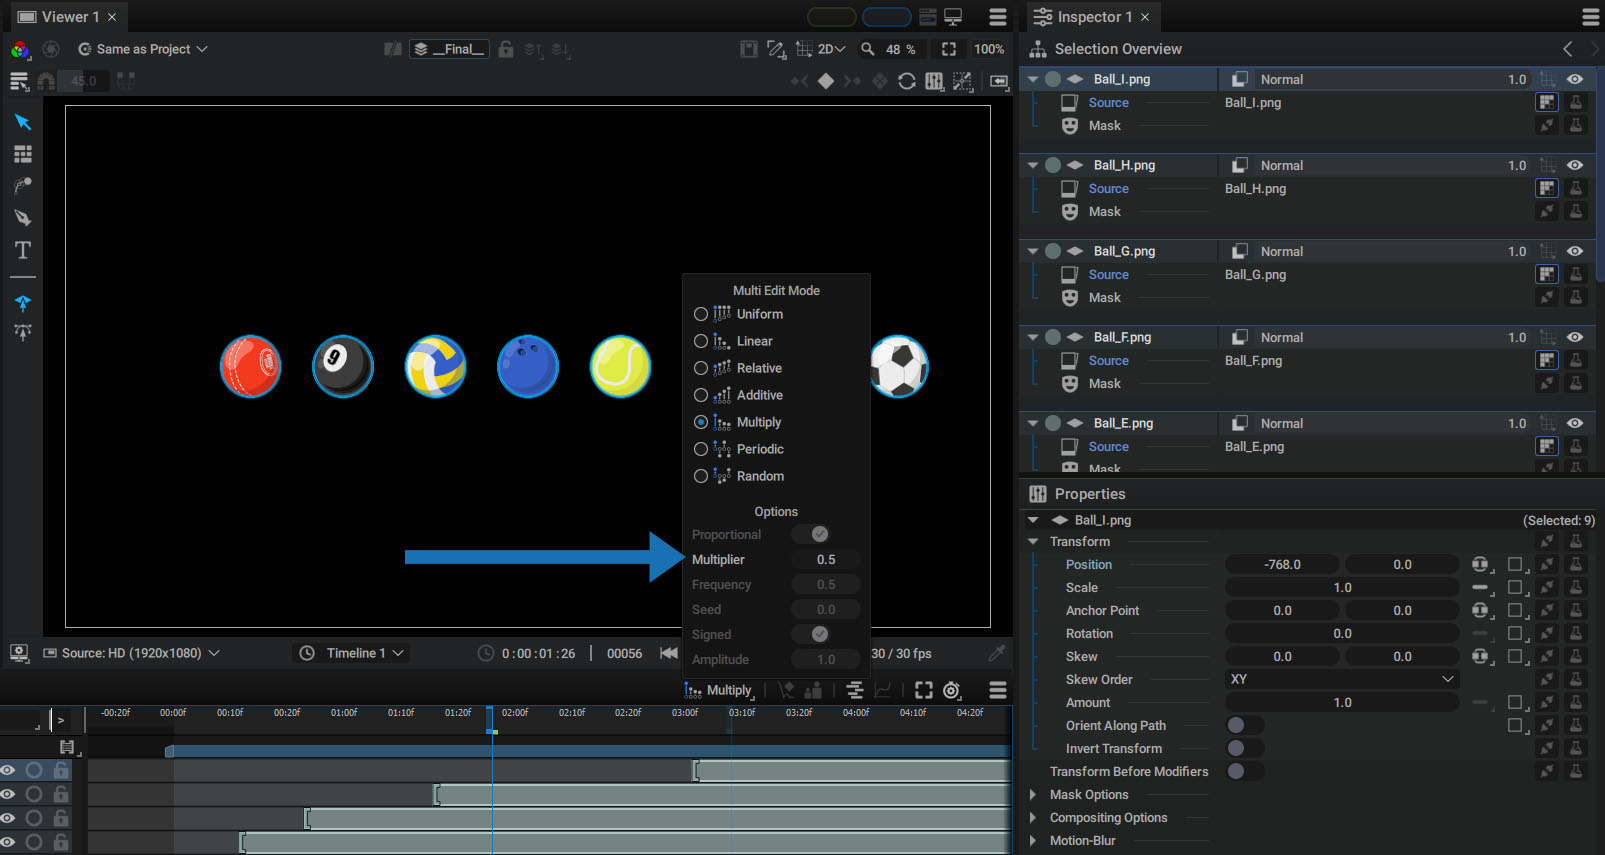
Multiply
Multiply mode recursively multiplies the variation applied to a parameter to other ones by a defined factor.
Layer Time Offset
When selecting Multiply mode from the list, you will see a Multiplier parameter that is set to 0.5 by default:

Select a group of layers and start to time offset the one at the top of the stack:
- The block under the cursor will be affected by 100% of the distance covered by the mouse
- The block next to this one will be moved by 100 x 0.5 = 50% of the distance
- The block even further away by 50 x 0.5 = 25% of the distance
- The block even further away by 25 x 0.5 = 12.5% of the distance
- Etc...
The further away a layer is, the less it is affected by the variation, depending on the value of the Multiplier.
Note
The default value of 0.5 is used to time shift the layers according to a curve.
Quickly Change the Multiplier Value, Live
The curvature created by these offsets will be very different, depending on:
- The number of layers in the selection
- The Multiplier value
So it's difficult to predict the appearance of the curve in advance. That's why the Multiplier value can be modified live.
While moving layers and without releasing the mouse button:
- Pressing the Up key will increase the Multiplier value by 0.01
- Pressing the Down key will decrease the Multiplier value by 0.01
Note
You can adjust these time offsets while playing your animation in a loop, possibly bound by Work Areas
Negative Values or Values Above 1.0
Assigning negative values between 0 and -1.0 to the Multiplier will reverse the parameter evolution on every other layer in the stack.
Here's What the Variation Looks Like for a Value of -0.5
Assigning a value above 1.0 will reverse the direction of the curve. The further the layers are from the layer clicked on or the active layer, the greater the variation.
Here's What the Variation Looks Like for a Value of 2.0
Distribution Across Other Parameters
Multiply mode can be used to apply these variations over several parameters that are the same type.
In the example below, we click on the layer at the top of the stack, which defines it as the active layer, then we press the Shift key before clicking on the lowest layer in the stack.
With this set of layers selected, we can modify the Position.Y parameter of the active layer, as displayed in the Inspector, in the Properties section.
The distance traveled by the active layer is reported on the other parameters, divided the covered distance by 2, for each new layer:
Changing the Active Layer
To define a new active layer, simply press the Ctrl/Cmd key, click on a layer to deselect it, then click again while holding Ctrl/Cmd to reselect it.
Changing the Position.Y value again will have a completely different effect.