Fill Style
When you add a Fill style to the Shapes container, it appears with several options in the tree which are on the same line.

- Visibility: completely disables the style if turned off
- Blending Mode: defines the mode for blending a style with previous ones
- Opacity: defines style transparency
- Fill Color: represented by a paint bucket, this provides quick access to the same parameter in the Properties section
- Modifier Slot: adds Modifiers to a style
Fill Color and Colorspace
This parameter defines which color will be used to fill paths. It's important to know that each channel can only be set between 0.0 and 1.0. Any value above 1.0 or below 0.0 will be clamped.
To bring up the Color Selector, click on the colored dot to the right.
Note
To boost output channel values above 1.0, you can add a Modifier to the style, such as Grade and increase the Multiply parameter.
The color is defined according to the Colorspace parameter, located a little further down. Read more about the Colorspace parameter in this section
Fill Rule
In Autograph, a path doesn't have to be closed to be filled. If the path is open, the first and last points will be connected in a straight line.
However, when paths intersect, they can be filled using one of two algorithms:
Odd-Even
To demonstrate how this Fill mode works, we'll draw an open spiral with Fill mode enabled in the bar at the top of the Viewer.
As we draw this spiral path, it'll generate fills, then holes, then fills again. The Odd-Even option will imagine a line intersecting the path at several points and define alternating fills and holes accordingly.
The Fill style lets you fill a shape that isn't closed yet, so we don't have to click on the starting point again to produce these alternate fills.
However, when there are several intersecting shapes drawn in a row, filling in Odd-Even mode is only complete once both shapes have been closed, as shown below.
This is one of the differences between this algorithm and Non-Zero mode.
Non-Zero:
Now if we change the fill rule to Non-Zero, it'll be based on the outer silhouette of the shape and ignore this alternating fill and hole.

If you imagine a line going across the shape again, you'll see that no matter how many intersections there are, it's the outer silhouette that'll be used.
Global Feather, Feather Fall-Off, and Ramp
The Fill style fills the paths while keeping the edges sharp but clean thanks to Multisampling Anti-Aliasing.
The Draw Bézier Curve and Point Editing tools allow you to locally diffuse path edges at each point.
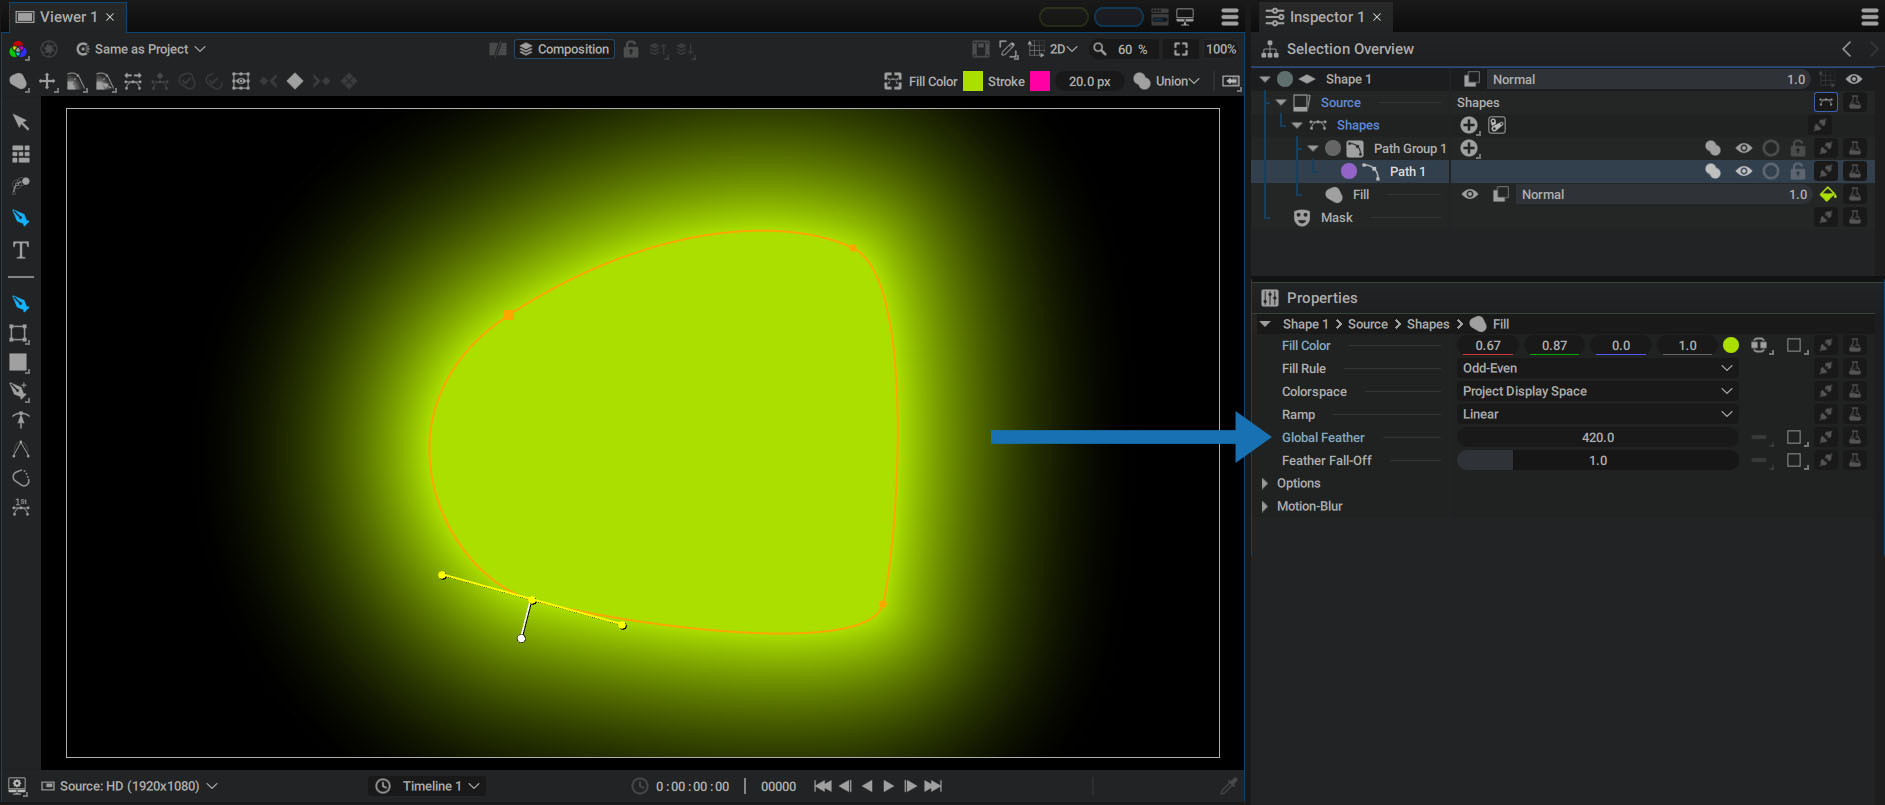
But the Global Feather parameter can be used to spread the edge of the entire path.

This parameter will blur the Path's edges, gradually reducing its Alpha channel, and it will be controlled by two parameters:
Ramp
Offers different easing options:
- Linear
- Perceptually Linear
- Ease-In: squeezes the gradient inside the shape
- Ease-Out: squeezes the gradient outside of the shape
- Smooth: maximizes the center df the gradient
Feather Fall-Off
This additional parameter applies a gamma to the gradient to better control its evolution from the inside to the outside of the path.
Options
In the Options section, you'll find parameters that are already accessible in the main Style line, in the Selection Overview:
- Enabled: represented by the eye icon
- Blending Modes: accessible via the button next to the eye icon
- Opacity: adjustable via the slider immediately to the right
What's different here is that these parameters can be animated, connected to Generators, and have Modifiers added to them.
Affected Path specifies how many paths are to be drawn:
- First Path-Group Above: draws all paths that can be found by moving up the tree, until another Style is found.
- All Paths Above: draws all existing paths to the top of the tree, stopping only at the top of the current Shape Group.
Produce Overbright and Negative Values with Blending Modes
We have already mentioned that the channel values for the Fill Color parameter cannot exceed 1.0. However, if two styles are in the same Shapes Generator and the latter is in Add mode, the channels will be added, and the result of this Blending may exceed the value 1.0. The same applies to modes that can produce negative values.
Motion Blur:
Each Style contains a Motion Blur section for calculating Motion Blur individually, according to different parameters.
The way it is computed is similar to the Steps method in the Text Generator.
This method renders several intermediate images between two composition images, defined by the Divisions parameter:
With few divisions, this accumulation produces a kind of echo. The intermediate stages are clearly visible. Increasing these divisions will produce a more accurate Motion Blur effect.
Other parameters, such as Shutter Angle and Shutter Phase, are identical to layer Motion Blur described in this section