Retiming
In order to define a time reference, Autograph provides Time parameters. These parameters allow you to perform operations such as setting a time offset, or specifying an image in a composition or footage.
Time is defined in three different ways:
- Timecode
- Frame number
- Seconds
Timecode:
Timecodes (TC) have been used for decades as a time reference when synchronizing images and sound. A timecode is expressed in hours, minutes, seconds, and images, separated by colons.
The TC is visible on the left part of a Time parameter.
Each of these elements start with the value 0. So, the first image in a composition will have the TC 00:00:00:00.
Since the last element represents images, its maximum value depends on the framerate. In a 30 FPS composition, this value will go from 0 to 29 in the span of one second, before going back to 0.
Frame Number:
The second part of a time parameter describes a number of images. This is not related to a framerate.
Keep in mind that this numbering starts at 0, which is the number of the first frame. So, the second image in a composition won't be numbered 2, but 1. If you go to the frame numbered 21, this value represents the number of images before the current frame, which is the 22nd.
Working with Seconds:
The internal time base of any Autograph project is seconds. This allows you to create a project in 25 FPS for example, and then switch it to 60 FPS last minute. A keyframe indicating a value at 2.75 seconds won't be time-shifted when changing FPS. A second will always time a second, no matter how many frames exist in that interval.
When you define a time, either by using a timecode or frame numbers, internally it corresponds to a decimal number defining seconds. If you connect or share a value between parameters, it is this Float type value that will be transferred.
This allows you to maintain maximum precision, as well as connect a Time to any 1D parameter, like a rotation for example.
The timecode and frame number prevent defining a time between two images, which can be useful when creating procedural animations; but, you can use Seconds mode, for more precision. You can enter a timing in seconds, with as many digits after the decimal point as the precision level requires.
Each layer can be time altered to shift, slow down, or speed up an animation, video file, or image sequence.
The parameters relating to these functionalities are listed in the Retiming section.
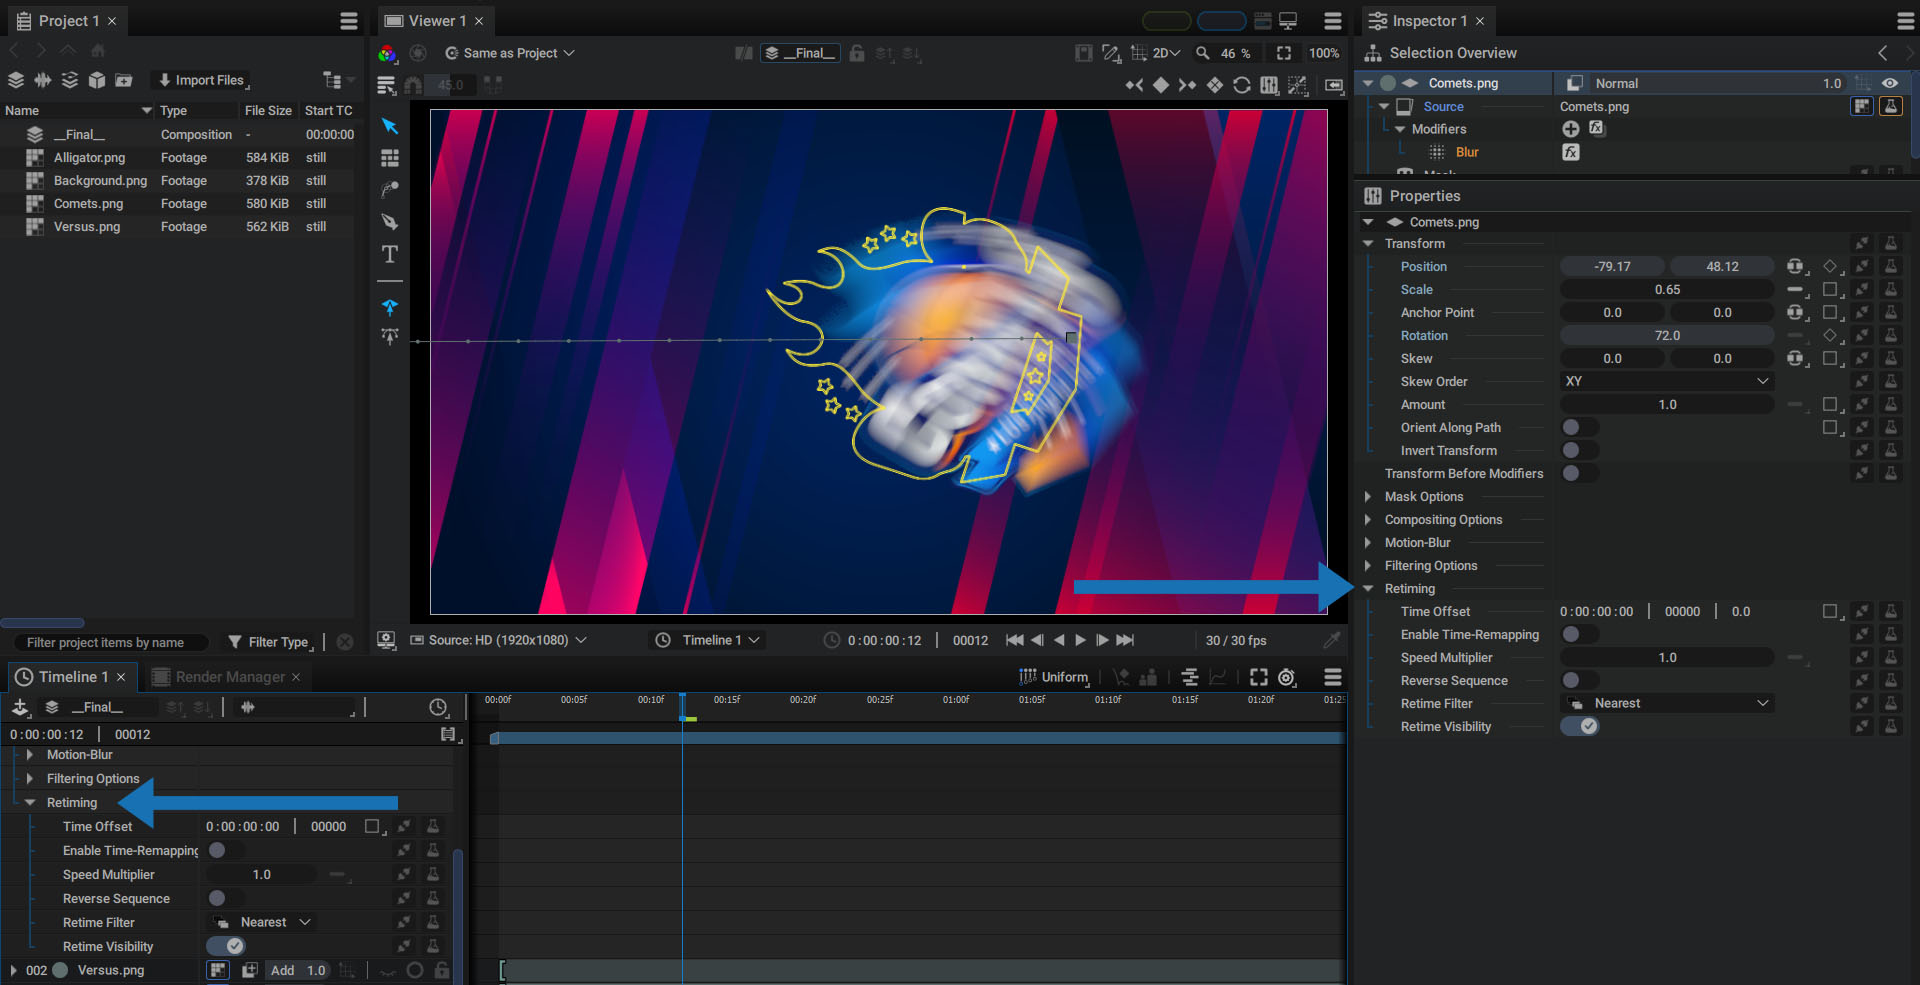
Time Offset
Time Offset is a type of Time that can be defined manually by entering a frame number or timecode, or by moving the layer block in the Dope Sheet.
To move a layer block defined by visibility keys, just click on it and drag it, which will change the value in the Retiming section of the layer.
In the Dope Sheet, the Time Offset value is displayed in frames, just next to the playhead when you click on/move a block.

By default, moving a layer's block snaps it to the nearest frame. But by pressing the Ctrl/Cmd keys, you can move a layer block between two frames.
Warning
The time offset can be keyframed or controled by a generator, allowing you to connect this parameter to a Composition Info generator in Duration mode. In this way, you can constrain the layer's time offset to the composition's duration. However, animating this parameter will not always update the block displayed on the right of the Timeline.
Enable Time-Remapping
By enabling this option, a new Time Remap parameter appears. By selecting it and displaying the Curve Editor in Value Graph mode, we can see a curve made up of two keyframes.
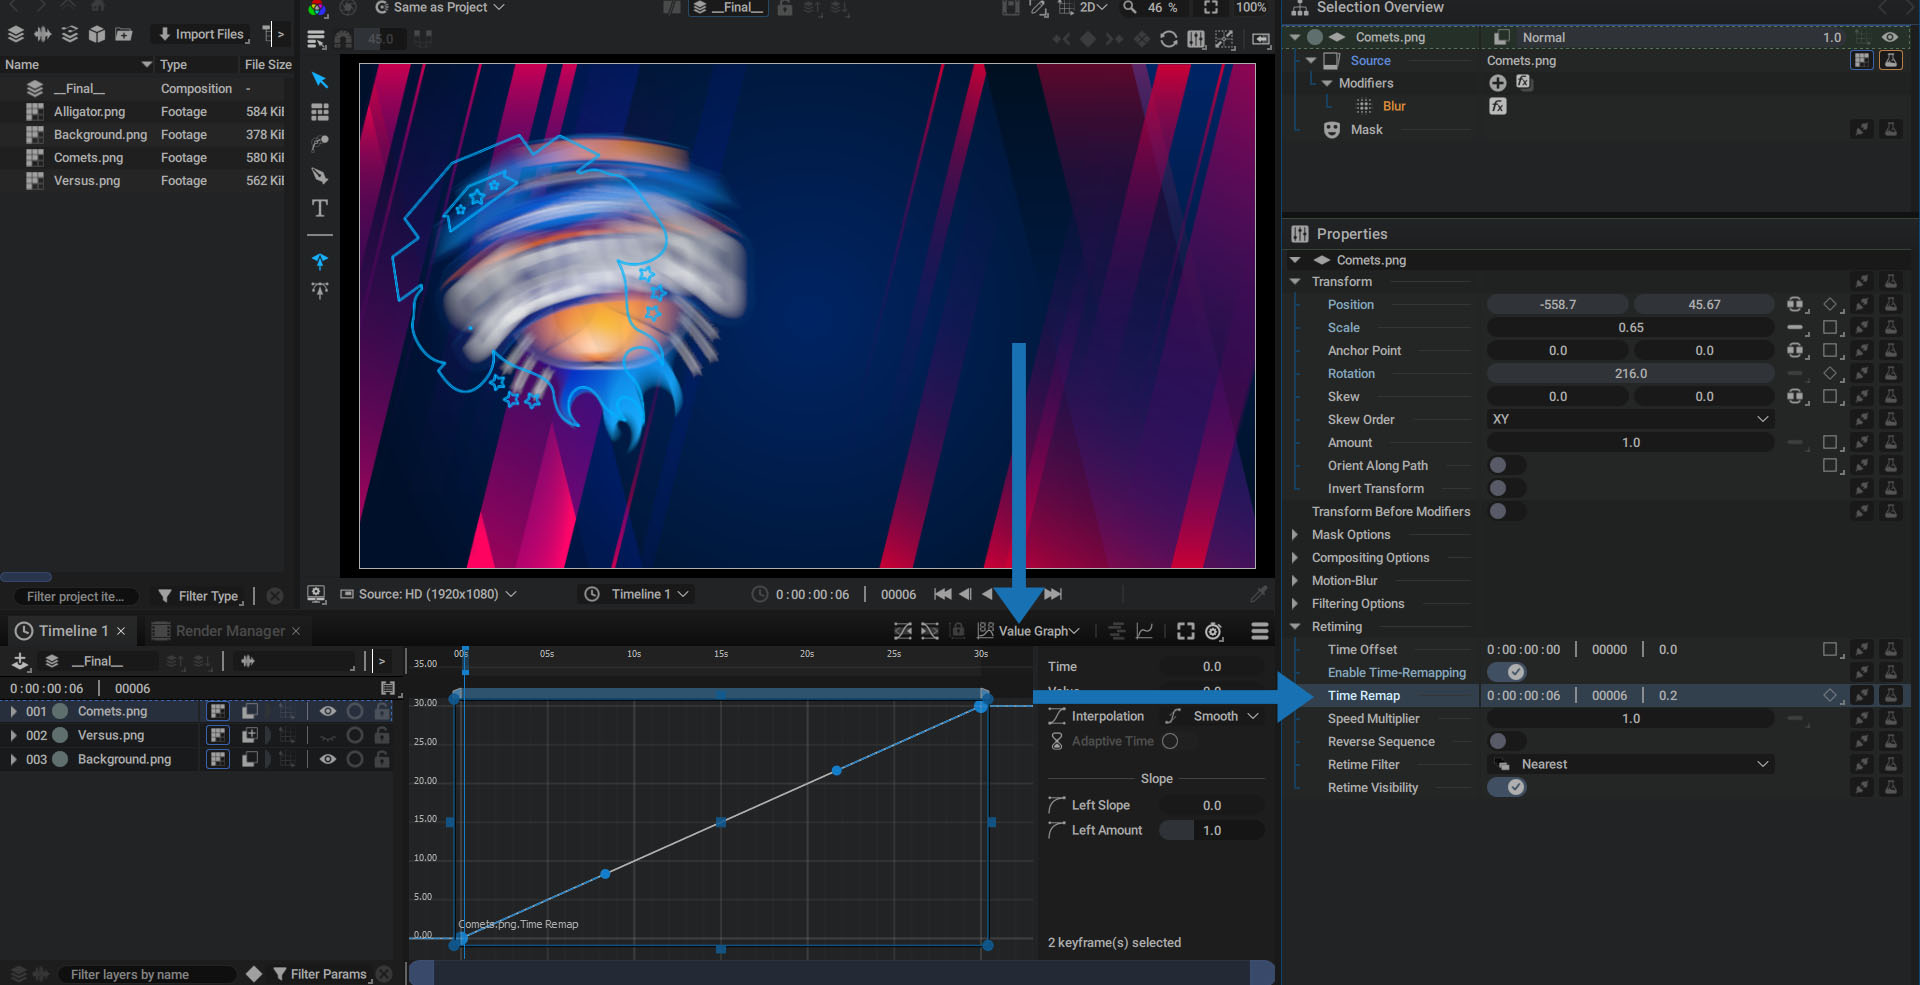
- The first Keyframe is created at the beginning of the layer range.
- The second Keyframe is created at the end of the layer range.
The vertical axis represents time in seconds and the value of a keyframe defines a time in the layer's timespace. If the first Keyframe has a value of 2.0 instead of 0.0, this means that the first image in this layer will be the one at 2 seconds in the layer's timespace.
By adding intermediate keyframes, rather than reading a layer linearly, you can slow down or speed up a source, time offset it or even go backwards through it.
Speed Multiplier
Like all other retiming operations, the Speed Multiplier acts on the entire layer – its parameters, keyframes, Generators, and Modifiers. By modifying this value, a time stretch that uses the original speed as a reference will be applied to the layer.
- A value of 0.5 will multiply the duration of the layer by 2, slowing down any animation
- A value of 2.0 will divide the duration of the layer by 2, speeding up layer animation
The only parameter that can be excluded from this time stretch is layer visibility, through the Retime visibility switch.
As with Time offset, it is possible to connect, share, and control this parameter using a Generator, but with the limitations mentioned in the "Connection to other parameters" section.
Time stretching and temporal reference point:
When changing the Speed Multiplier value, the layer will shrink or expand based on a reference point that will remain unchanged. This point is the first frame of a layer's initial range:
- The first frame of a movie or image sequence, regardless of the first visibility key
- The first frame of a procedurally-generated layer, such as a Circle or Polygon.
This value cannot be negative and is not made to reverse footage. To temporally reverse a layer, use Reverse Sequence instead.
To control this time stretch using the notion of duration rather than speed, please refer to the Time Remapping features above, which will also allow you to define a non-linear temporal interpolation.
Reverse Sequence
For layers that have a range, the Reverse Sequence button allows you to reverse the entire layer in time by inverting the first image of its range with the last.
The following elements will be inverted:
- Keyframes
- Sources
- Masks
- Modifiers
Generators will also be inverted, except those applied to the layer source, since they would produce a graphic element without a range.
The Reverse Sequence option is always present even if it cannot be applied to the current source. Since it’s possible to change the source of a layer at any time, this option is available in anticipation of any possible future changes.
For a layer without a range, this option will have no effect.
Retime Filter
When using keyframes or procedural Generators/Modifiers such as Random, Noise, or Animator, any retiming operations will modify the interpolation produced by these tools.
The high precision interpolation allows Autograph to slow down any animation by creating new intermediate images in order to maintain maximum smoothness; but, using a movie or an image sequence, there is a finite number of images played at a given frame rate.
A 25 FPS movie will only have 25 images to play in one second. By default, when using this source as a layer in a 25 FPS composition, each image of the comp will use one image of the movie; but, if this sequence is slowed down using a Speed Multiplier of 0.25 for example, Autograph will have to create new images to fill in the gaps based on the previous and subsequent frames.
For this, there are three Retime Filters:
Nearest:
This is the simplest technique where the last complete frame provided by the reader is kept on screen until the next one is required. Visually, this produces a more jerky animation but it has the advantage of being based solely on existing frames.
Blend:
Rather than keeping an image on screen until the next one is used, it is possible to create a cross fade between these images in order to reduce the jerkiness of Nearest mode. This option can be used even when no retiming is applied to the layer.
After selecting this option, a new section called Acceleration Motion-Blur will appear.
Shutter Angle:
The goal here is to mix several images together by accumulation. Choosing a Shutter Angle value will define a range of images to take into account before and after the current time. The higher this value, the further Autograph will search before and after the current time. Using the notion of Shutter Angle rather than a number of frames allows you to keep the same look, no matter the composition FPS.
Num samples:
This parameter lets you define how many images within this range will be used during accumulation. The wider the range, the higher this value should be in order to smooth out the animation.
Auto Shutter Angle:
This switch allows you to automatically calculate the shutter angle, based on the source frame rate and the retiming applied to the layer.
Pixel Motion:
Rather than just mixing existing images to produce new intermediate frames, Autograph is able to create new images based on movement between frames.
The image at the current time is compared to the next image, in order to detect how the pixels have moved from this image to the other. A second analysis is done in the other direction, from the next frame to the current one.
The result is two sets of motion vectors, indicating the direction and the distance traveled by visible pixels in these two images. In addition to tracking pixels, these vectors are used to detect occlusions or the appearance of new elements that are not present in the two frames.
From this information, Autograph can recreate as many intermediate images as necessary, depending on the remapping applied to the layer.
A warping deformation is applied to the current image to transform it into the second image. All that’s left is to determine how to fill the gaps when elements are missing in between one of these two references.
There are two options:
-
Backward: The starting image is used to fill in the missing pixels using the adjacent ones. Some of them can go in completely different directions, so strange deformations can appear; however, this method has the advantage of being quite fast during calculation.
-
Forward: A denser deformation grid where each subdivision is equal to one pixel is used and this time the destination image is used to fill in the missing pixels. Although it’s more intensive in terms of computation, this method generally yields better results.
Retime Visibility
Retiming operations act on all layer parameters, including its visibility keys. Applying a Speed Multiplier with a value of 2 will reduce a layer’s presence on screen by half.
However, it’s possible to make an exception for this particular type of keyframe in order to keep the same visibility on screen. This comes in handy when keyframes are placed according a specific rhythm or for specific moments of an animation.
To do so, uncheck the Retime Visibility option, which is checked by default:
Here you can adjust the Speed Multiplier and see what happens in the Dope Sheet when this option is checked/unchecked: